Showing posts with label Guest Designer. Show all posts

Tuesday, 13 September 2022

Roll up, roll up. The circus is in town. By Sara Annau.


Hello again. 
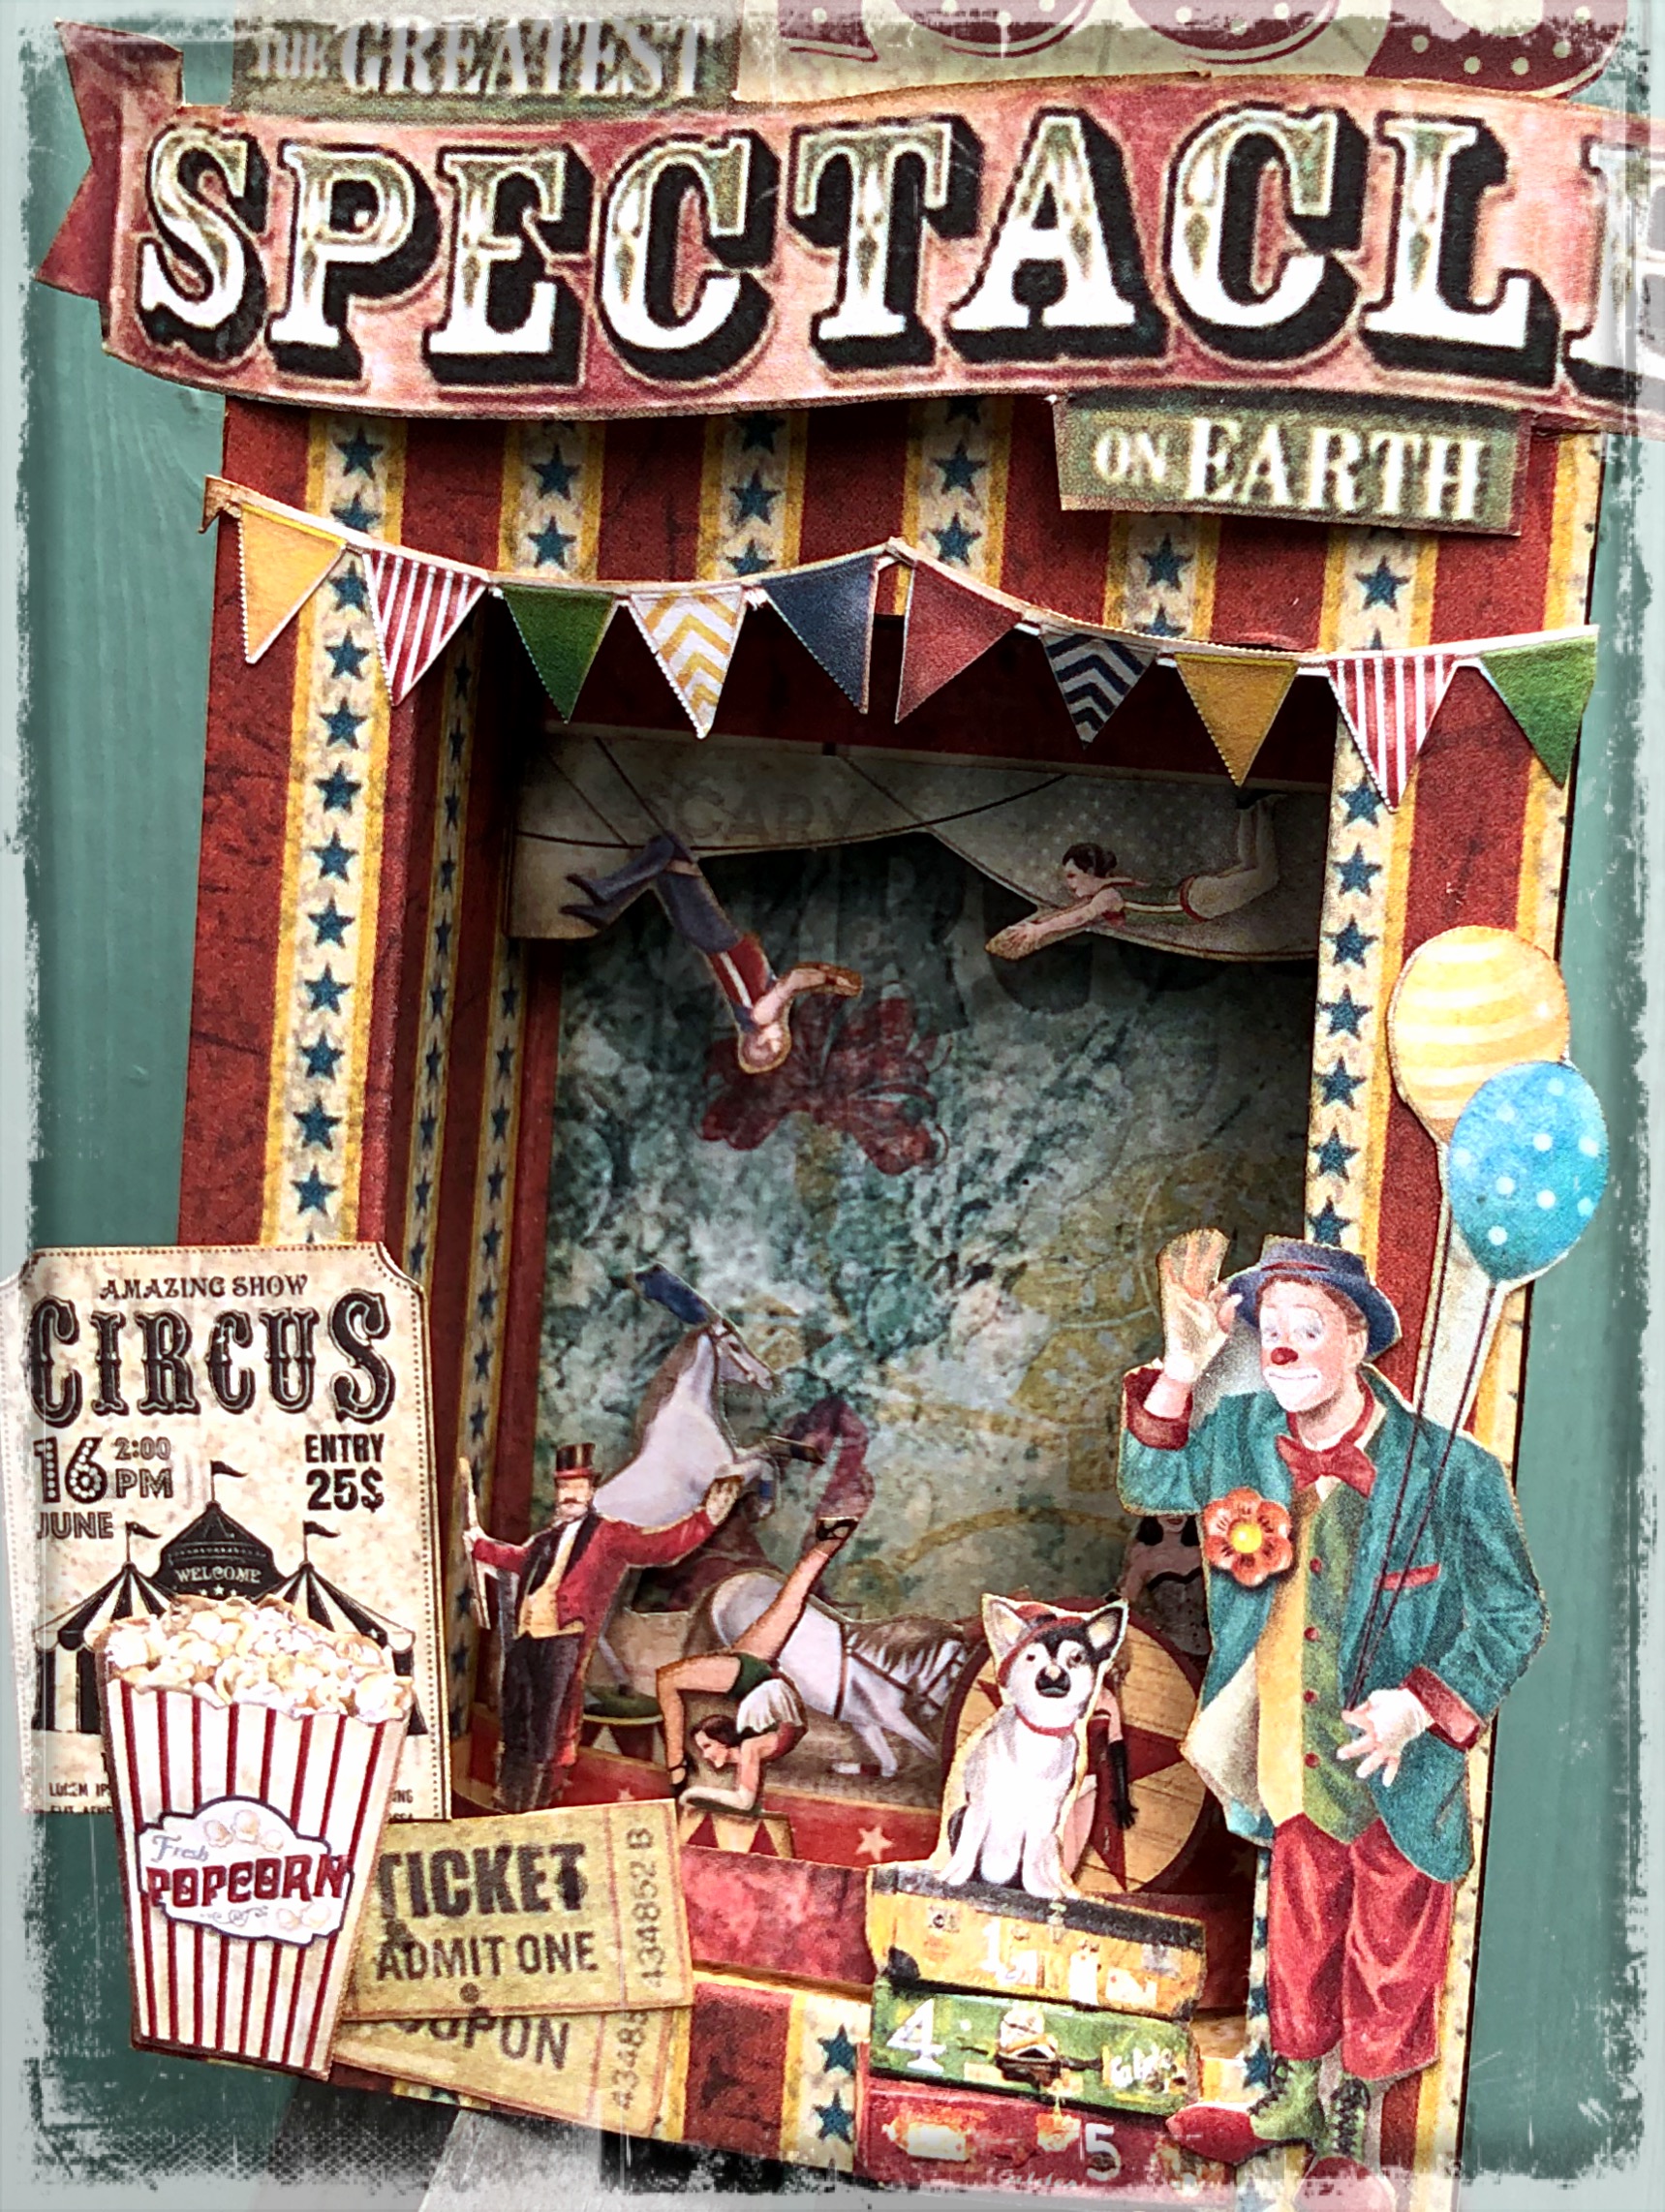
I’m back with my second guest designer project and this time I’m bringing you the colour and fun of the circus, all rolled up into miniature form inside this little shrine kit. 


I absolutely love a good circus theme, vintage circus in particular which means I often buy beautiful scrapbook papers relating to the circus. What better way to use some of those papers than to create a little circus that can sit on a shelf. 


When I received my order from Calico craft parts, it included this lovely elephant which I’ve used to add some interest to the back of the project. I’ve gently highlighted it without going too heavy handed so as to keep the detail of the original laser cut showing. 


This project involved an awful lot of fine detail cutting (fussy cutting). A job I usually find relaxing but it may take my fingers a while to recover from this one lol.
However, I think it was worth it as there are so many fun and interesting little details to look at on the finished project. 


I hope this project has given you some ideas of your own and that you might feel inspired to decorate a little shrine in your favourite theme 
Thank you for looking.
Sara. 

Supply list.

Monday, 29 August 2022

Nostalgia Avenue: by Sara Annau


I was delighted to be asked by the design team coordinator, Louise, to be a guest designer for Calico Craft Parts and couldn’t wait to get started. 

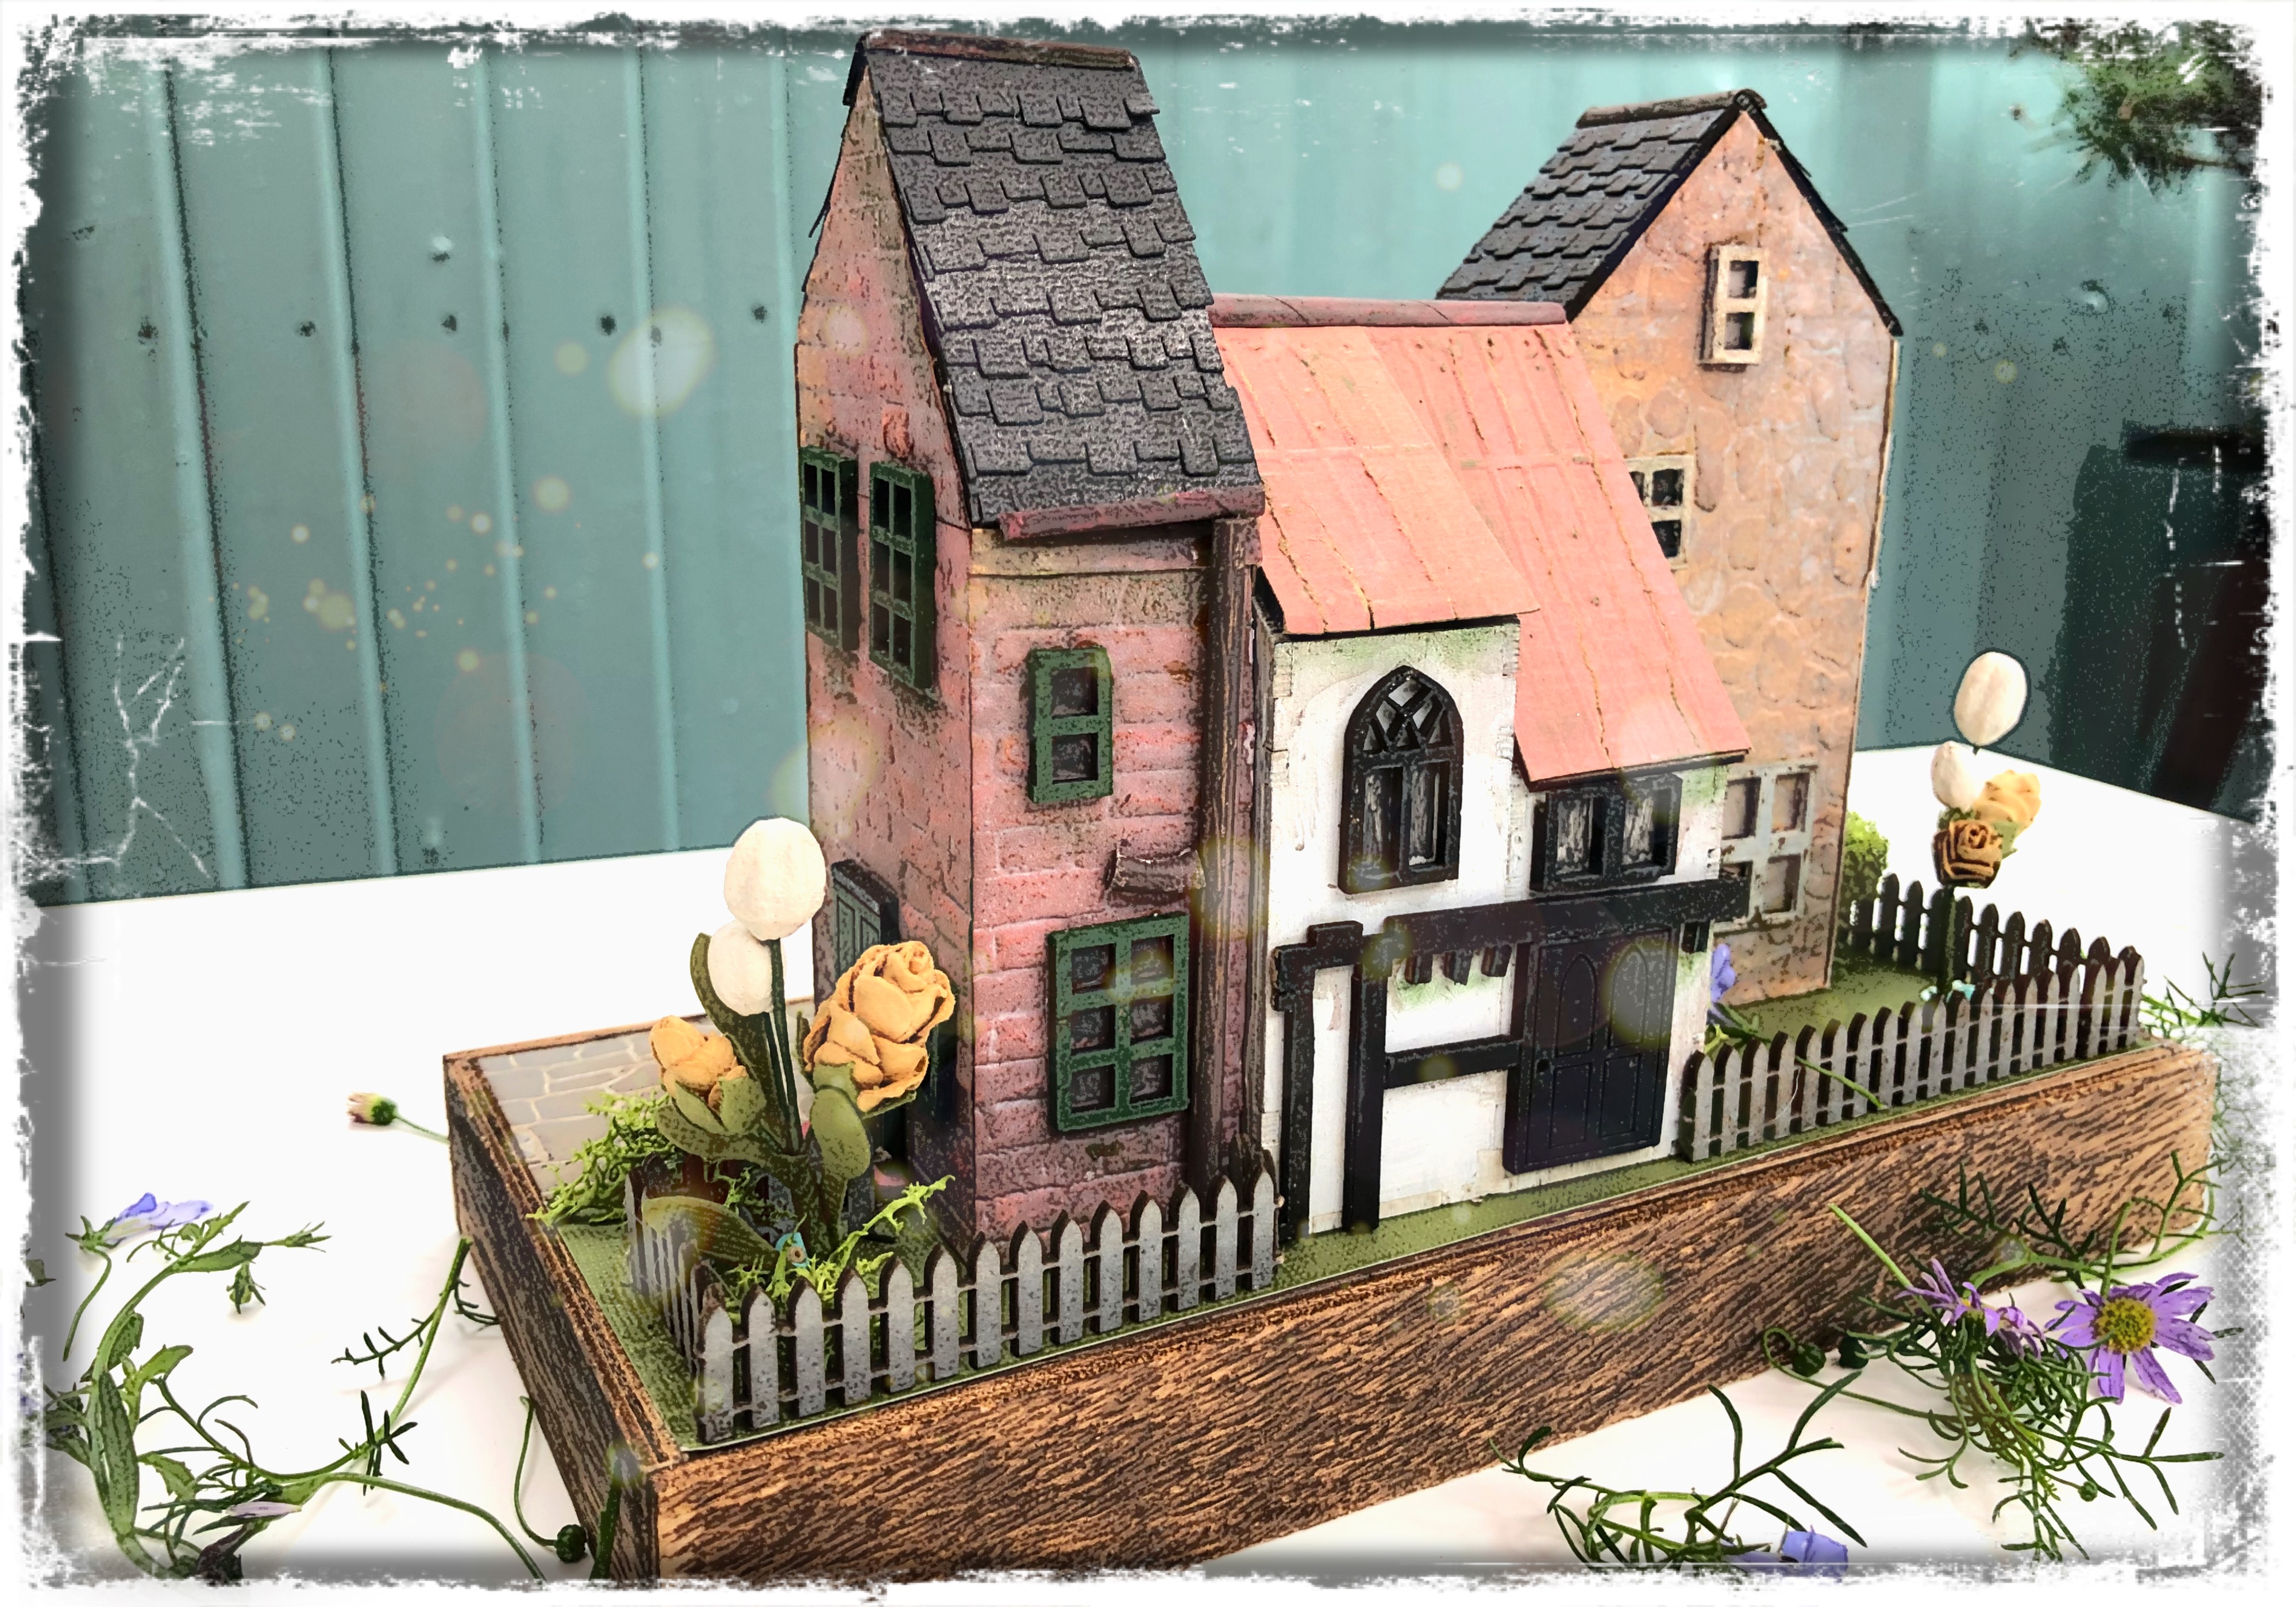
The first project I want to share with you is this little street scene I’ve created using four small house shapes and some mini doors and windows (some of which I’ve cut down or added to to suit my needs).

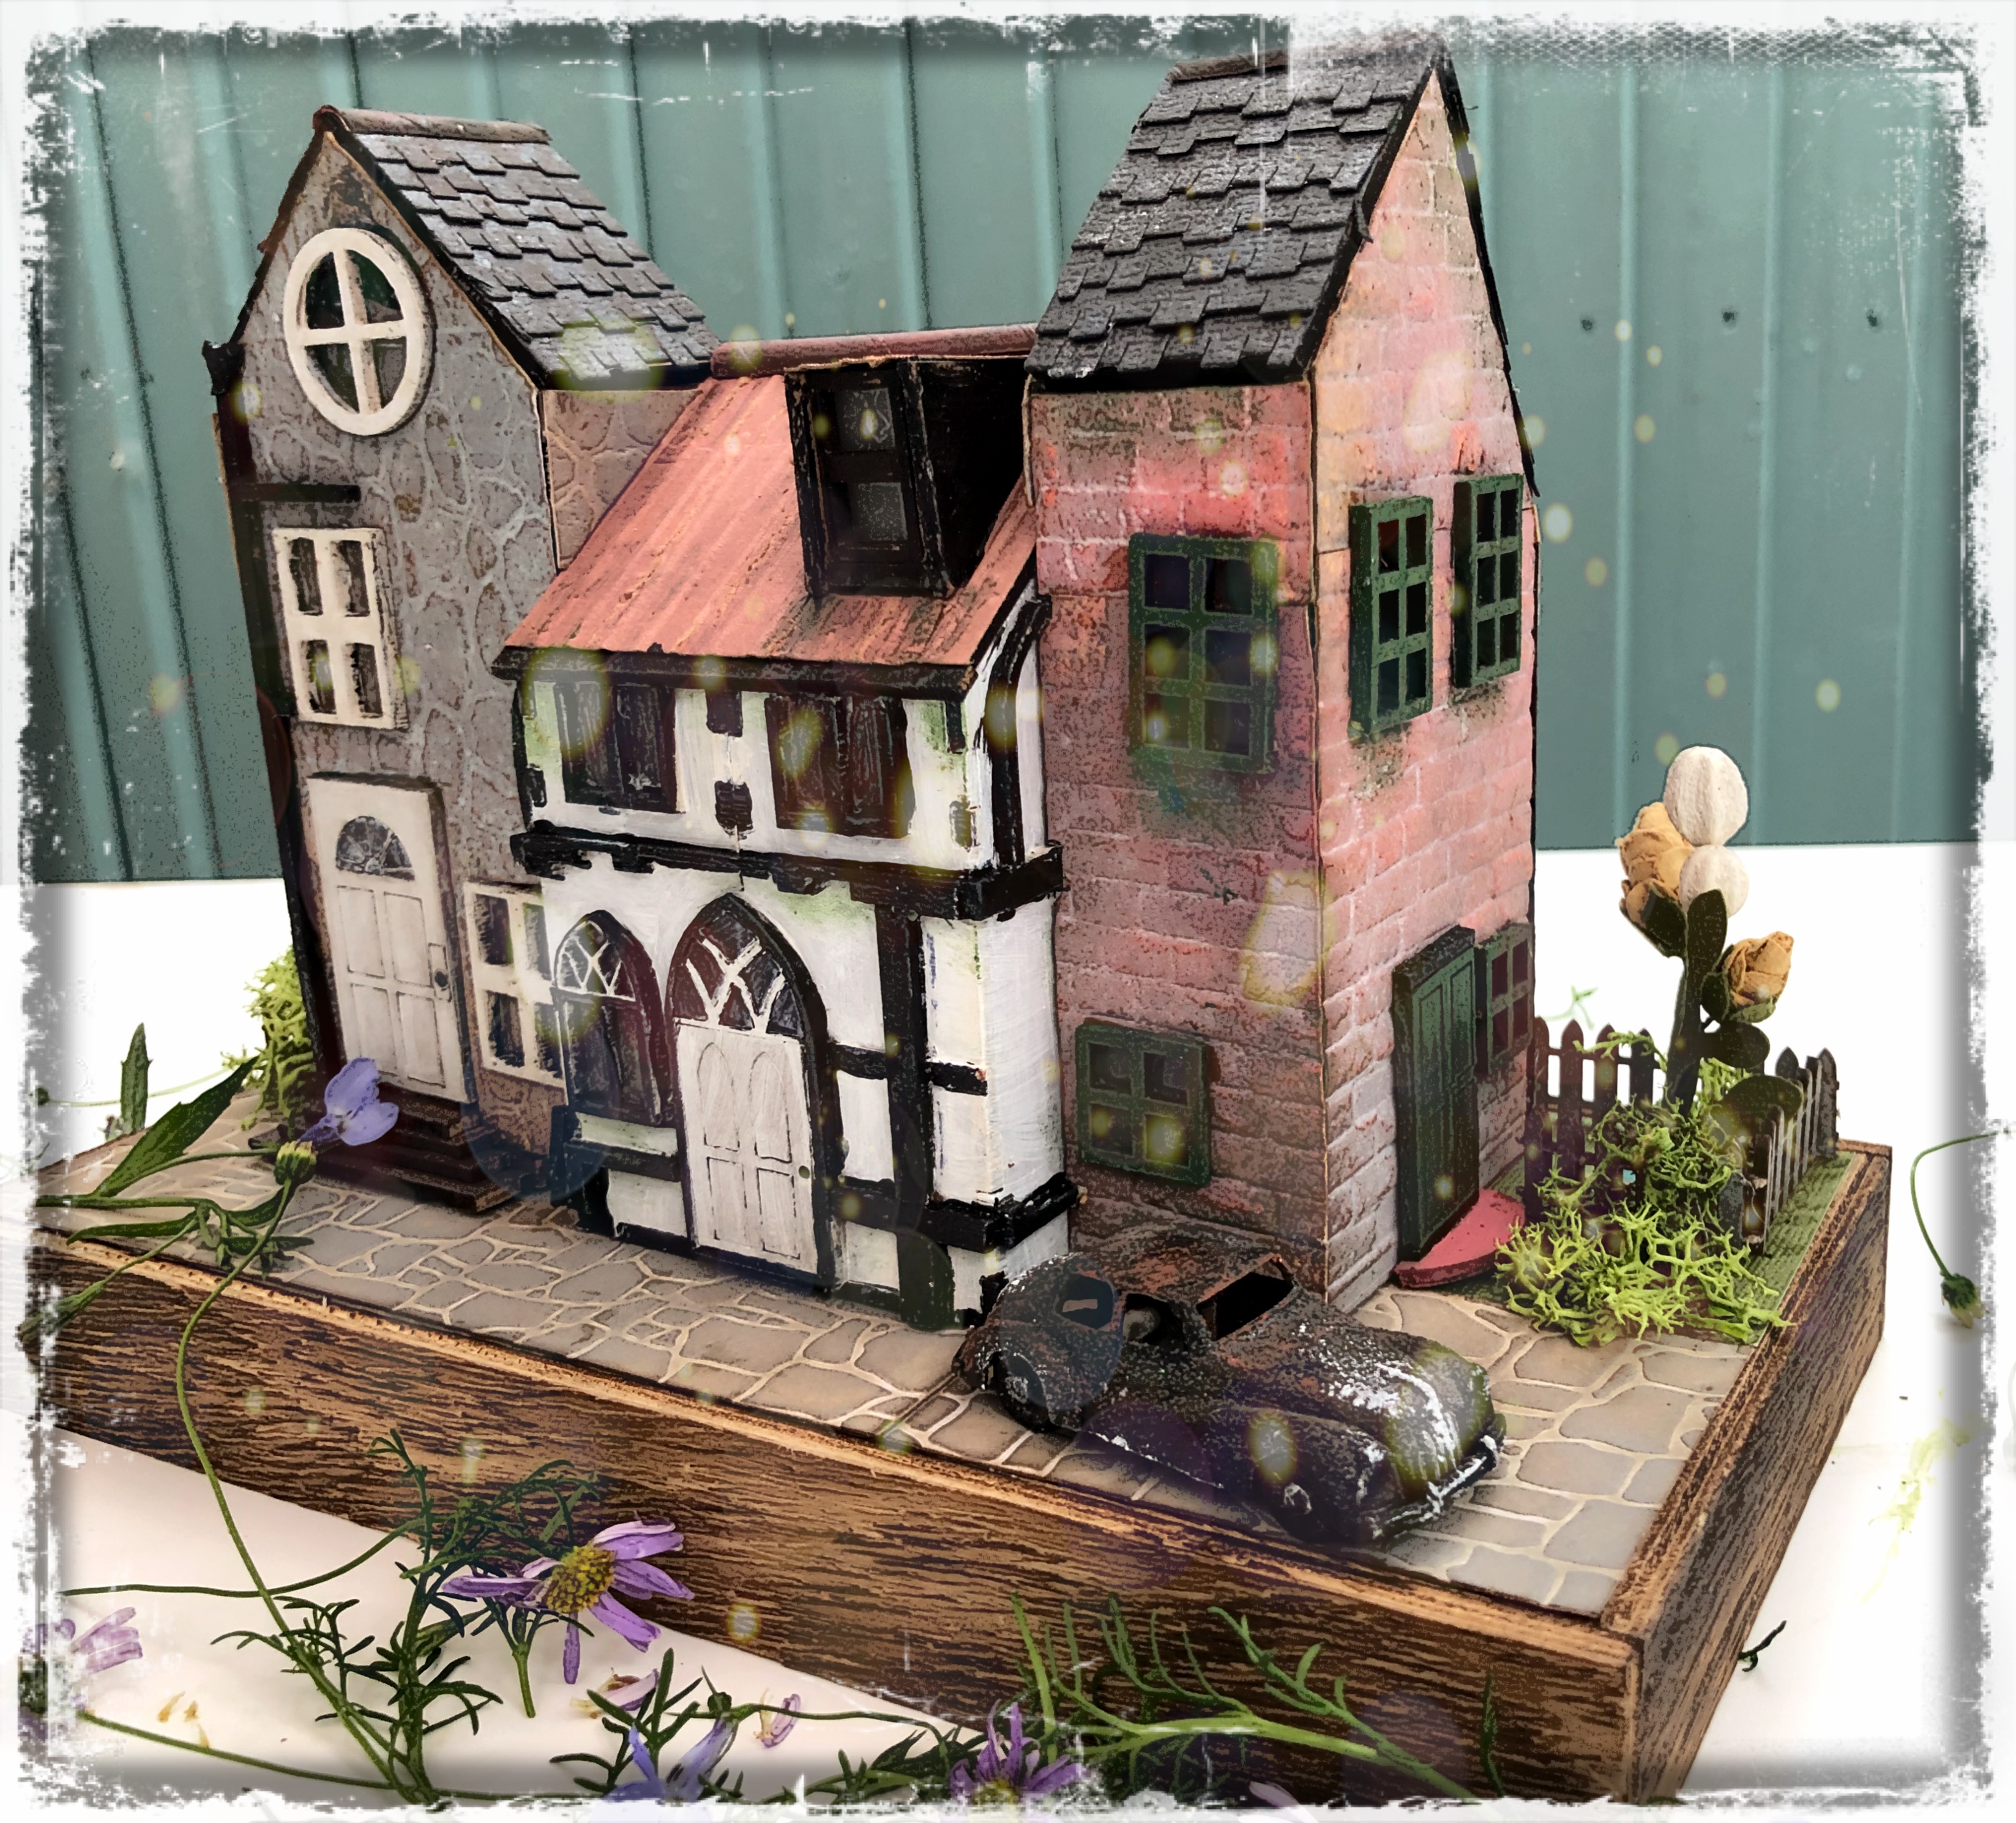
The middle house is made out of two individual houses stuck together and I deliberately chose one with a regular roof and one with a wonky roof to add an interesting feature from the back view (as seen in the next image).


Although the little houses all have no features, Calico Craft Parts sell all kinds of accessories and textures to add some authenticity. From cobble stones to bricks and lots of architectural pieces including windows and doors so you can customise your houses to your own taste.
I’ve gone for a very vintage nostalgic look.
As I had a very specific budget for my design team order, I didn’t get everything I could have used so I’ve used some texture from embossing folders to create some of my brick etc.


I’ve also added a dormer window to the middle house and I’ve included some resin cast drainpipes in a couple of places to add a wee touch of authenticity to the look. 

 Adding all the little details to make four very plain house shapes become this nostalgic little street took some time but it was time spent enjoying myself and letting my imagination run free. 

I’m now looking forward to starting my second design team project which involves a lot of  “fussy cutting” so I’d better get on with it. 


Supply list


Block style house kits: 

short with wonky roof, 

 short ,

 tall, 

tall with wonky roof


Sheet of Mini MDF doors

Sheet of mini MDF windows


Additional supplies that may be of interest for a similar project:

Sheet of pipes and drains etc

Selection of fences

Bricks and Cobbles etc

Saturday, 9 October 2021

Oh mummy! by guest designer Lori Woods

 Hello friends! I'm super happy to back with another guest design post for you and since it's October, I went super spooky!


The Standing Skeleton kit is a fantastic 3D kit that has so many possibilities but I decided to make a creepy mummy with mine. Once I had assembled the skeleton, I gave it a quick coat of white gesso. Next I created two eyeballs from clay and glued these into position in the skull eye sockets. Now came the fun part, wrapping the mummy!


I made a mix of watered down white glue- I used PVA but you could use any kind of glue that has a nice runny texture as the idea is to saturate the fabric with it. I cut strips of muslin and gave them a good soak in the glue mix then squeezed out the excess. Then I began wrapping! It doesn't have to be neat and tidy and you can miss out areas of bones like the hip bone and some ribs to give the effect of an ancient old mummy who's starting to unravel a bit!


Once the wrapping was finished and the bandages were dry, I took some watered down brown acrylic paint and used this to create some areas of shadow and a little green paint to create an effect of some moss growing on the mummy. A quick dry brush of white gesso and some red paint for the eyes and the mummy was finished!

Although the kit does stand by itself, I wanted to give the mummy a base so that I could position him in a sort of lurching stance. I used an oval MDF board, painted it green and glued on some art stones to create a bit of texture. I then positioned the mummy in the stance that I wanted and using a strong glue, attached him to the MDF board.


I hope this gives you some ideas on how versatile this kit is and inspires you to create your own creepy cute Halloween decor!


Monday, 2 August 2021

Dalek kit: by Guest designer Stephen Taylor.


Hello everyone. 

I was lucky enough to be given the opportunity to test drive one of the Dalek kits. The design team coordinator, Louise, had been sent it as part of her design team kit but she said she didn’t feel too confident doing such a large kit. As a model builder, I thought perhaps I could give it a try. 

And here it is…. 


Looking good with its slightly vintage paint job as a nod to one of my other passions, steampunk. 

I achieved this look by sealing the wood, painting with metallic paints, using metallic wax for highlights then giving it a colour wash with a watered down mix of black and raw umber acrylic paint to add shadow, depth and age.  

If you are a model builder yourself, I would say this kit was roughly a level 2 / 2.5. Not for a complete beginner but would certainly suit someone who’s only done one or two models in the past. 

You can find the Dalek kits HERE


Friday, 16 July 2021

Riding on a Bat! By Kat


I have always been interested in fairies, pixies, witches and fairy folk and had many books on the subject as a child. Some were hand me downs from older family members, some I bought with my pocket money from car boot fairs and jumble sales. One of the many images I used to love, and still do is the little fairy riding on a bat by Ida Rentoul Outhwaite. As a child my house was right by a river and on warm sunny evenings we often used to get bats swooping gracefully in our garden as they chased insects. I used to lie on the grass watching them imagining I was that fairy going for a ride! 

So using Calico Craft Parts mdf shapes here is my version of the same fairy and even though she is now older, like myself, she is still enjoying riding on a bat! 

Firstly I painted all my mdf shapes with white matt paint, I find this gives it a good base before adding coloured paints. Once dry I used water colour paints. To add some sparkle to my fairy's dress I added some gold acrylic paint. 

I then painted a simple river scene onto the circular mixed media board. I was planning on using a larger moon at first but then to my delight found one of Calico Craft Parts mini circles was a perfect size to use! So I painted this with matt white paint. 

Once the paint had dried I arranging my bullrushes until I was happy with their position. I then glued them into place. 

I then did the same with my moon, bats and fairy, positioning and gluing them into place. To add colour to the moon and bats I used some distressed crayons. 


To finish off the whole scene I added a little cardboard wording quote. 
The string ribbon is a length of gardening hemp. 

Well I hope you enjoyed another 'Kat Make'. Please contact me if you have any questions and of course if you like it let me know. It's always nice to hear from you. 
Until next time,
Kat 😊

MDF shapes used. 

Round MDF Shape

Flying Bat Colony

Art Nouveau Figurine

Mini Circle Shapes

Bulrush Grass Shape

Friday, 2 July 2021

Madame Maud Fortune Teller by Kat Hazelton.

 "Roll up, roll up, get your palm read, gaze into the crystal ball or have a tarot reading! She sees all, knows all, please come in and have your future told!" 


This fun project was inspired by a book I own called The Fortune Teller and Dreamer's Dictionary by Madame Le Marchand. In this wonderful book it shows you all sorts of different ways to tell fortunes from tarot cards to reading tea leaves. However, it is the wonderful front cover that I particularly love. Instead of traditional imagery on the cover it has a fortune telling witch sitting on a chair gazing into a crystal ball! This gave me a fantastic idea and using a wonderful witch sitting on a chair from Calico Craft Parts, I made Madame Maud's Fabulous Fortune telling tent! 

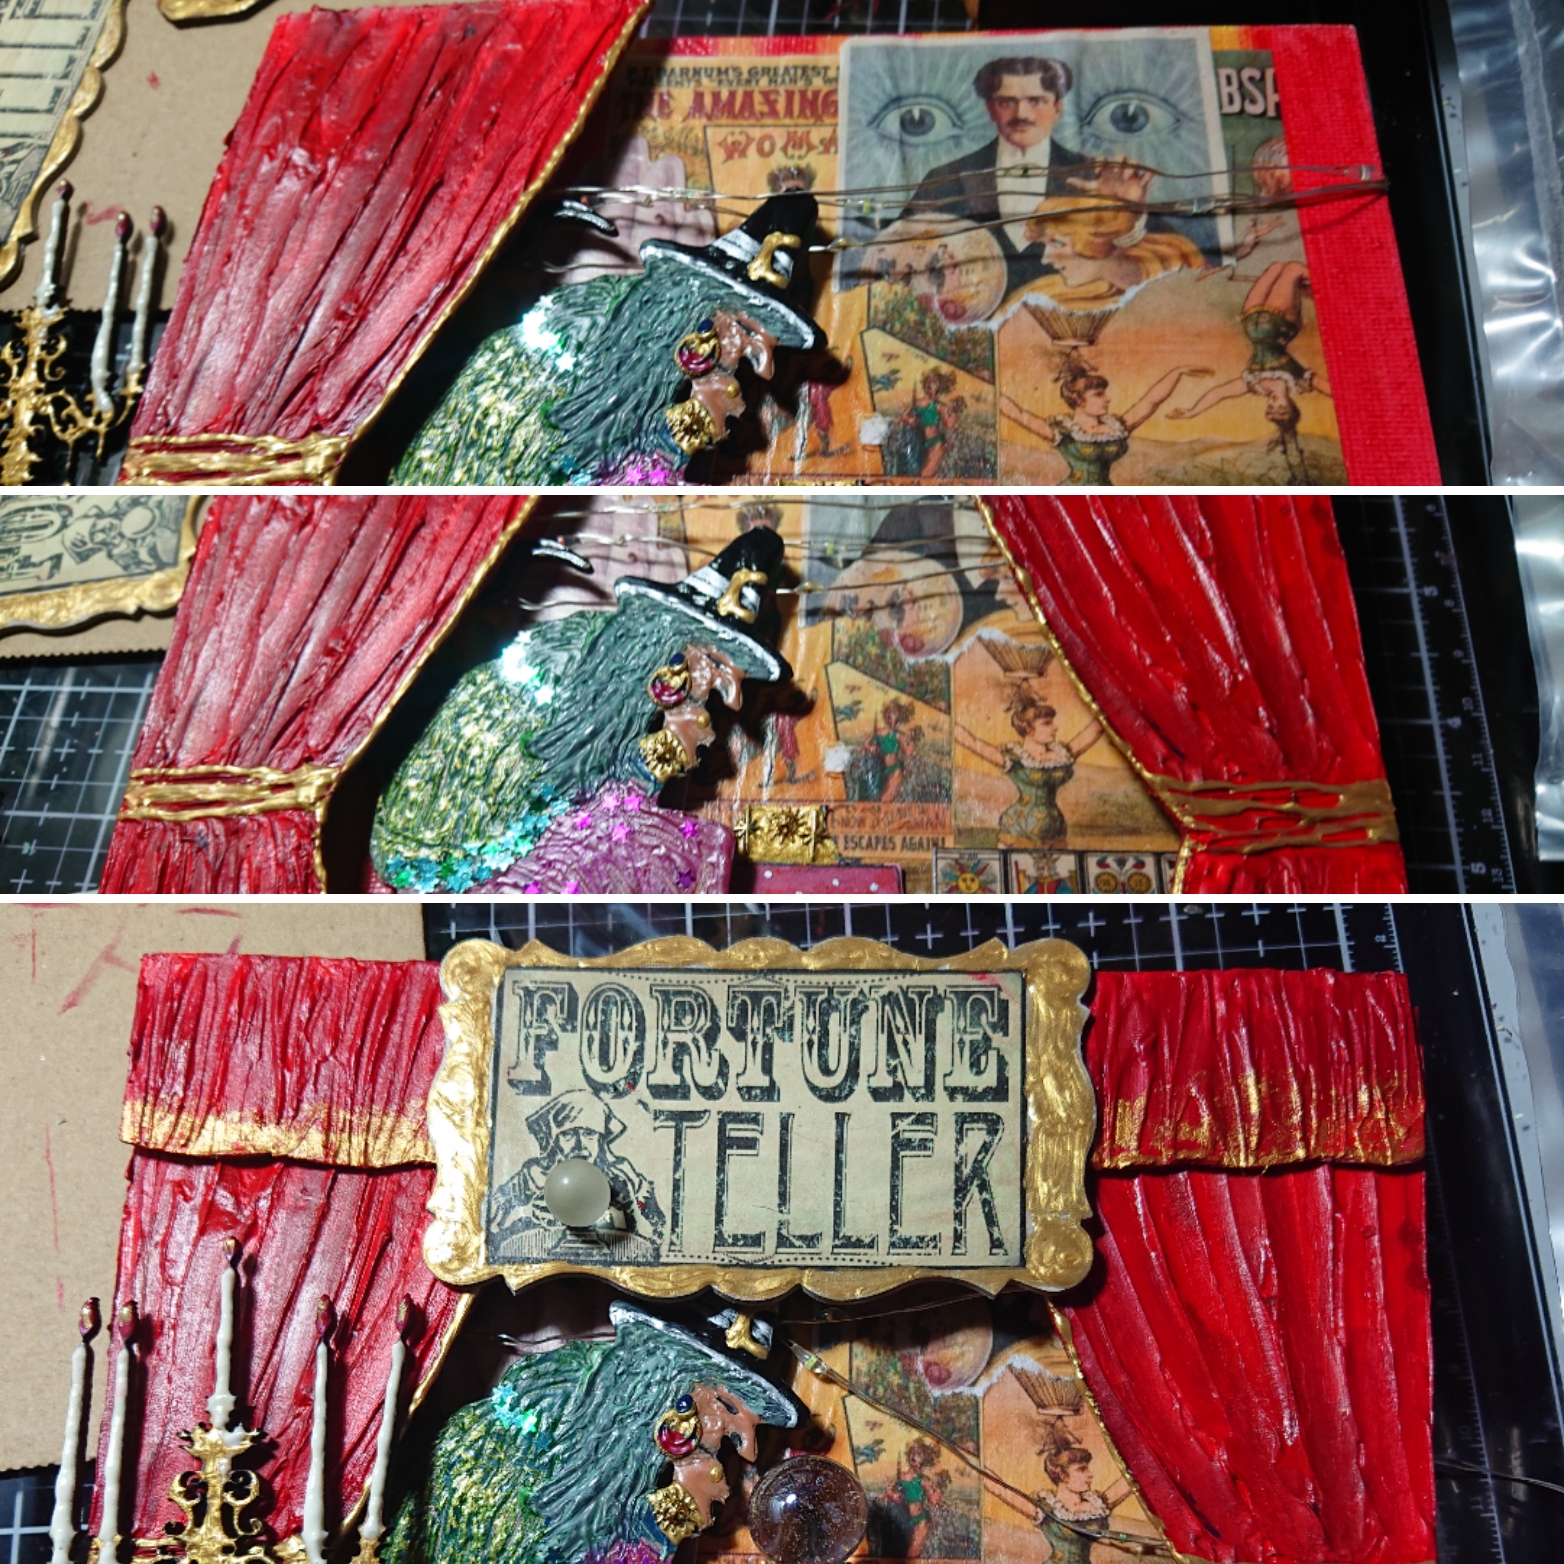
Firstly to make my Madame Maud a tent I used a piece of cardboard to create the back of the tent, you could use a flat piece of mdf. This was firstly painted with white gesso and once dry I used distressed crayons to create the traditional Circus/Fairground red and yellow stripes. I also added some dark brown crayon round the bottom to make it look mud splattered. To add some extra Circus details I researched online for posters. I resized the images to make them smaller, then printed and glued them onto my tent wall. I then made a start on painting some accessories and making the tent curtains. 


To make the curtains I used stiff grey board, the type you often get in packaging. I often recycle old packaging to use in crafting especially cardboard. With a pen I drew a rough curtain shape. To make sure I could see Madame Maud I used her as a positioning model.

I painted Maud using acrylic paints. Instead of painting her in traditional witch clothes I painted her in brighter colours with the addition of glittery 'bling' to make her look more Fortune Teller in appearance! 

To give the curtains folds I used sculpting paste and a cocktail stick. I applied a thin layer of sculpting past onto the curtain area and using the cocktail stick as a tool I addes fold lines.
Once dry I painted the curtains with red acrylic paint.


Once the paint was dry I glued on some small mdf circles on the back to help to give the scene a raised 3D effect. I also did the same for Madame Maud. 

I also added a string of real mini battery operated lights! I wrapped these around the backboard and taped them into place on the back. 


Once Maud and the curtains were glued in place I added lots of other details including a beautiful candelabra, sign, crystal ball and curtain pelmet, made in the same way as the curtains. The crystal ball was a pretty marble gifted to me by my friend Debbie. Thank you Debbie it makes a perfect crystal ball! 


Lights on! 
Madame Maud is now set up and ready for business! 


Will you have your future told? 

Well I hope you all enjoyed another 'Kat Make' if you have any questions please do message me and of course if you like it please do let me know. Always nice to hear from you. 


Friday, 4 June 2021

The Kraken Shrine: by guest designer Lori Woods

Hello everyone! I'm Lori and I'm thrilled to be the guest designer for Calico Craft Parts this month. 

As soon as I saw the Nautical Shrine kit I knew it would be perfect for a piece dedicated to my favourite sea creature, the kraken! Once I had assembled the shrine, I used textures pastes and stencils on the outside to create some areas of interest and then I painted it with cream, browns and red to give a weathered and aged look. To finish decorating the outside I added elements from the Mini Nautical motifs set, an Art Deco Ornament shape and a Compass shape, gave these a splash of colour and then dry brushed white gesso over everything to highlight all the different textures and details.


For the inside of the shrine I painted a very rough sea and sky in two different colours of blue, then added a crackle glaze over the top to give it an antiqued look. I coloured the Galleon Boat shape with paints and glued this into the shrine, using some pieces of card to raise it off the background and create a more dimensional look. Then, the tentacles! I rolled some lengths of air dry clay into tentacle shapes and once they'd dried, coloured them with some metallic paints to give that glistening wet look. I mixed a blob of gel medium with some blue paint to create the water effect on the bottom of the shrine and used this to secure the tentacles in place. A little white paint dabbed on top of the gel to simulate the look of waves and voila, my shrine to the kraken was done!

Supplies used:

 Nautical Shrine kit 1

Art Nouveau & Deco ornament 7

Mini Nautical motifs 6

Galleon Boat 6

Compass shape

Friday, 21 May 2021

Embellishing a layout: by guest designer Liling Payne


Hello Everyone

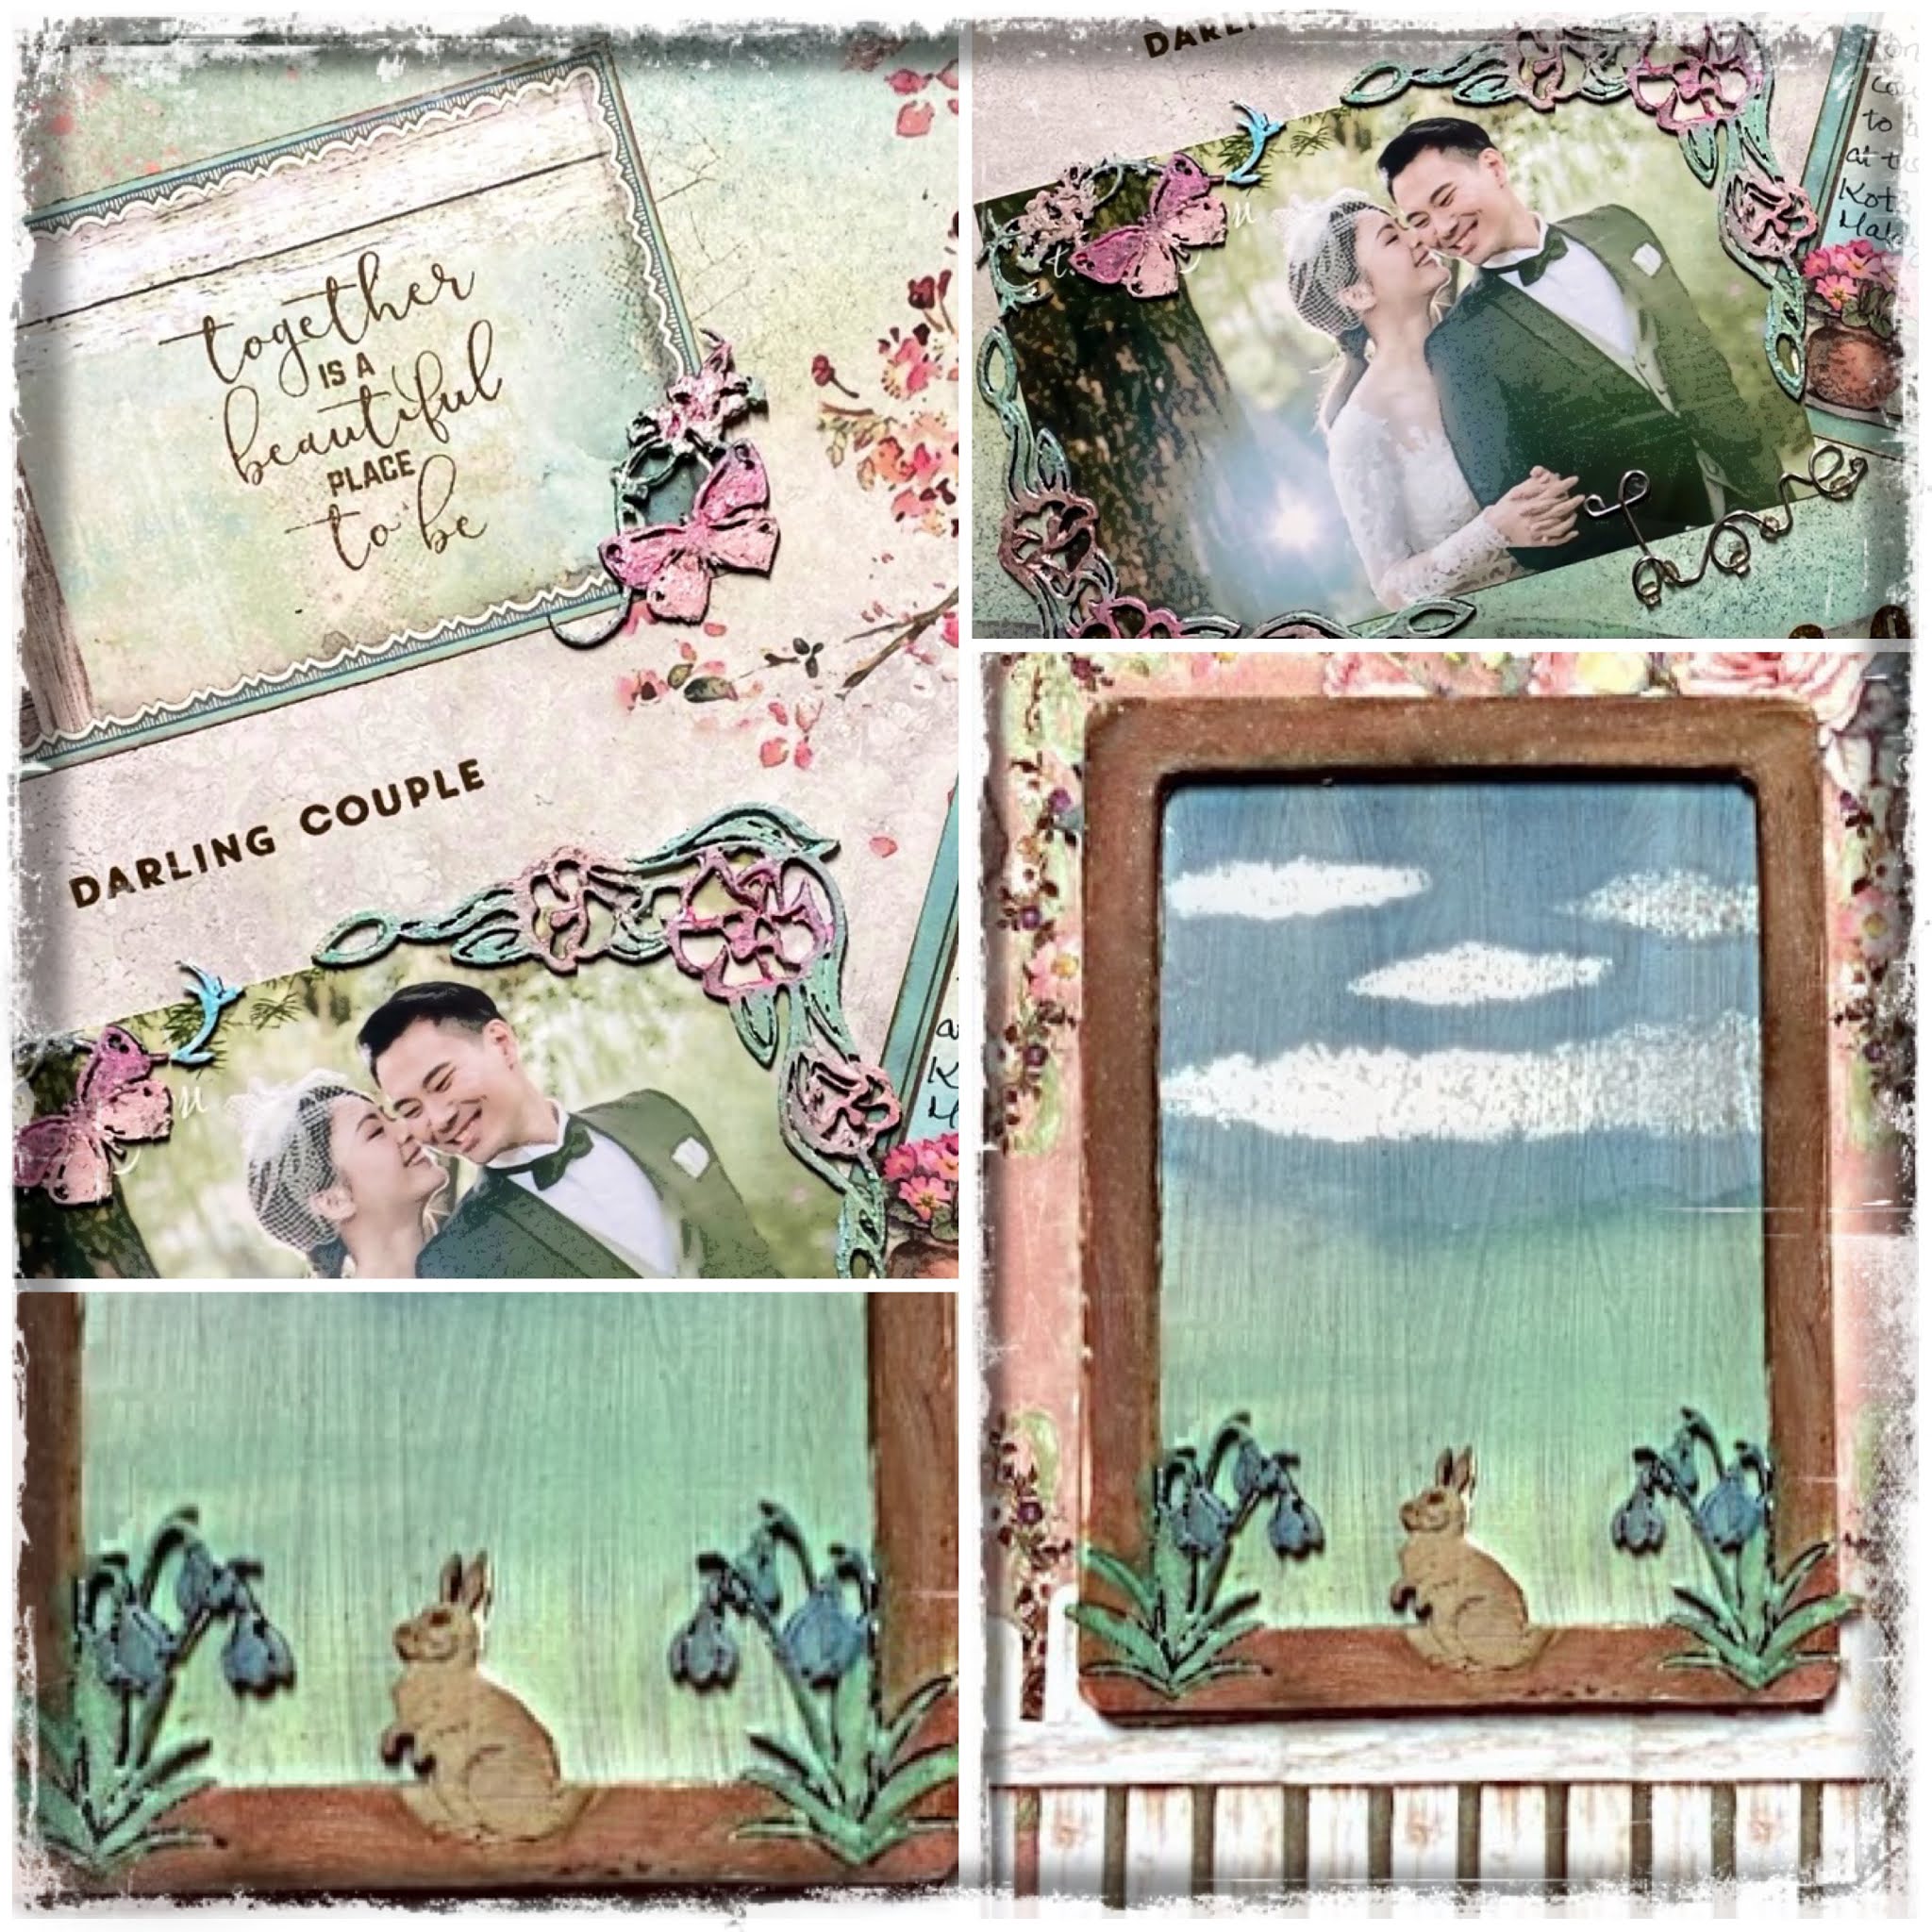
Again, thanks go to Louse Crosbie for the invitation to be a Guest Design Team member for May. You will have seen my first blog post which was an ocean theme and for this second one, I decided to do a completely different theme based on the lovely floral and butterfly elements that are among the wonderful range of products Calico Craft Parts sell. I also ordered an ATC blank with rabbit to do for my granddaughter as she has just lost her pet rabbit, so I thought this might be a nice wee memorial.

I used to think that mixed media was only about gothic, steampunk or grungy type media and it’s only since I started playing around with the media, that I realised it can be anything you like and it meets all crafting styles e.g. scrapbooking, cards, boxes and basically anything that you wish to embellish with the fabulous parts available from Calico Craft Parts so go ahead and give it a go.

I prepared all the pieces with a fine layer of white gesso and let it dry overnight (you can dry in a few minutes using a heat gun if you prefer). This gave me a base colour to which I added distress inks and a glacier paste for some shimmer

I decided to do a scrapbook page of my nephew’s wedding and used these parts to form a frame around the photo which I laid onto co-ordinating cardstock. I had coloured the beautiful calico craft parts to match the floral theme of the wedding.


I love how versatile the embellishments are and will definitely be using more elements

I then decided to use the ATC to make a memorial tag for my granddaughter and loved the rabbit in the bluebells which I coloured accordingly.

First of all I laid a base of white gesso and let it dry overnight (or you can dry in a couple of minutes with a heat gun if you do not like to wait).
I then decided to use my distress inks as watercolour to paint the background scene which I wanted to be an outdoors one for the frame which had the rabbit and bluebells.


Then I joined the frame and background to provide this lovely little ATC tag.

I hope you’ve enjoyed seeing how versatile the wooden embellishments can be and check out the website to see all the fabulous themes and designs you can make at an incredible price to enhance and embellish your crafty makes.

Friday, 7 May 2021

Marine plaque by Liling Payne


Hello Everyone

First of all, thanks to Louse Crosbie for the invitation to be a Guest Design Team member for May.  We were fellow DT members of another craft blog so it’s been a privilege to learn from all the talented crafters out there.

This has been my first foray into mixed media and a bit of a learning curve, but thanks to You Tube and Pinterest, I was able to find inspiration to help me choose what I wanted to make from the amazing range of products and themes that Calico Craft Parts sells.

I love oceons, sea life and the colours of the seas and oceons so I decided to choose ocean themed  products:


Helen, the owner, included an extra plaque with my order so I decided to use that as the base for today’s project. 

So first of all I decided to prepare the oval plaque and the craft parts with white gesso. 


I gathered a selection of ink pads and paints I thought would suit the project focusing mainly on aquatic themed colours.

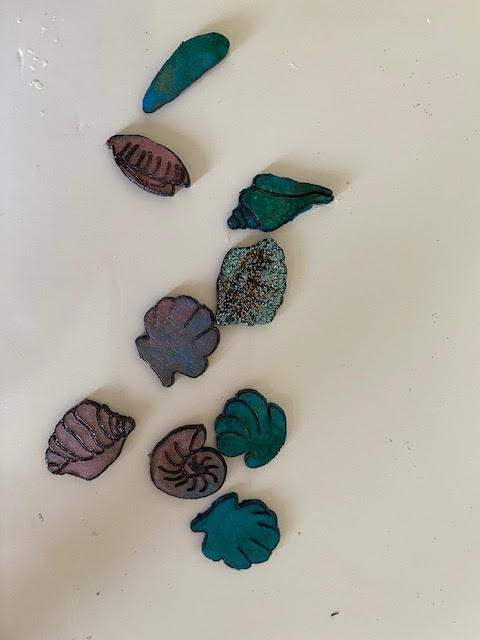
I stamped the seahorse with some of the inks starting with where I thought the shadows would be so darker shades on the head and tail. I sprinkled water to activate the distress inks so it gave a nice mottled look to the sea horse. I then used the darker brown distress ink to draw some markings on the element then I used some bronze coloured modelling paste to highlight some areas and give a metallic sheen, then I added some sparkle with a glitter based products. This also helped give the shell a nice glossy effect (which, sadly does not show up in the photos). I also covered the base in various shades of green and blue mica spray, then added texture with some mesh fabric I had as well as muslin. I then played around with the different gesso, pastes and sprays until I got the look I wanted on the base, however it did end up very blue and green so that’s why I did some of the embellishments in paler colours and glimmer/glacier paste. I also laid some bubble wrap over the base to give me some more texture which I thought I could then use embellishment drops or glossy accents to highlight the bubbles.


Once all my elements were painted, covered, embellished, I laid them out on my board to decide on placement. To try knock some the blue back, I found a piece of burlap which I left natural to give me some dimension and then lightened the base below the burlap and added more gesso for texture before deciding how to place all my pieces. I played around with layout, took photos each time until I found the layout I wanted.

So here is how I decided to place everything which I then glued down.

think I’ll probably use this as a wall hanging as the plaque had holes in the top which have been covered by the gesso and pastes, but to showcase it for the blog, I found some ocean themed papers in my stash which I felt co-ordinated well.

So I hope you like my first ever mixed media project.  Thank you to Louise and Calico Craft Parts for giving me the opportunity to try the products and design something as a complete beginner and novice and hopefully this will inspire other beginners to mixed media to just jump in and find your theme then be creative.

Happy Crafting 

Liling

xoxo

Supply list:

Seaweed style 12

Coral style 1

seaweed style 7

starfish 

starfish

sheet of mini shells

oval plaque