Showing posts with label Zuzu. Show all posts

Tuesday, 26 July 2022

In the deep. Little ocean themed plaque by Louise Crosbie.


Hi there.  

I’m sharing this little deep ocean themed plaque today. While I often use craft parts as embellishments to larger projects, this project is about 90% craft parts. Very soothing to work on as all I had to do was pick out the parts I wanted and glue them down to create a scene. I used a stencil on the background first then I used little cobble stones to create the pebbles at the bottom of the ocean floor  I added some mini art stones to create a sand effect.

Once all my parts were glued down and secure, I gave everything a coat of white gesso then added colour. A bit of dry brushing restored the detail.

Some sequins and glitter added a touch of magic. I’m thinking of turning this into a mini album cover as I have another plaque the same I could turn into the back cover and bind the book with mini book rings. 


Craft Parts Used

Mixed media board door shape

Octopus

Diver octopus

Seaweed #9

Seaweed Stalked leaf bearer 

Chub Fish

Cobblestones mini sheet

Porthole

Anchor

Seahorse


Monday, 11 July 2022

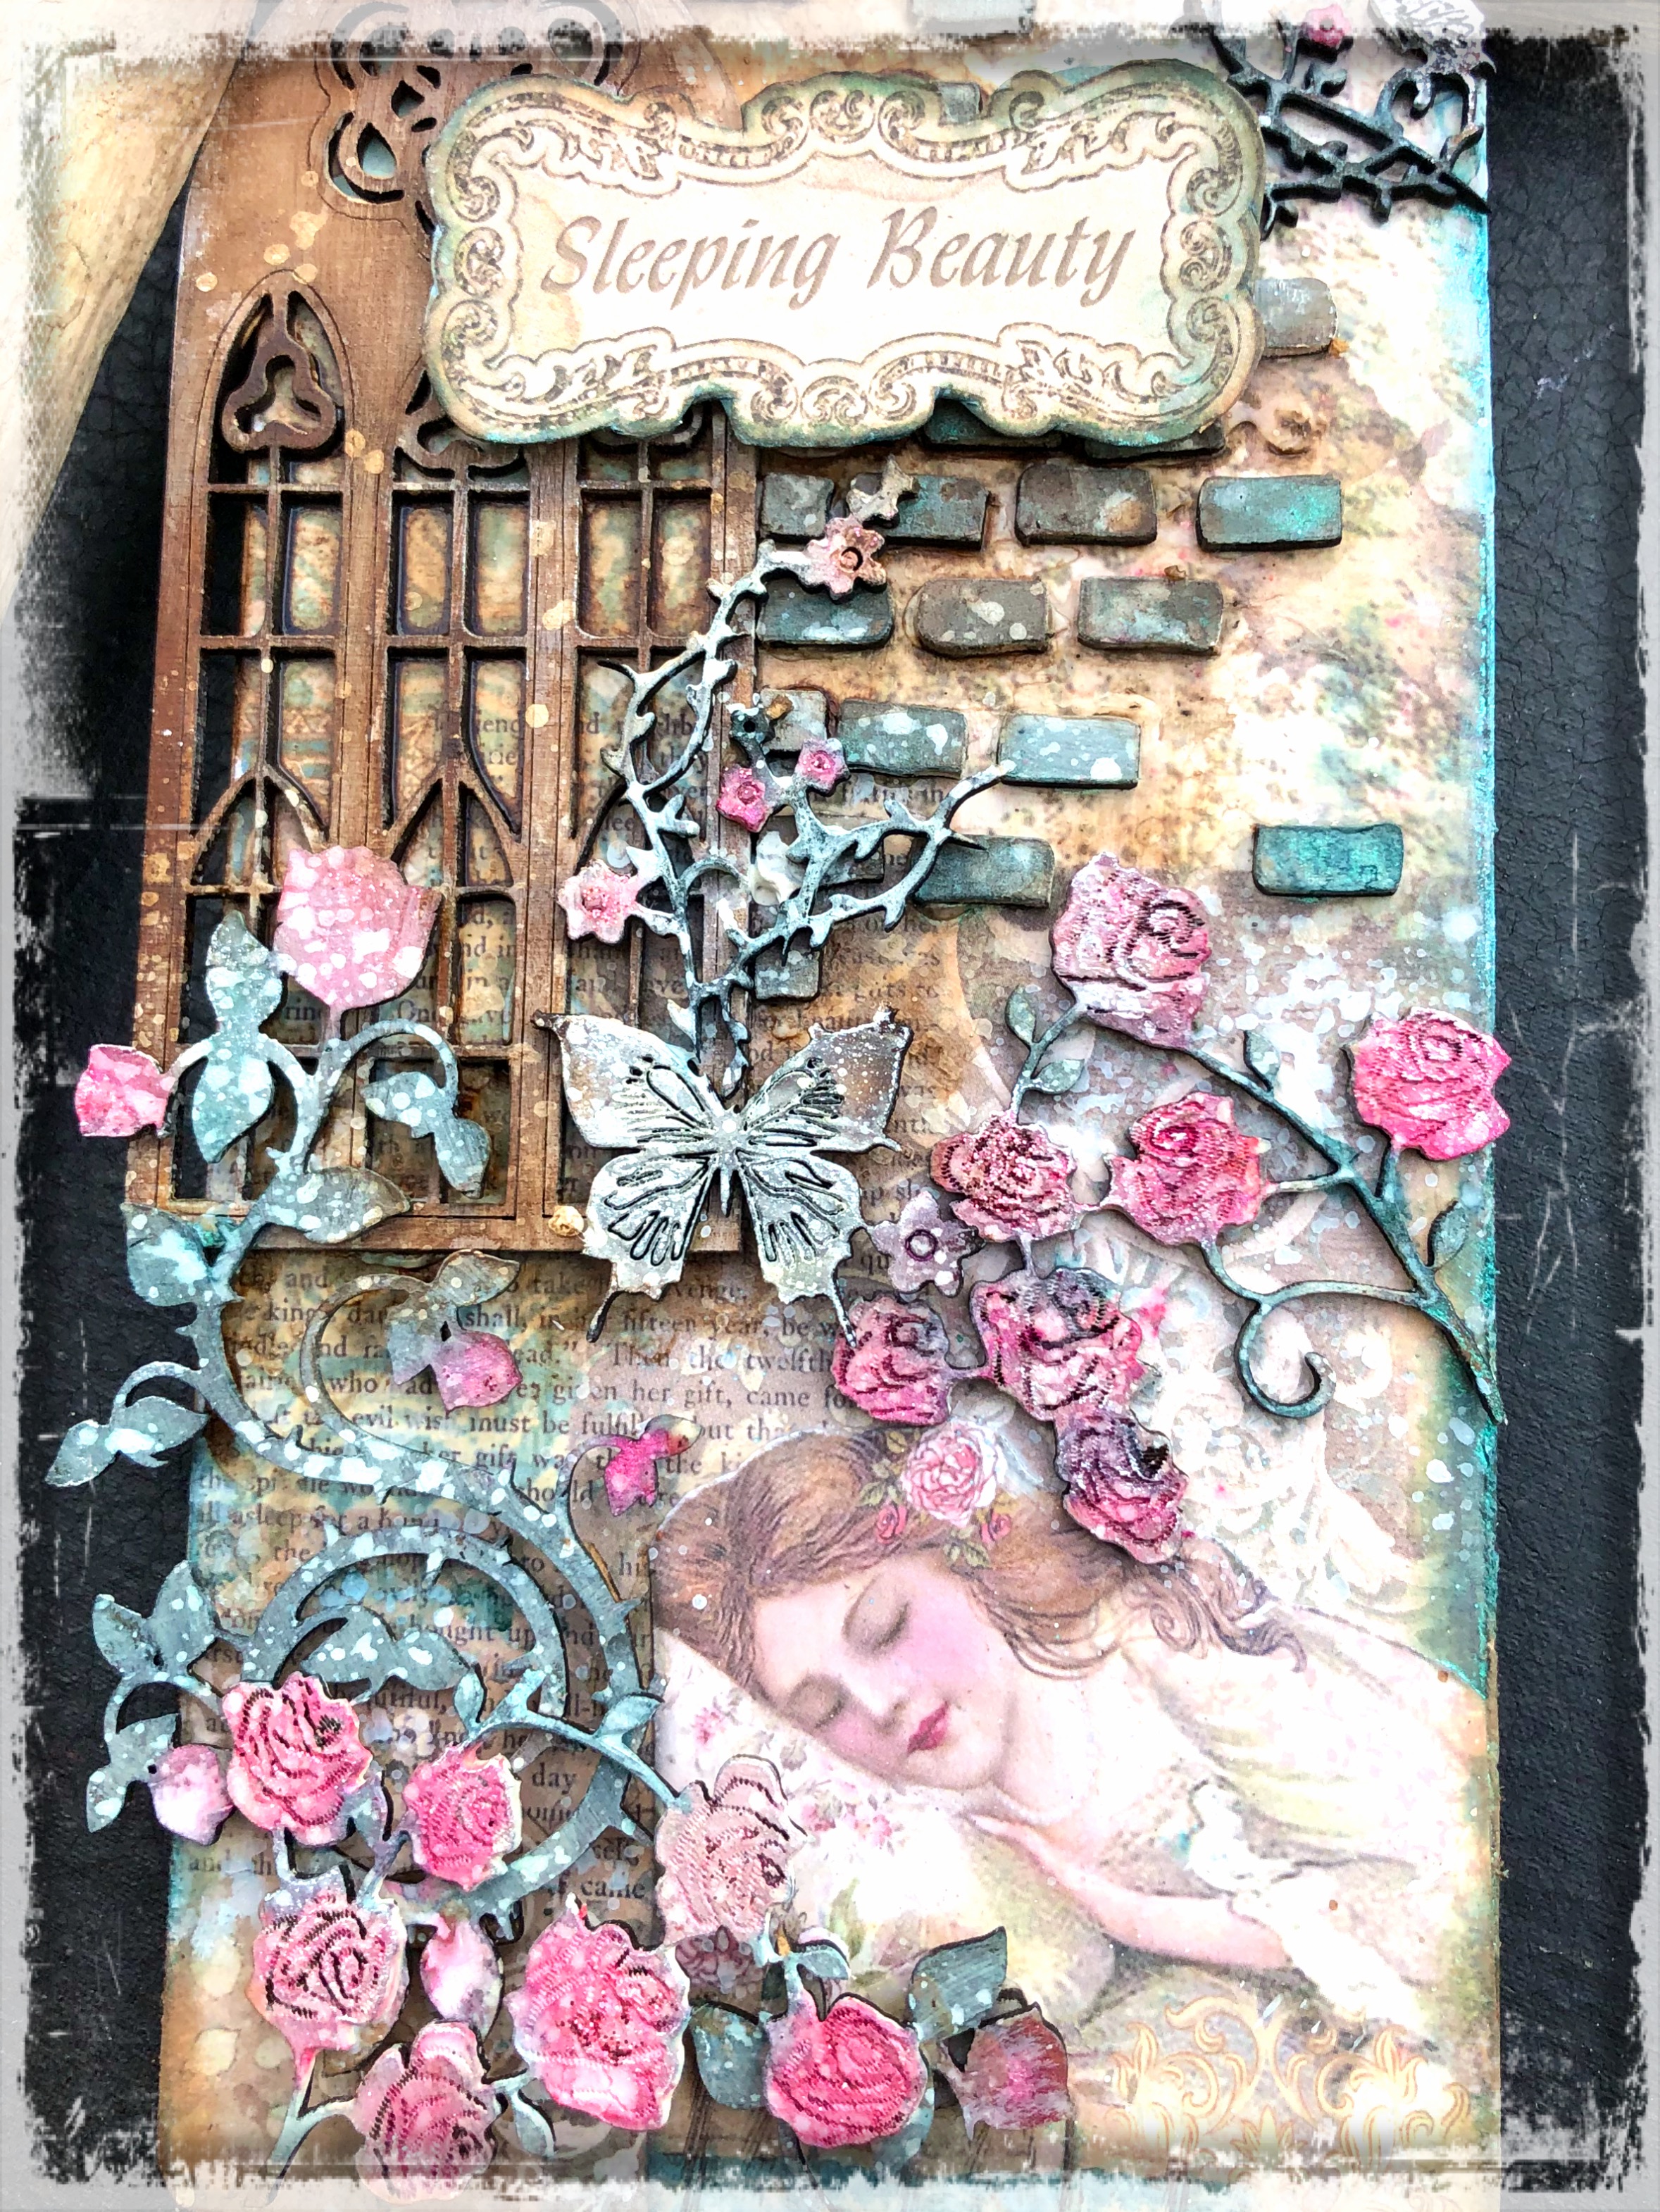
Sleeping beauty tag: by Louise Crosbie. (Zuzu)


Hi there.

For todays project I’ve used a large wooden tag as my base. After gluing on my papers, I covered them in clear gesso to protect them from getting stained and obscuring the images in the later stages.

While it was drying I gave all my chosen embellishments a very light coat of  white gesso before painting them with colours to match the papers. A nice teal and a rose pink. 


I think these arched windows are perfect for fairytale themes and the mini bricks give the hint or suggestion of a castle wall. 

I’ve not necessarily kept all my craft parts in one piece which seems to be a regular theme with me. I like to snip them into convenient pieces depending on the needs of my layout and it gives me the impression that they go further that way too. 

These pretty little rose bushes and vines really suit the papers I’ve used. Especially with the added colour. 


Craft parts used: 

Tag

Rose bramble

Throned rose scroll

Butterfly bramble

Mini brick sheet

Narrow rose window

Thursday, 30 June 2022

The Summer house: by Louise Crosbie.


Hi there. 

Today I’m sharing a project using a little house shape as it’s base. 

I’ve also used wooden leaves: sugar maple, sweet gum

Flourishes: Vine flourish, swirl curly flourish.   

A birdcage  

and a round Christmas bauble style frame. (Because it reminded me a little of a pocketwatch)


I lined the house with rice paper and added some texture through a stencil. I added a touch of watered down coral pink transparent paint to the texture so it was only just noticeable.

Then I painted all the craft parts before gluing them into place along with my vintage photo and some paper flowers.
Lots of white paint splatters finished it off. 


Saturday, 4 June 2022

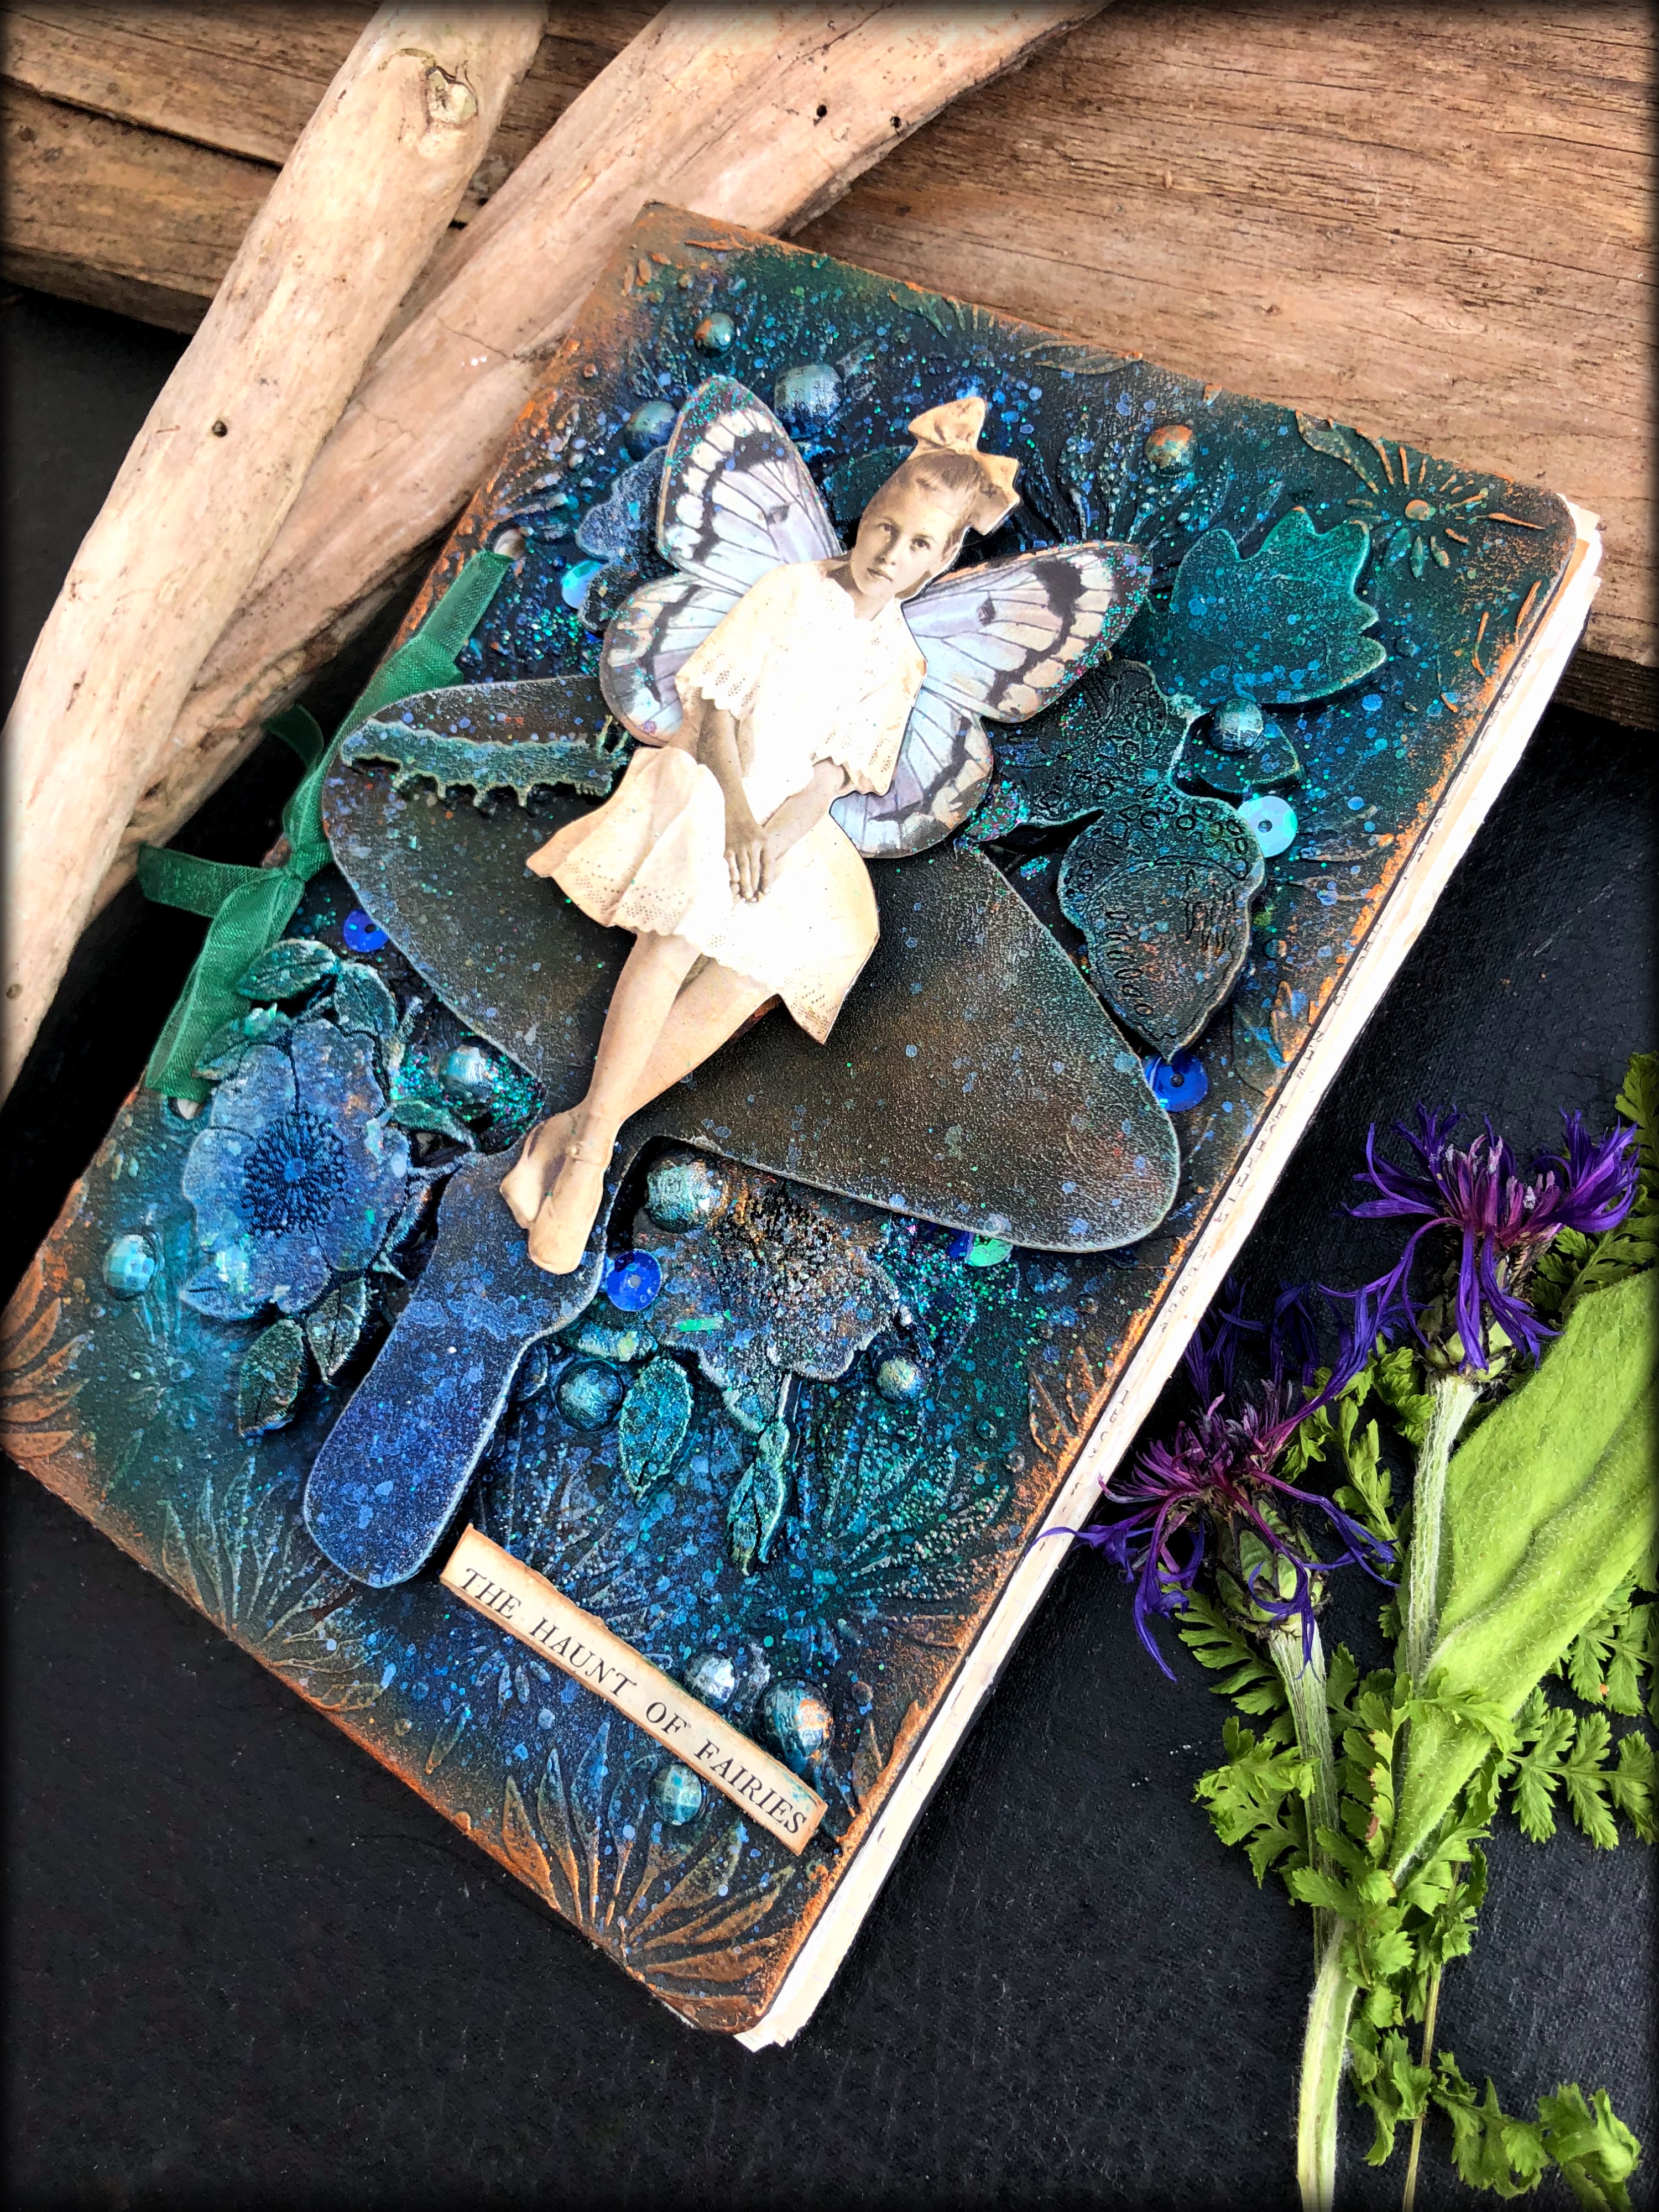
The Haunt of Fairies: junk journal by Louise, Zuzu, Crosbie.


Hi there. 

Today I’m sharing with you a very simple junk journal that I put together and decorated using mostly “Calico craft parts”. 

I’m very ‘into junk’ journals at the moment and very ‘into’ toadstools. So I made a large toadstool the start of my focal point. I simply built up a little woodland floral composition on a piece of board I’d already added texture to through a stencil. And once I’d gessoed and painted it, I added my ‘fairy’ and also a little phrase cut from an old book. 


Craft parts used:

Toadstool silhouette 

Dogwood sprig

Oak leaves 

Oak leaves with acorns

Caterpillar from mini sheet insects style 3


Tuesday, 1 March 2022

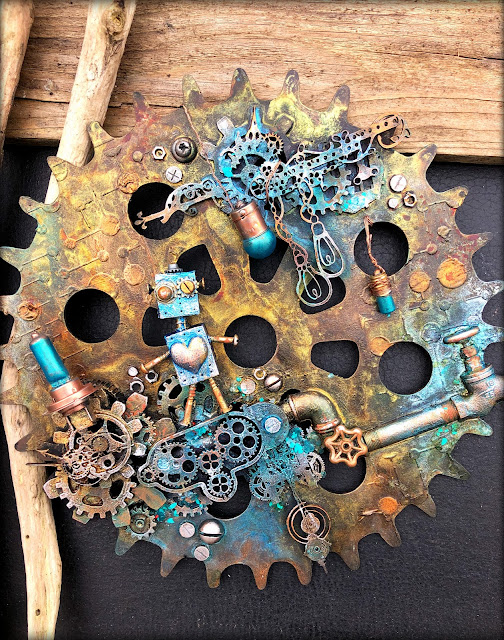
Giant cog - mini robot: by Louise Crosbie (Zuzu)


Hi there folks.

I’m sharing this assemblage that I learned in a class given by Nuneka Box. She used lots of resin pieces and metal embellishments but I decided to try my version using calico craft parts. 

I do love Nuneka’s style and her classes are very inspiring whilst being great fun. This one was part of her patreon membership.

I have used a few bits of resin cast in Finnabair moulds but it’s probably 90%  calico craft parts.


Parts used

Giant cog

Sheet of MDF cogs: 3

Sheet of MDF cogs: 4

Edison bulbs and chains

Mechanical clockwork motif 24

Cogs and clock hands

Mechanical clockworks motif number 16

Mechanical clockworks motif number 27

Sheet of mini hardware 


Monday, 22 November 2021

Woodland shrine. By Louise Crosbie


I seem to be a little obsessed with layering up these trees every winter but they are just so perfect for it. Especially as they come in several sizes.

I wanted to do a night sky scene with Santa but at the same time, I still love the natural wood colour. So I’ve combined the night sky on the outside with a more natural woodland vibe on the inside. I gave my shrine little feet using teeny wee thread bobbins so I can stand it on my shelf .


I’ve not been heavy handed with the paints. I didn’t want the colours to be too saturated. I painted it on then dabbed it off with a baby wipe, leaving just a small amount of colour.
The outside part of the shrine was first painted with black gesso. I then added a colour wash of midnight blue before taking sandpaper and sanding back all the edges. I just wanted to see a little hint of the natural wood to help tie it in to the inside part of the shrine.
Then I was able to glue Santa and the front trees into place. 


 It’s quite 3D inside as the shrine kit has a little bit of depth to it. I put the smallest of my trees at the back then layered more in front of them (as ever, I broke the pieces up to suit my desired effect). I glued a little stick half way in to give me something to glue the tree with the deer on to.

When everything was painted and glued, I added the decoArt snowtex and glamour dust glitter to everything along with some white paint splatters to make it look like it is snowing. 

Saturday, 13 November 2021

Let it snow plaque by Louise


Pretty title and much as I love to look at snowy scenes, I don’t much like having to go out in it unless it’s a walk in the woods or up the hills. Shopping and chores are not so great in snow so maybe it could hold off till late  December lol.

I made this plaque inspired by the lovely little sledge shape. I adore winter crafting. Not just christmas (or in my case Yuletide and winter solstice) but I love the snowy scene crafting. Or the cosy fireside images, hot chocolate and woolly socks. Winter birds. 

Ok I’m rambling now. 

Back to the plaque…

I used an ARCH  (large) for the substrate and then by using one of the DOORS, a FENCE, and a TREE along with the SLEDGE and a couple of SNOWFLAKES I created a wintery scene.

I finished it off with the “LET IT SNOW” phrase. 

The Craft Parts used by Louise to create this project are available in a money saving bundle (30% off!) over at the web shop - CLICK HERE to purchase.

I simply used bits of cardboard from the packaging my craft parts came in to cut out bricks to give the impression of bits of a wall. I only added enough to give a hint. I didn’t build the whole house.*

Since Louise originally created this project, we do now have Sheets of Mini Bricks as part of our Architectural Add Ons range.


(I used DecoArt snowtex and glamour dust glitter to creat my twinkling snow ).


Wednesday, 27 October 2021

Little gothic story plaque. By Zuzu (Louise Crosbie)


My last Halloween project of the year (on to twinkly winter and Yule). 
It’s almost Halloween and I’ve got friends coming over. I love this time of year and I love the traditional telling of spooky stories to try and scare your friends (regardless of our adult age lol).
But I don’t see Halloween as only scary. 8 love the traditional Celtic version of “day of the dead” that it represents. Setting an extra space at the table for any visiting ghosts of your loved ones who have died. Although that’s just a metaphors for taking time to remember that love and how we miss them. 


But as it’s a t8me when the veil between the worlds of the living and the dead is at its thinnest, then obviously there’s room to enjoy the spooky side as who knows what will get through that veil. 
Woooooooooooo (spooky noise lol)


I made this before seeing Kerstin’s fab tag earlier in the season but hopefully they are different enough.
There’s a LOT of glitter involved here so it’s very sparkly. Sadly the camera can’t show glitter as the twinkle is all about motion.  


I have used “parts” of some bits, as I often seem to do. I like to cut them to fit with what I’m making and this also means the shapes go further. 


list of craft parts used

Gothic window: https://www.calicocraftparts.co.uk/stone-mullion-gothic-arch-window-mdf-wood-shape.html

Grass: https://www.calicocraftparts.co.uk/wild-grass-mdf-wood-shape-style-4.html

Toadstool: https://www.calicocraftparts.co.uk/curly-double-toadstool-plain-or-engraved-mdf-wood-shape.html

Red oak leaf twig:  https://www.calicocraftparts.co.uk/red-oak-leaf-and-twig-mdf-wood-shape.html

Bird on a branch: https://www.calicocraftparts.co.uk/bird-on-a-branch-mdf-wood-shape-style-1.html

Grave stone/cross: https://www.calicocraftparts.co.uk/tilted-gravestone-cross-mdf-wood-shape-style-1.html

Flying Bat:  https://www.calicocraftparts.co.uk/bat-mdf-wood-shape-style-1.html

Birch plywood Plaque: https://www.calicocraftparts.co.uk/rectangle-birch-ply-wood-plaque.html


Sunday, 24 October 2021

The (not so) Grim reaper.


The reaper has hung out the bunting and the fairy lights for his favourite night of the year. All his dead pals are going to be visiting and partying until dawn. 


I assembled all the parts then painted it over with black gesso. Then I put on patches of rust paste and sprayed with a water mister to make it run down in streaks. I did the same with some metallique paint in a


nice flame orange. 

I decided to give the reaper more detail so I used a resin bird skull I cast from a mould. Once it was glued to the reapers face, I used black contour paint to make him a hood so his skull face blended in more and I used the contour paint to add some details to his robe. 

I also added an extra row of gravestones using a die cut I cut from black card  


It is categorised as a hanger as it can be suspended by a hook or ribbon if you use them, but as I need daylight to get decent photos and I’ve nowhere to hang it in the garden, I’ve placed it on four large, wide chunky beads to act as feet. 

I’ve used the skeleton tree & graveyard Halloween hanger.


Sunday, 18 July 2021

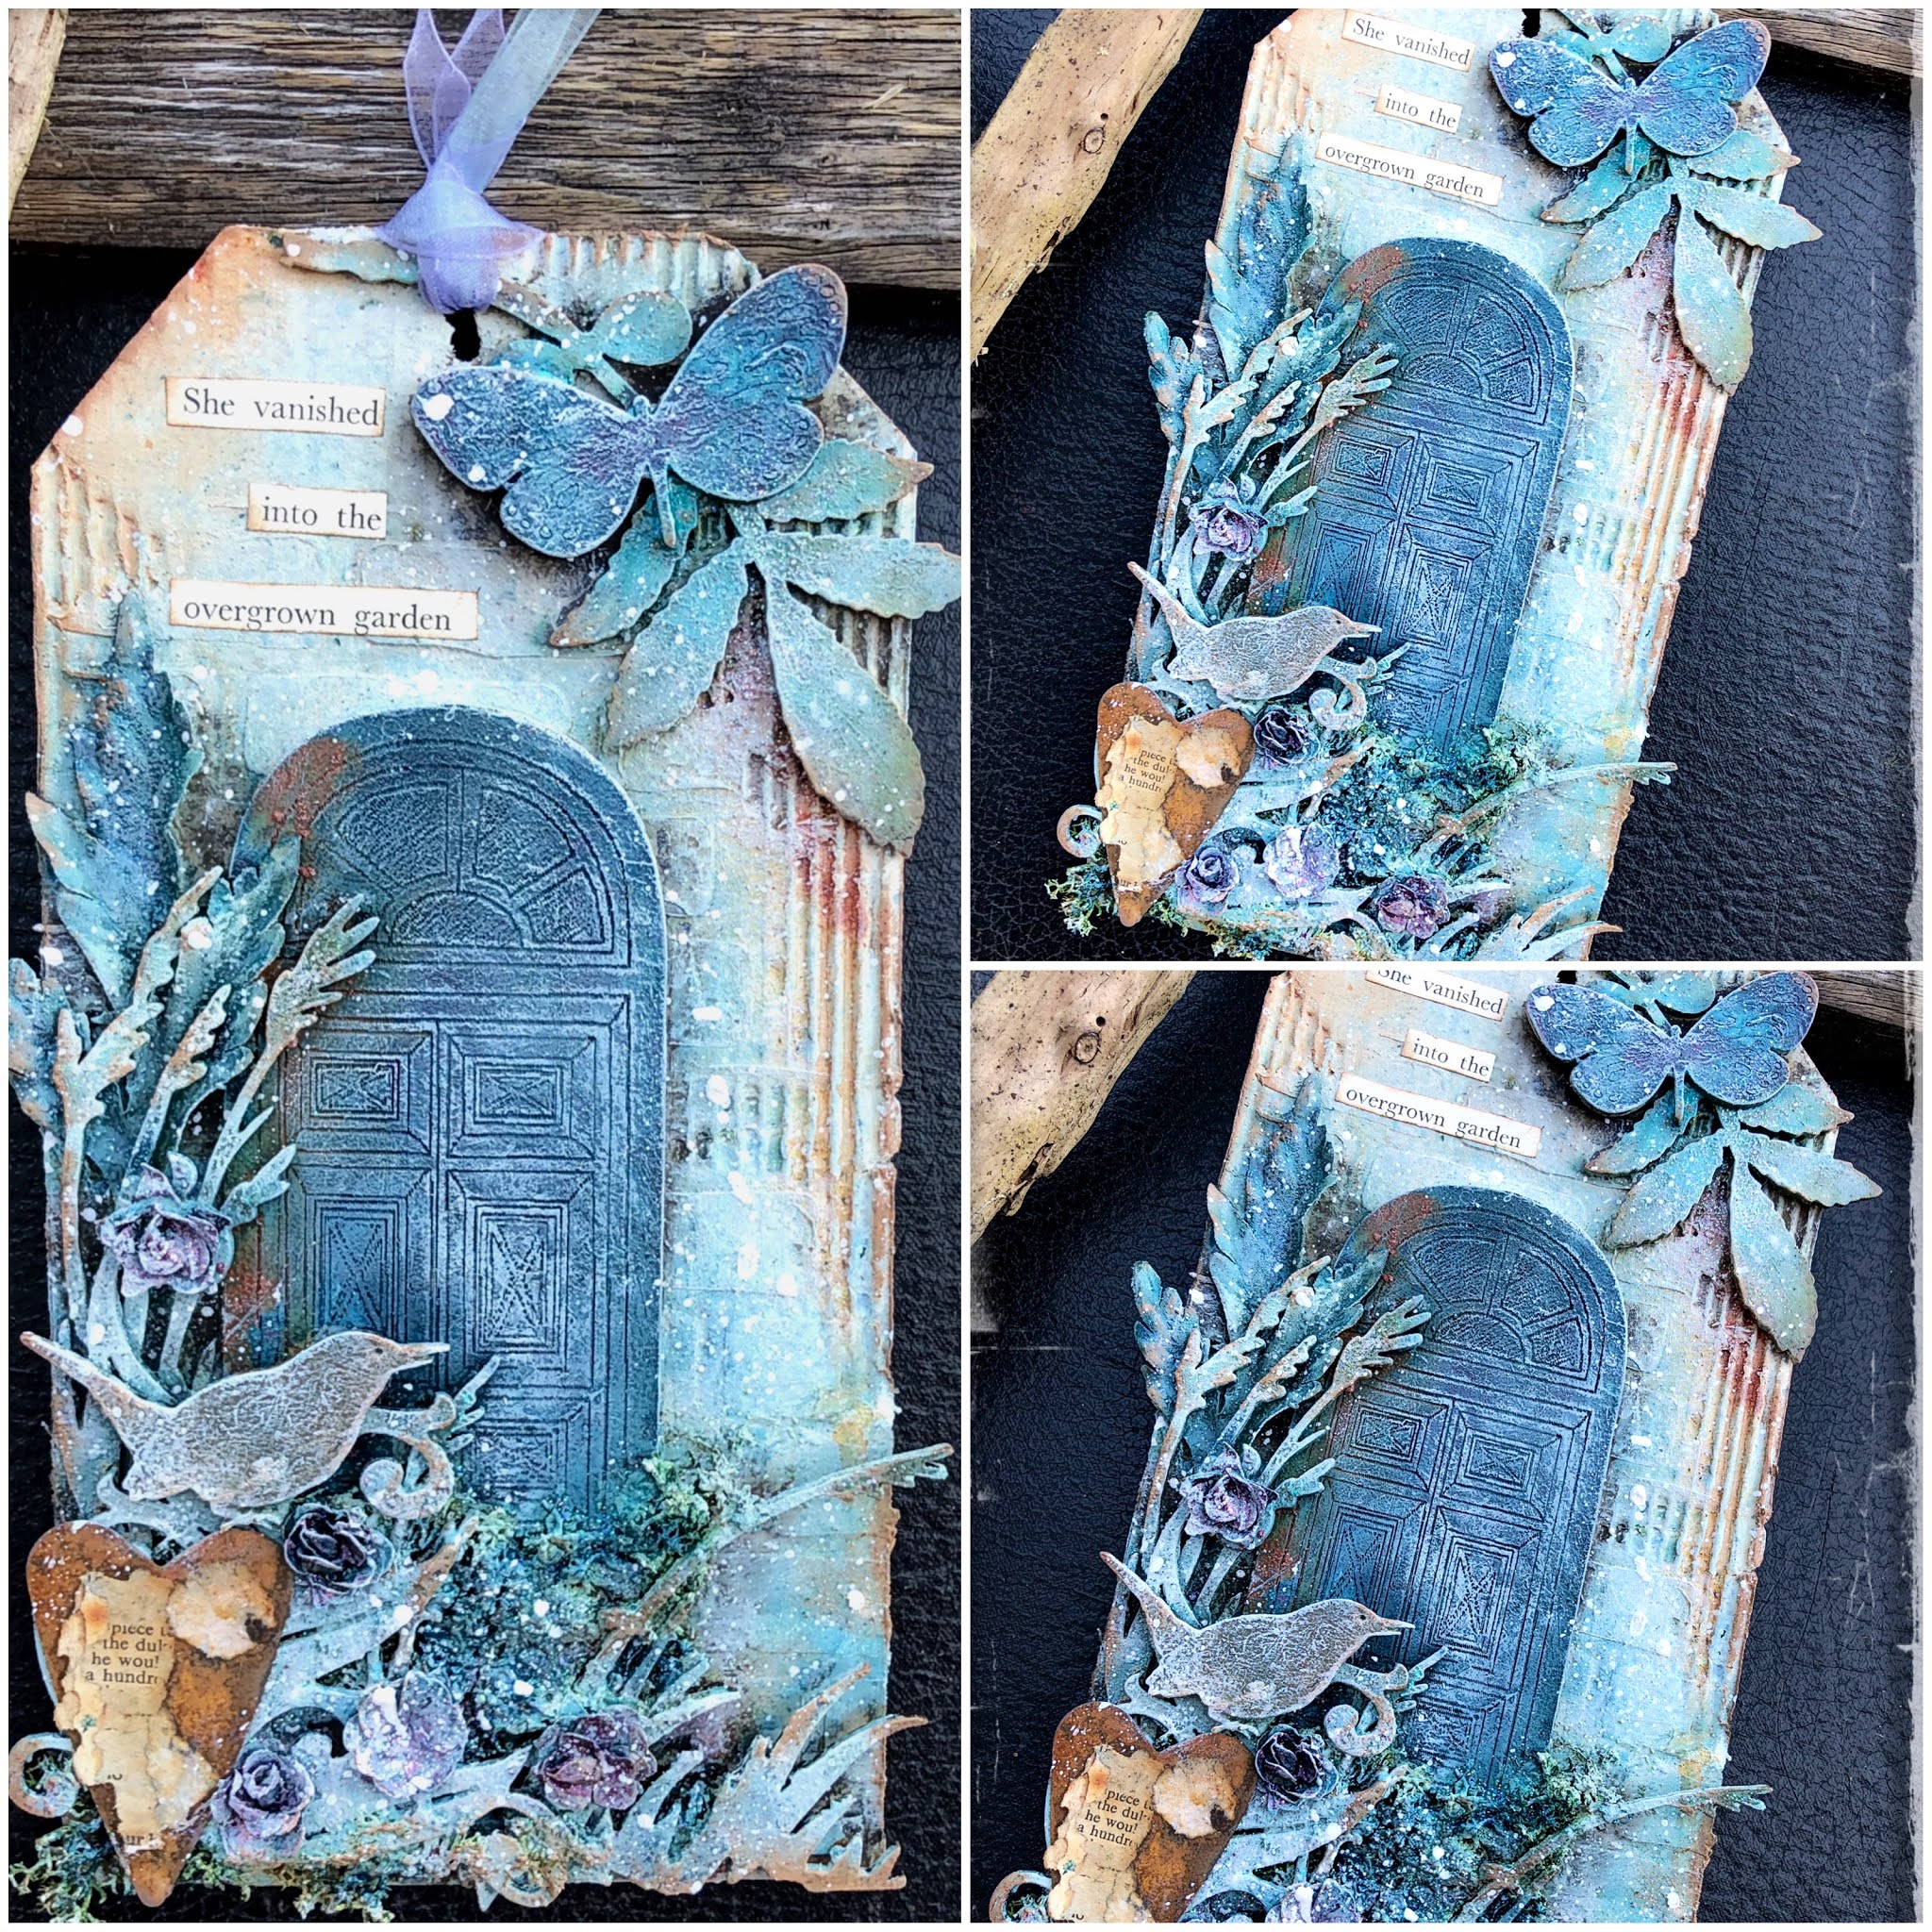
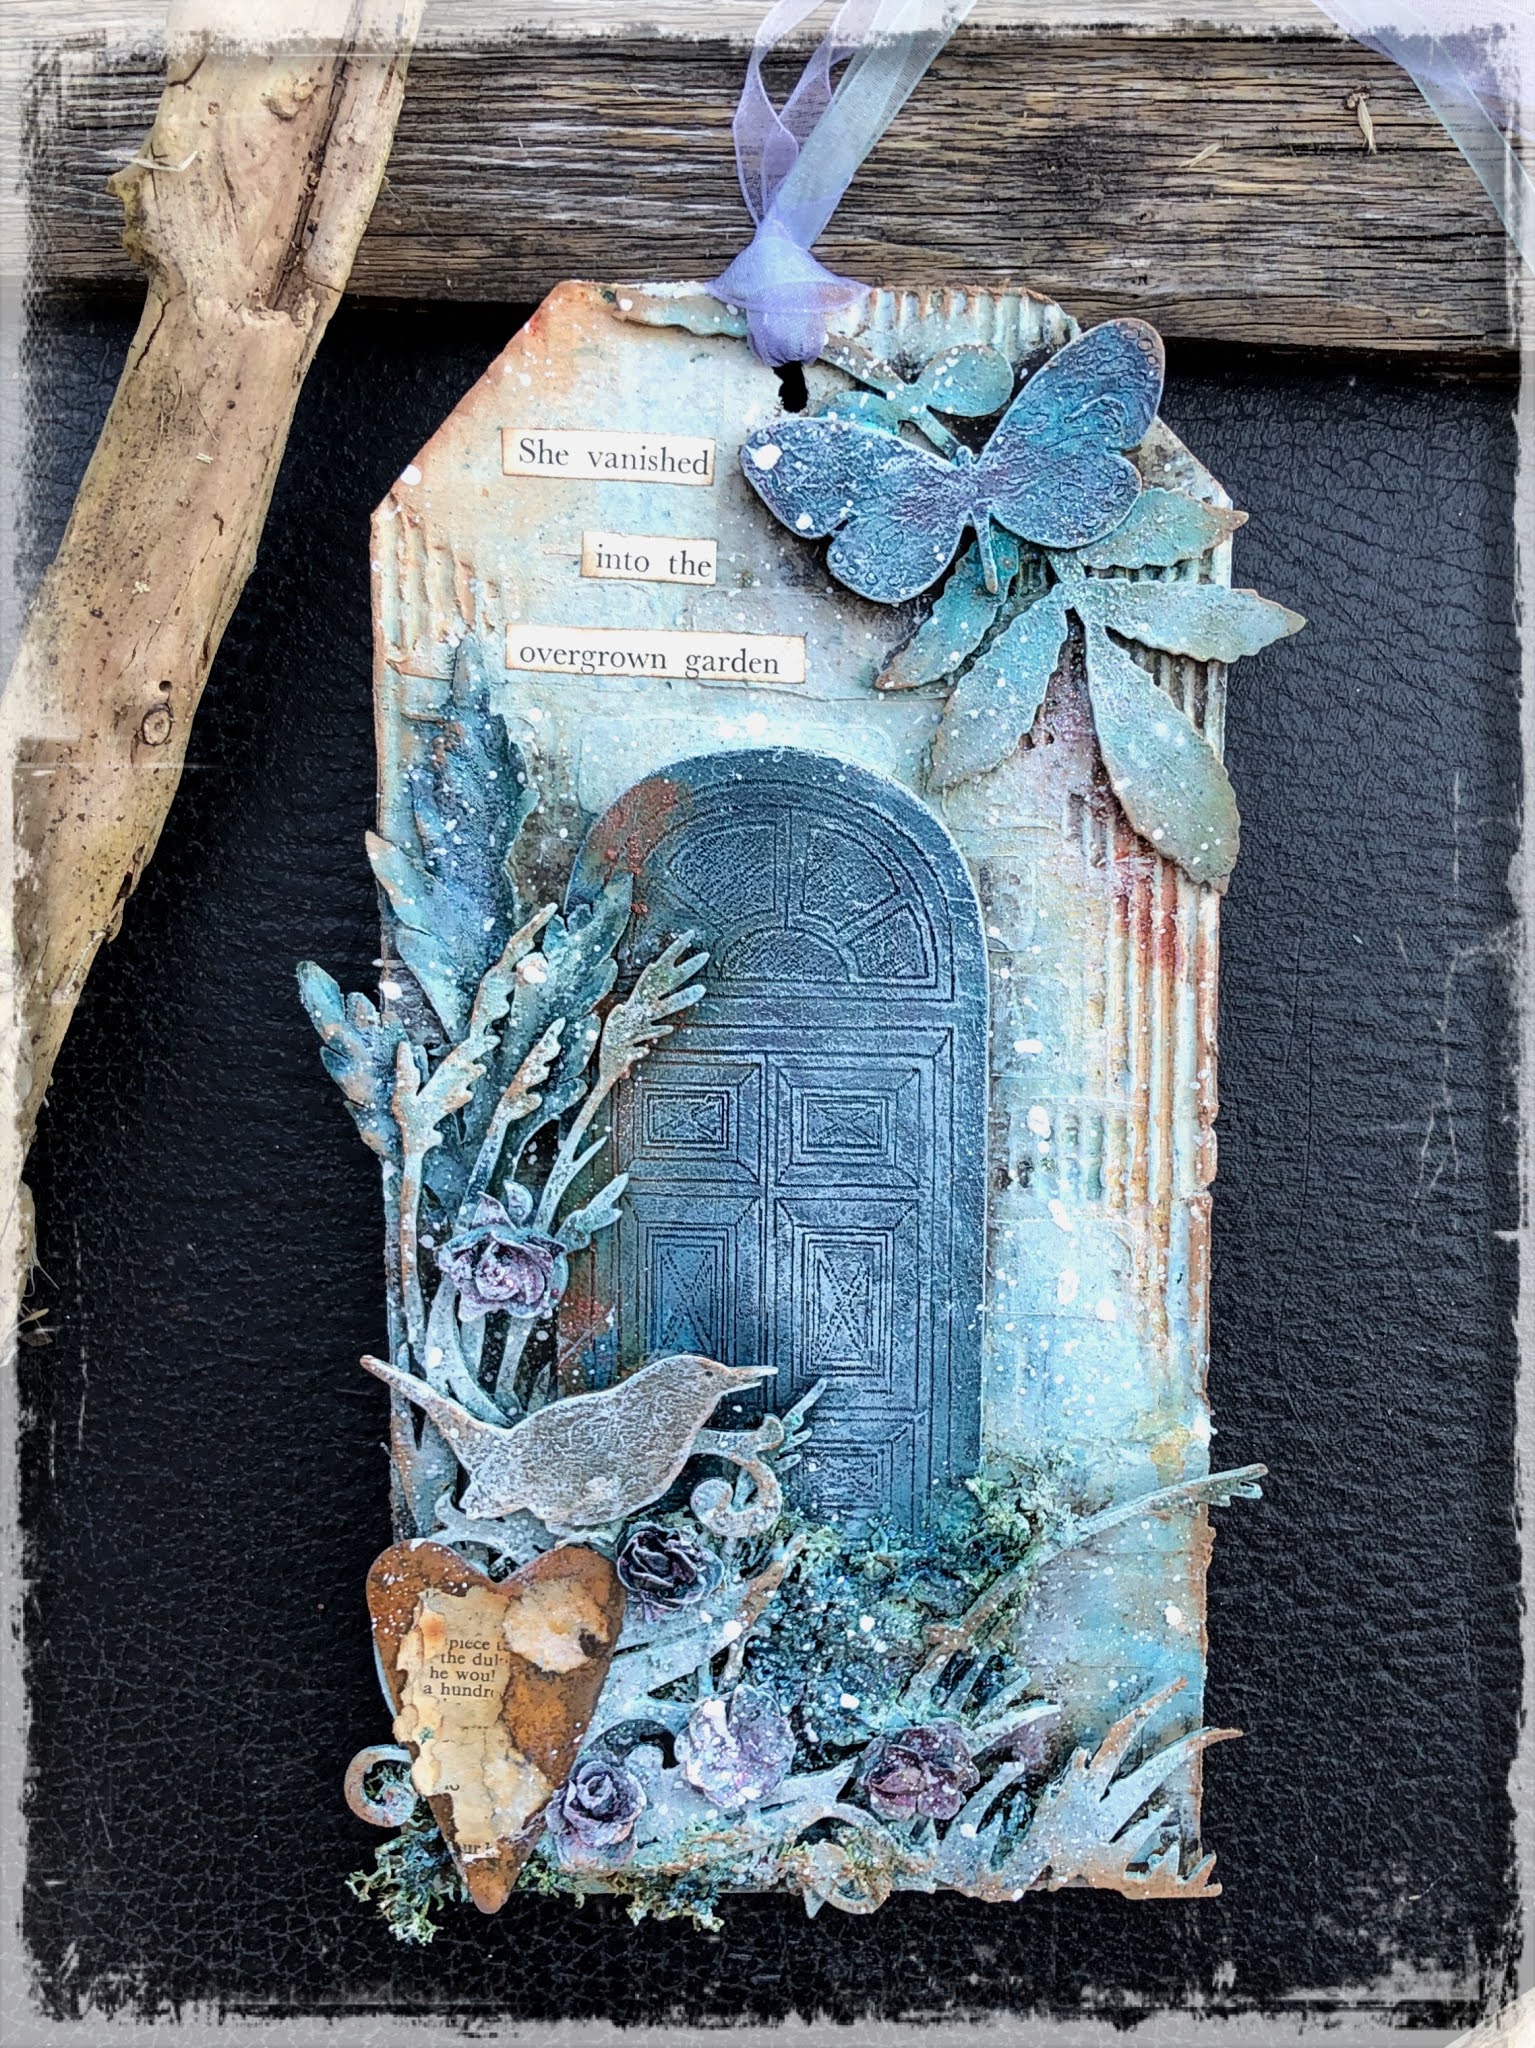
Wild garden tag. By Zuzu


Hi there.

Today I’m sharing a jumbo tag featuring one of the lovely door shapes as well as grass, a flourish, leaves, a butterfly, and a lovely little wren.

I’ve used a piece of the packaging the craft parts were posted in to make my tag. 

By tearing away some of the top layer and exposing the corrugated card underneath you can achieve some lovely texture.

I simply built up my layers, panted it all over with white gesso then applied paints with a lot of water. When it was dry I dry brushed it with more white gesso. Just enough gesso to catch the tops and highlight everything. 


Supply list 

Panelled door with arched window.

Wild Grass

Butterfly

Leaves

Flourish

Wren

Monday, 5 July 2021

Window to the past by Zuzu


Hi there.

I’m sharing a little plaque today. I liked the look of all the doors and windows in the shop and when the postman brought them I was keen to use on on something… anything… 

The substrate I’ve used is actually a piece of grey-board that the shop used to keep the craft parts from getting broken in the post. So it’s like a little free plaque.

And the photo is of my mum as a baby. I have two of these photos. one in the original sepia sort of colours and this one with the colour added (this is just a copy of the original). It is one of the few old family photos I have that has been colourised like this. Very interesting now that we take colour photos for granted. Wonder how much it cost my grandparents to have that done.

When I use craft part embellishments I often break off bits that fit the size and shape I need at the time so I am often left with little piles of left over broken flourishes and leaves etc. This little plaque was the perfect size to use some of those up. It’s going to be hard to give you a supply list for those little bits but I will do my best. 

But it is worth noting that when you are selecting your flourishes, it’s a good idea to think about which ones you could break up into more than one piece to use in different ways. 


Supply list

Arched window

Songbird trio (I used part of it in a previous project so mine is a songbird duo.)

Mini hardware sheet

Swirly flourish (bits of it)

Mini sheet of butterflies (style 6)  

Mini sheet of hearts 


Sunday, 13 June 2021

SciFi police box with a steampunk twist.


Hi everyone. 

When Helen told me they were going to be adding a “Police Box” kit to the range I was super excited. I am a geek... there is no denying it. 

I was very lucky to be sent an advanced one before the shop even had them online to buy and my steampunk pal (our extended household bubble person) and I wasted no time in constructing and decorating it. 

It was so much in advance that there was no pdf with the construction guidelines which did leave us expecting some fun mishaps as there were a lot of parts.  But we still managed it simply by looking at the photo Steve sent of an example he had constructed to make sure the kit worked ok. 

So in honour of a well known SciFi tv series and with a bit of a steampunk twist, here is the completed police box. 


For my engine, I’ve used some resin mould pipes and a propeller, some calico craft parts gears/cogs, a kitchen shape cutter and a little bulb.
I’ve added a sort of fake rivet effect using little hardware screw heads from a mini sheet and as a little vintage Victorian detail,I used a couple of paper fasteners that look like old door pulls/handles.
 Needless to say I predict ordering a second one 😄

Supply list.

A selection cogs (gears). 

Monday, 17 May 2021

Ideas for ATC frames: by Louise Crosbie.


Hi there. 
I know a lot of you will make and swap ATCs (Artist Trading Cards) but I also know a lot of you don’t. 
But that doesn’t mean you can’t still make great use of the ATC frames.

An ATC should be the same size/dimensions of all other official trading cards like baseball cards, Pokemon cards etc. And thus, they should fit in to the official trading card pocket pouches for collectors.
Sadly, nowadays, folks call just about any small piece of mixed media or paper raft an ATC, regardless of its actual shape and size. This makes it impossible to collect them the way they were intended. This is the reason I stopped collecting. I have two beautiful large lever arch folders filled with the official collectors pockets and each with a beautiful display of ATCs of the correct dimensions. But in my last few months of swapping, my returns were sadly not proper ATC dimensions and wouldn’t fit in to my collection.

However despite not doing ATCs anymore, I still had some of the gorgeous little (correct dimension lol) ATC frames. 
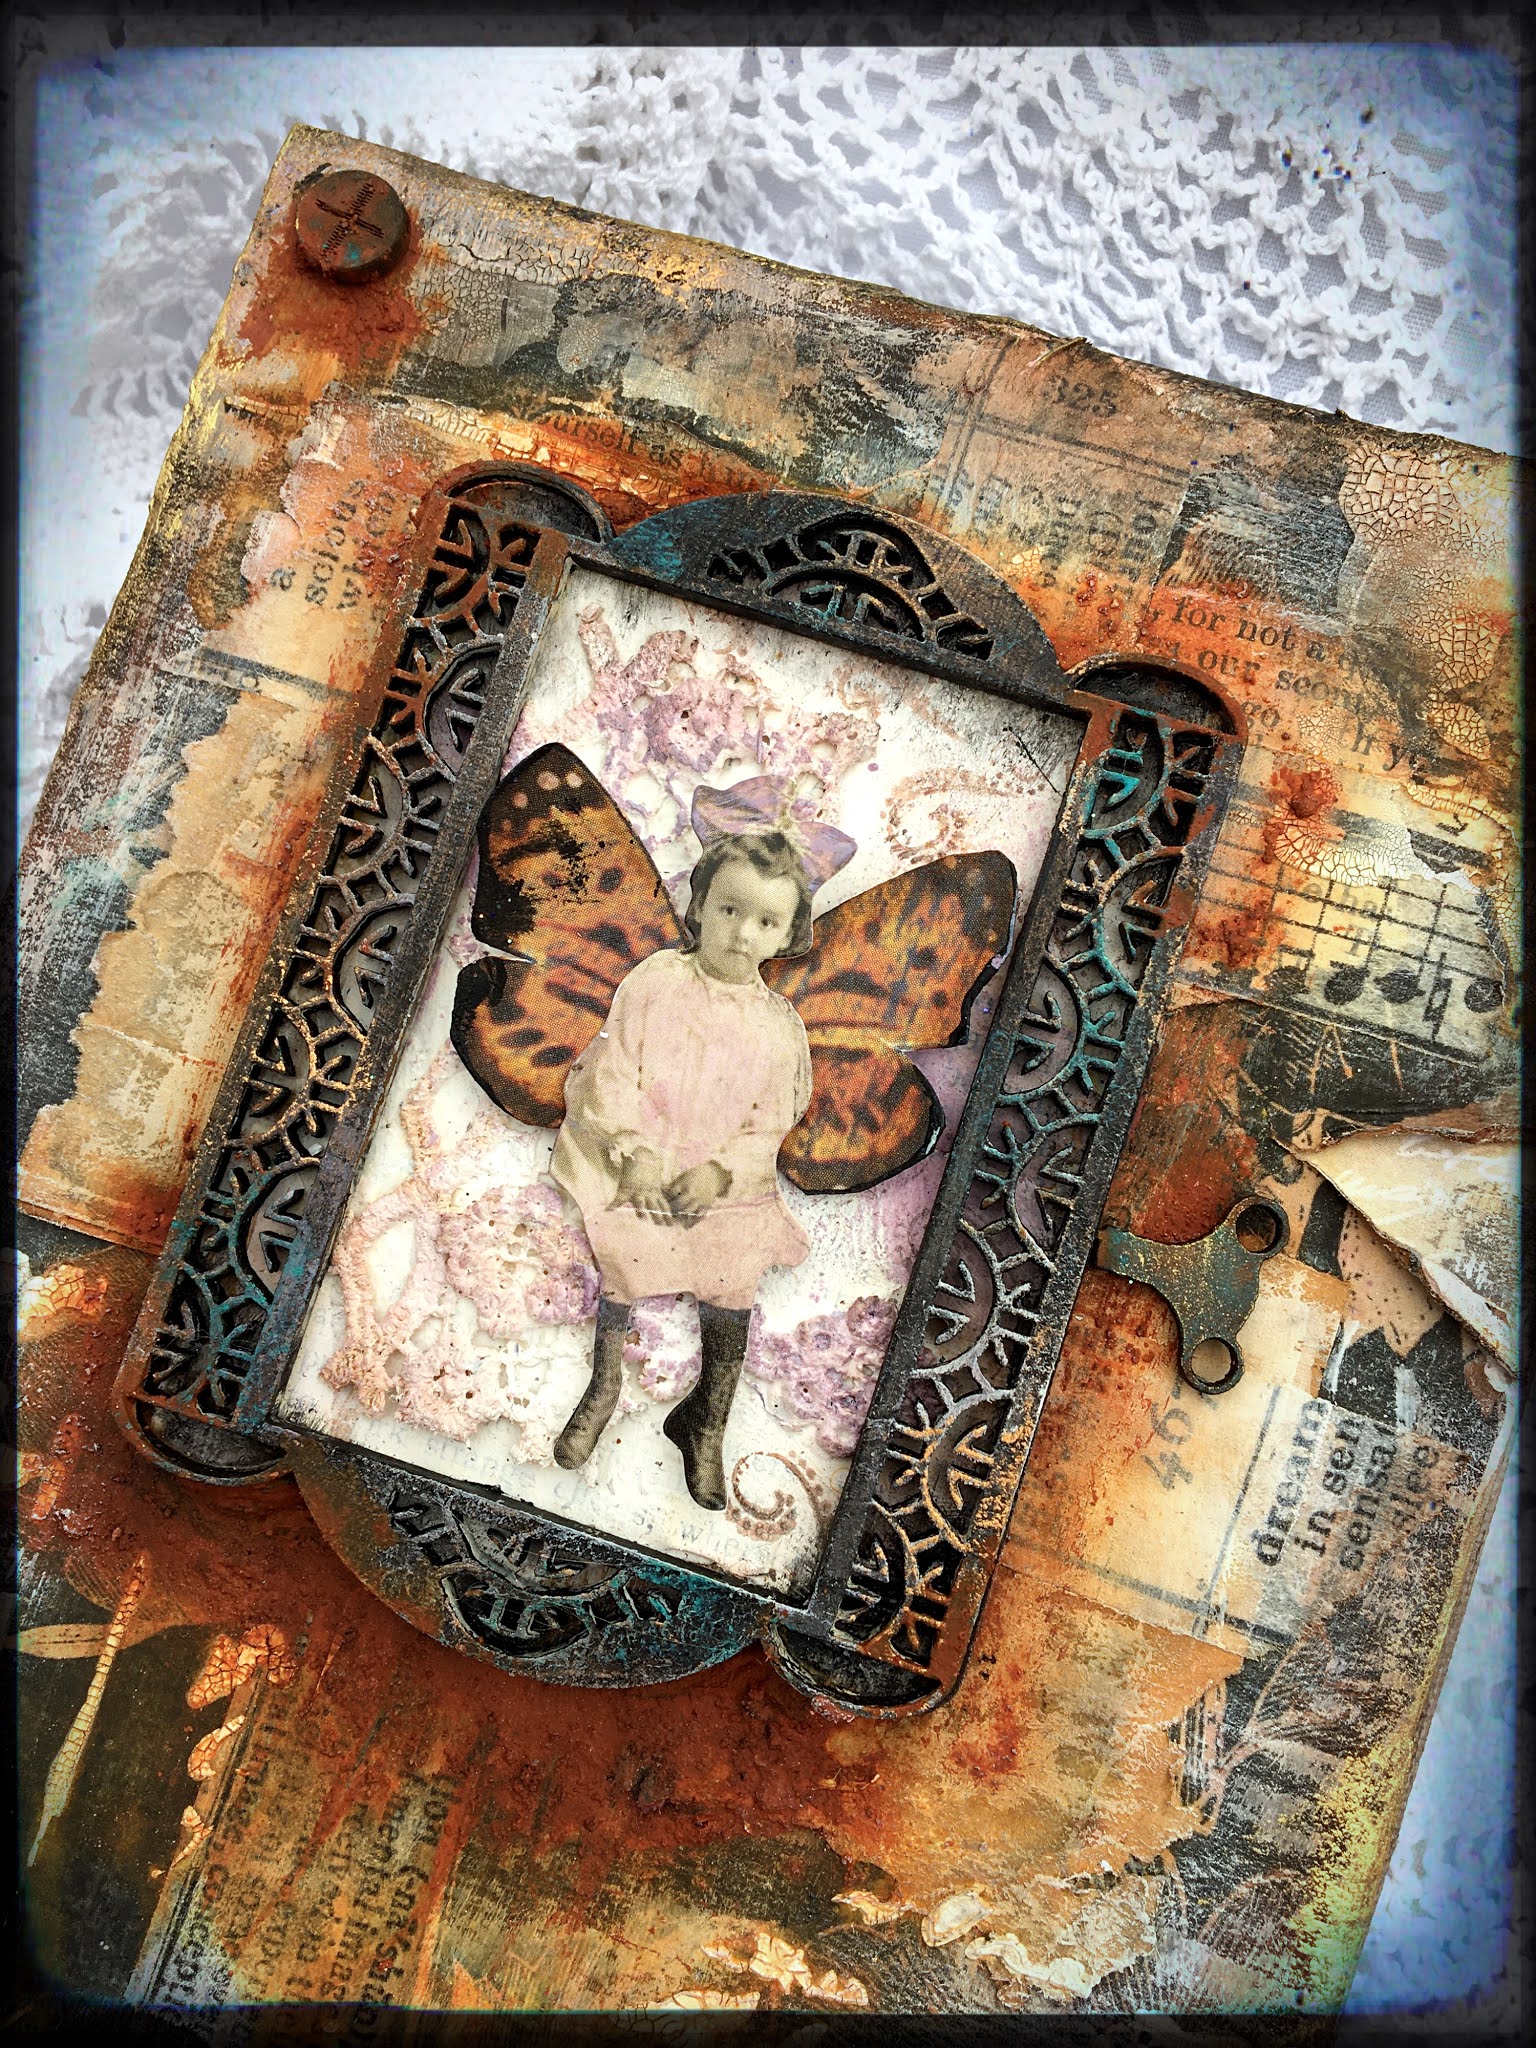
I turned one into a sort of miniature cabinet card for my little vintage fairy and put it on a rusty canvas. 


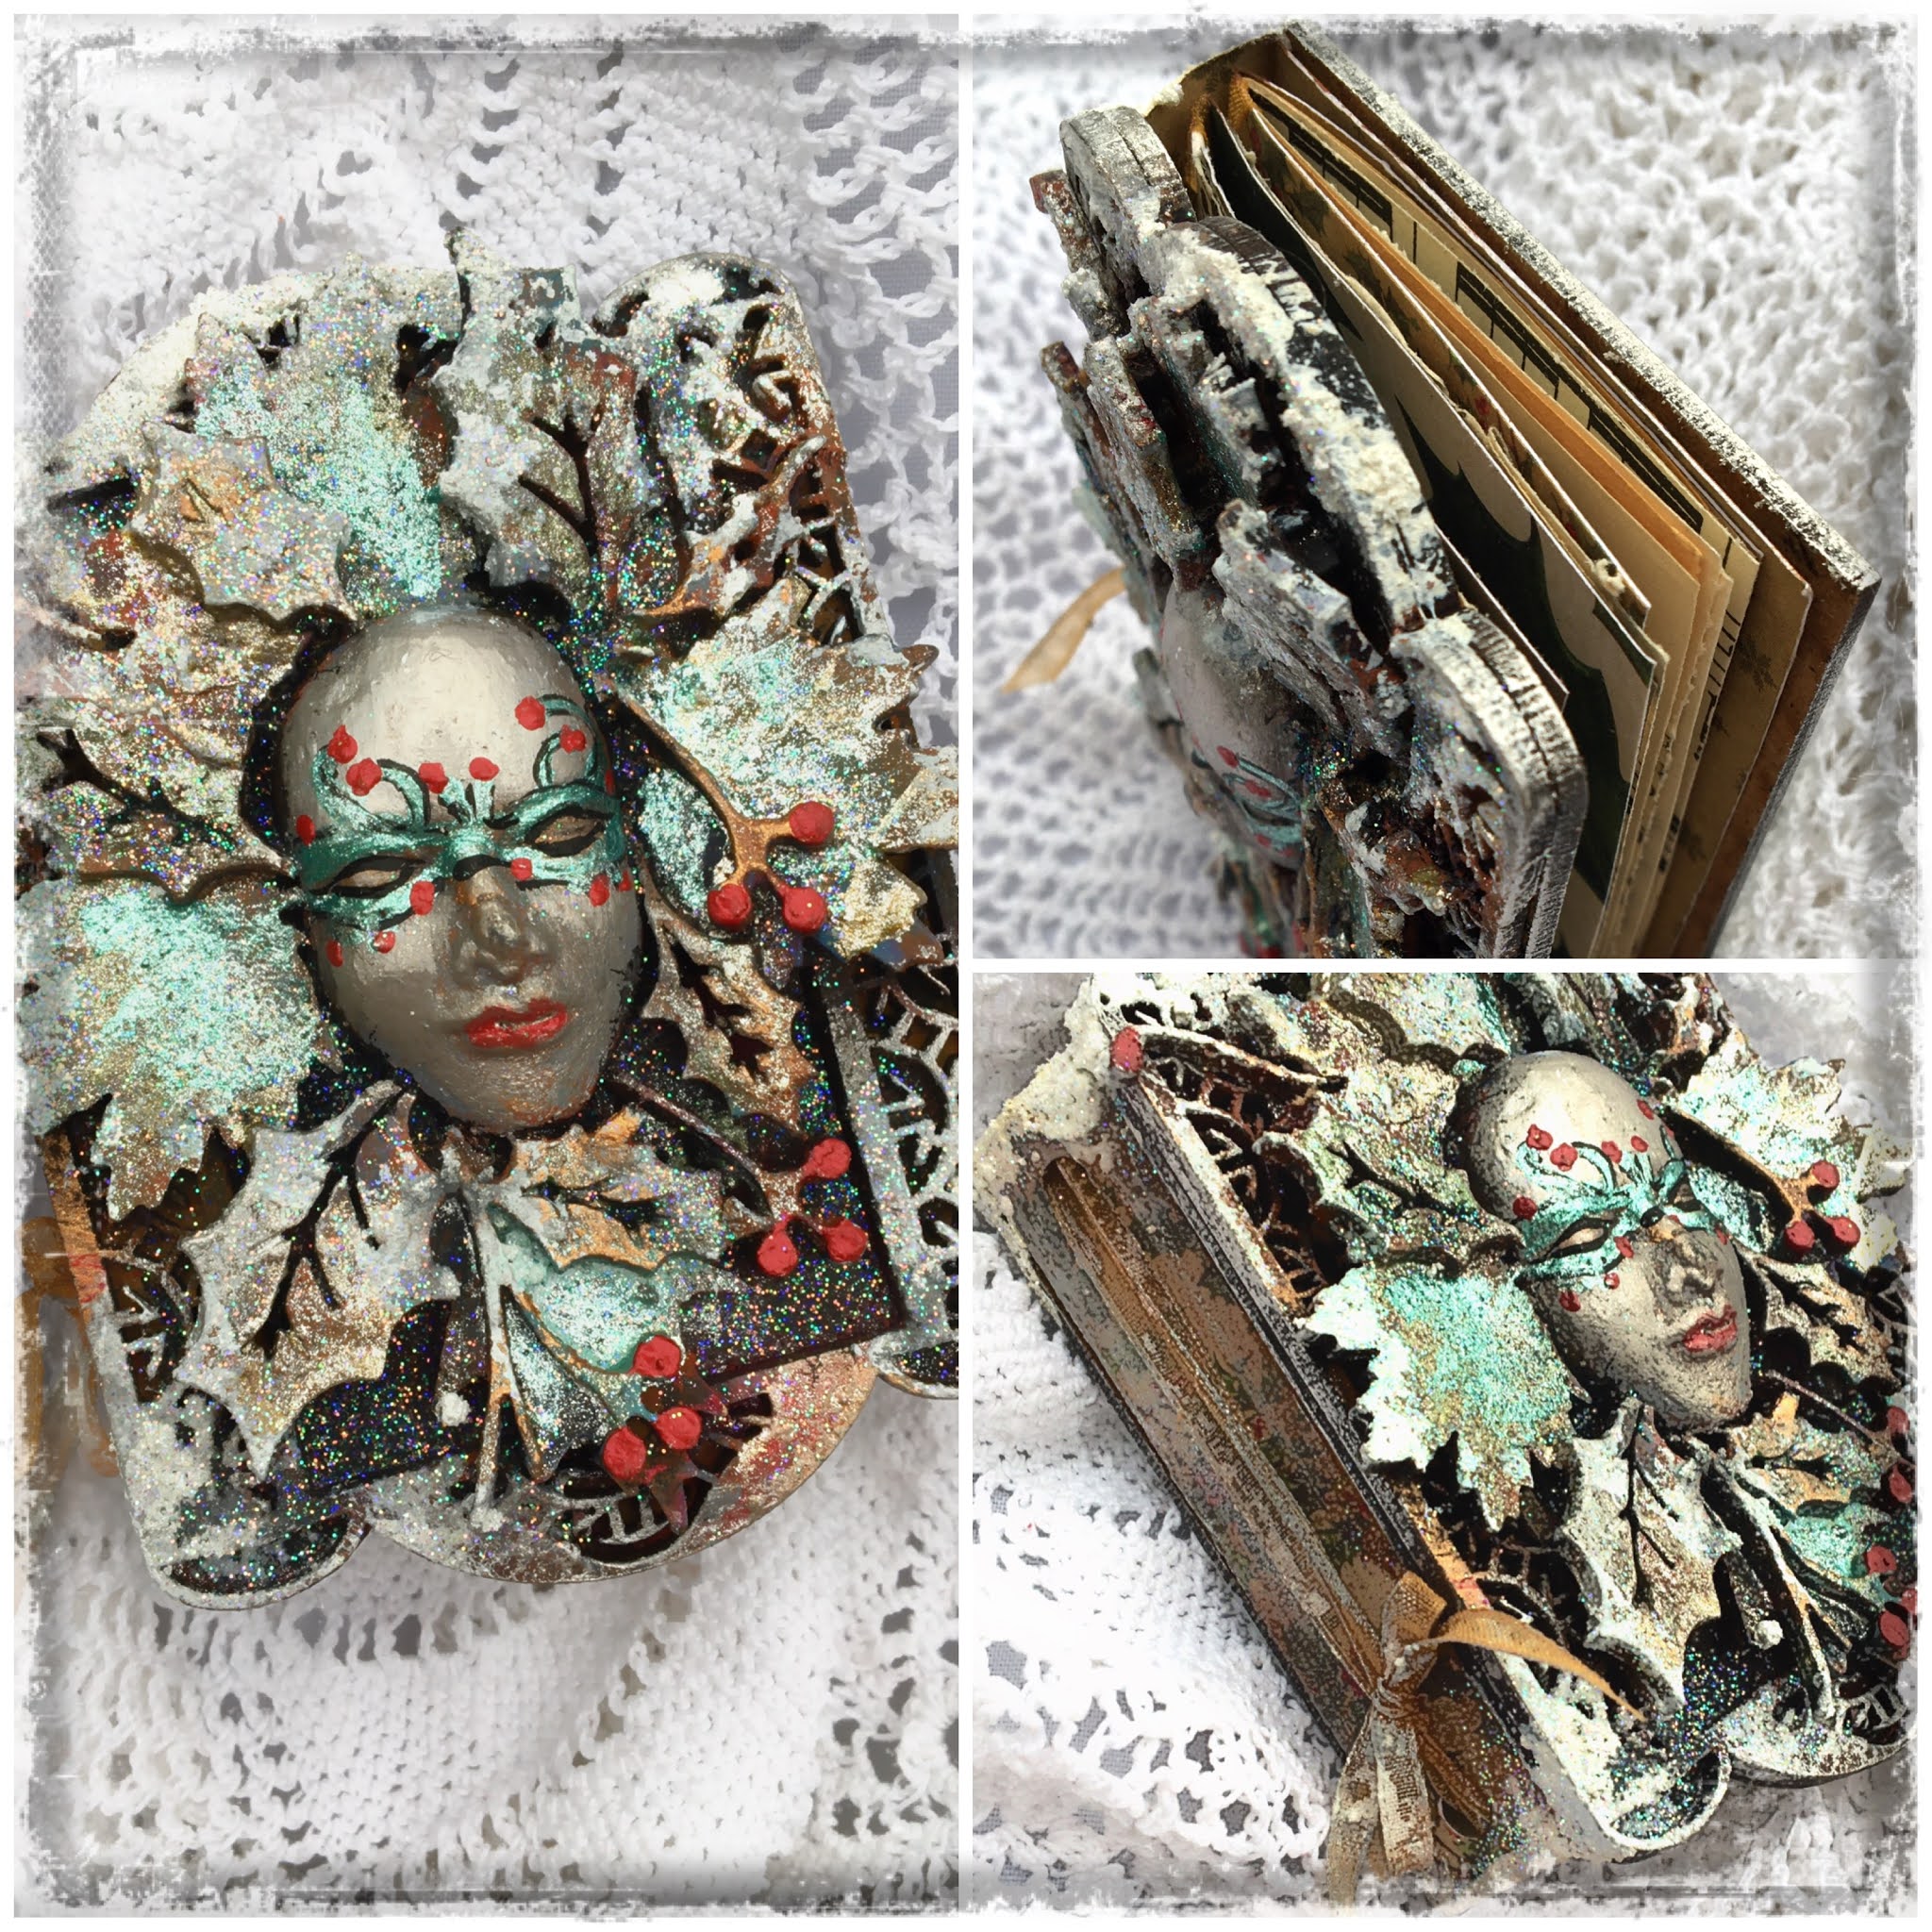
The second frame, I turned into a miniature junk journal which I intend to complete in a Yule theme so I can give it as a stocking filler gift.


These little frames are so versatile. They make great key fobs, wooden tags, embellishments for scrapbook pages and cards... 

Thanks for reading. 

Supply list