Showing posts with label Art Dolls & Angels. Show all posts

Friday, 10 September 2021

πŸŽƒPumpkin Jack and The Groovy Zombies! By Kat Hazelton.

Hi everyone, I am delighted to be asked back to do another guest spot for Calico Craft Parts blog page. Today I am posting two 'Kat makes'

I thought it would be lovely to kick-start the beginning of Autumn with a nod to the pumpkin fields growing up and down the country. A sure sign that Halloween is around the corner. So my first 'Kat make' is a friendly Scarecrow called Pumpkin Jack.

Jack stands proudly guarding the pumpkin patch in the local farmers field. Jack is a kind and gentle soul though maybe a bit too kind as the crows instead of being scared by him like to nest in his waistcoat pocket.

To make Pumpkin Jack you will need.

Art Doll Kit

Carved Pumpkin Skull Shape

Mini Wood Shapes - Birds, Crows & Ravens

Selection of paper and fabrics

Scissors, string, glue, crayons or orange paint, black paint, pencil, drawing pens, card, paper and buttons.

To make Jack's clothes I drew around the art doll pieces to give a guide to form a pattern. I created sleeves, shirt body, waistcoat and trouser legs. I used a range of handcrafted papers you can use felts, fabrics or patterned paper. 


To create Jack's beautiful head I coloured the mdf shape with a distresed orange crayon and added fine details with an art pen. To give Jack deep dark black eyes and mouth I drew around his head onto a piece of card. Which I cut out and painted with matt black acrylic paint. I then glued Jack's head onto the cardboard backing and then onto the mdf head shaped that came with the kit.


Those little details, to make Jack's clothes look more scarecrow I drew on little stitches with a white pen. I also added little pockets, patches, buttons, handkerchief and straw. The straw is dried sweetcorn husk. Notice the little crow has already moved into Jack's pocket. The crow was coloured in with a black crayon and highlighted with a white pen. 


To put Jack together I used string threaded through the pre-drilled holes. 


For that added touch I made Jack a scarecrow perch by gluing two sticks together. 
Jack is now ready to watch over the farmers pumpkin field until harvest time. 


My second 'Kat make' is a fun light hearted take on Halloween Zombies. Instead of scary flesh eating Zombies you see in the movies these Zombies are a group of happy Hippies from the 1960's! They enjoy dancing, picnics, and picking giant groovy flowers! Oh and they are all vegetarians so you are all safe. 

To make The Groovy Zombies you will need. 

Bright coloured acrylic paints, white paint and a white pen for adding details. 
Assorted papers flowers, glitter, gemstones, moss plus ribbon for hanging


Firstly I detached the mdf shapes and painted with a base coat of white acrylic paint. 
Once dry I painted them with bright acrylic paints. Then added fine details with a white pen.


Using the same paint I splatter my paper flowers and added a sprinkle of glitter.


My Zombies now painted are ready to assemble. 


Once assembled I decorate the base with flowers, moss and added a ribbon for hanging. 

My Zombies are all done and having fun! 


Well I hope you enjoyed both 'Kat makes' and I hope they inspire you to have a go at creating. If you have any questions please get in touch I am always happy to help if I can. 
Happy making, 
Kat 😊

My next 'Kat make' will be on the 25th of September! This one will be an extra spooky Halloween one wahahahahaha! (Evil laugh) πŸ¦‡πŸ¦‡πŸ¦‡πŸ¦‡πŸ¦‡πŸ¦‡πŸ¦‡πŸ¦‡πŸ¦‡πŸ¦‡


Monday, 15 June 2020

Beside The Seaside - Beach Scene by Jannet


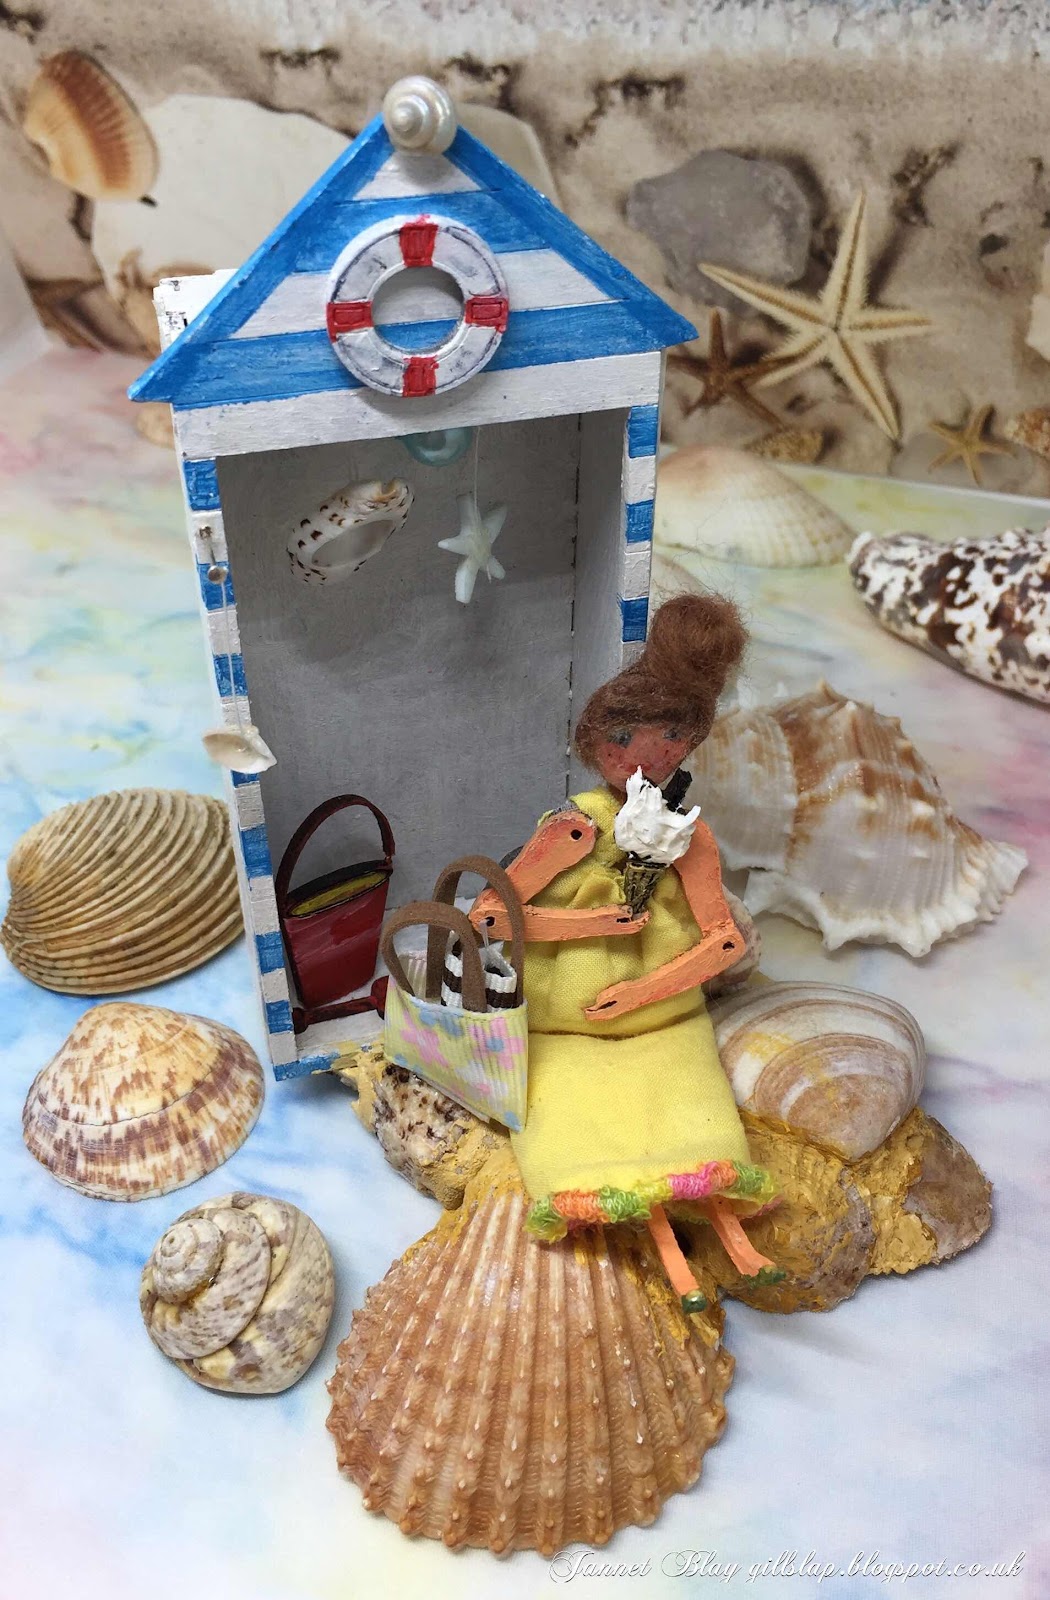
Dreaming of the Seaside is my inspiration for this months project. My little art doll is happily sitting next to her beach hut, and enjoying a yummy ice cream. Let’s hope the seagulls don’t come and pinch it out of her hand! 


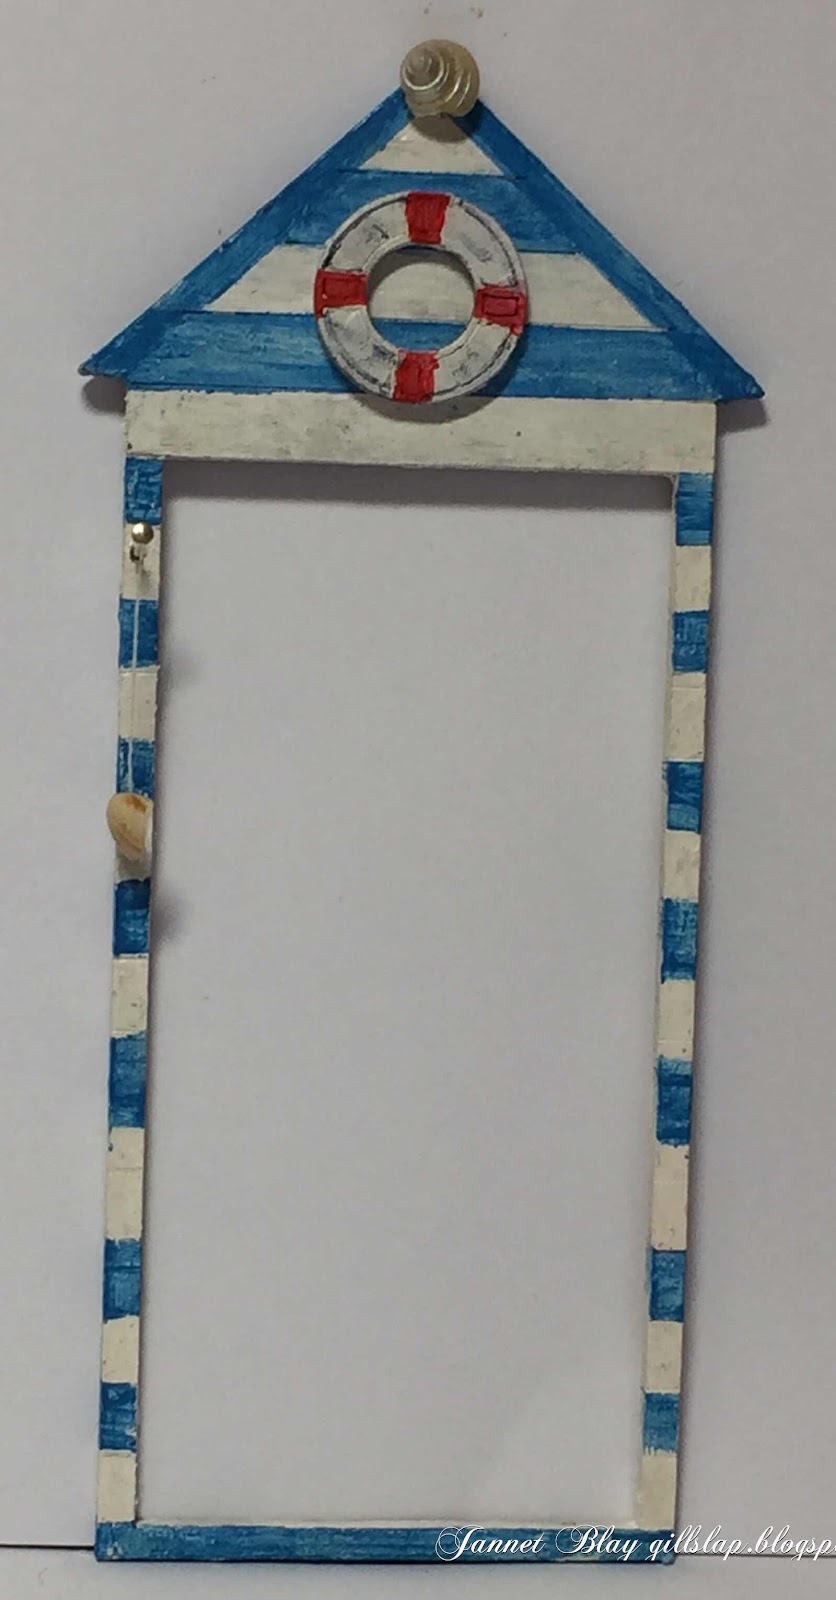
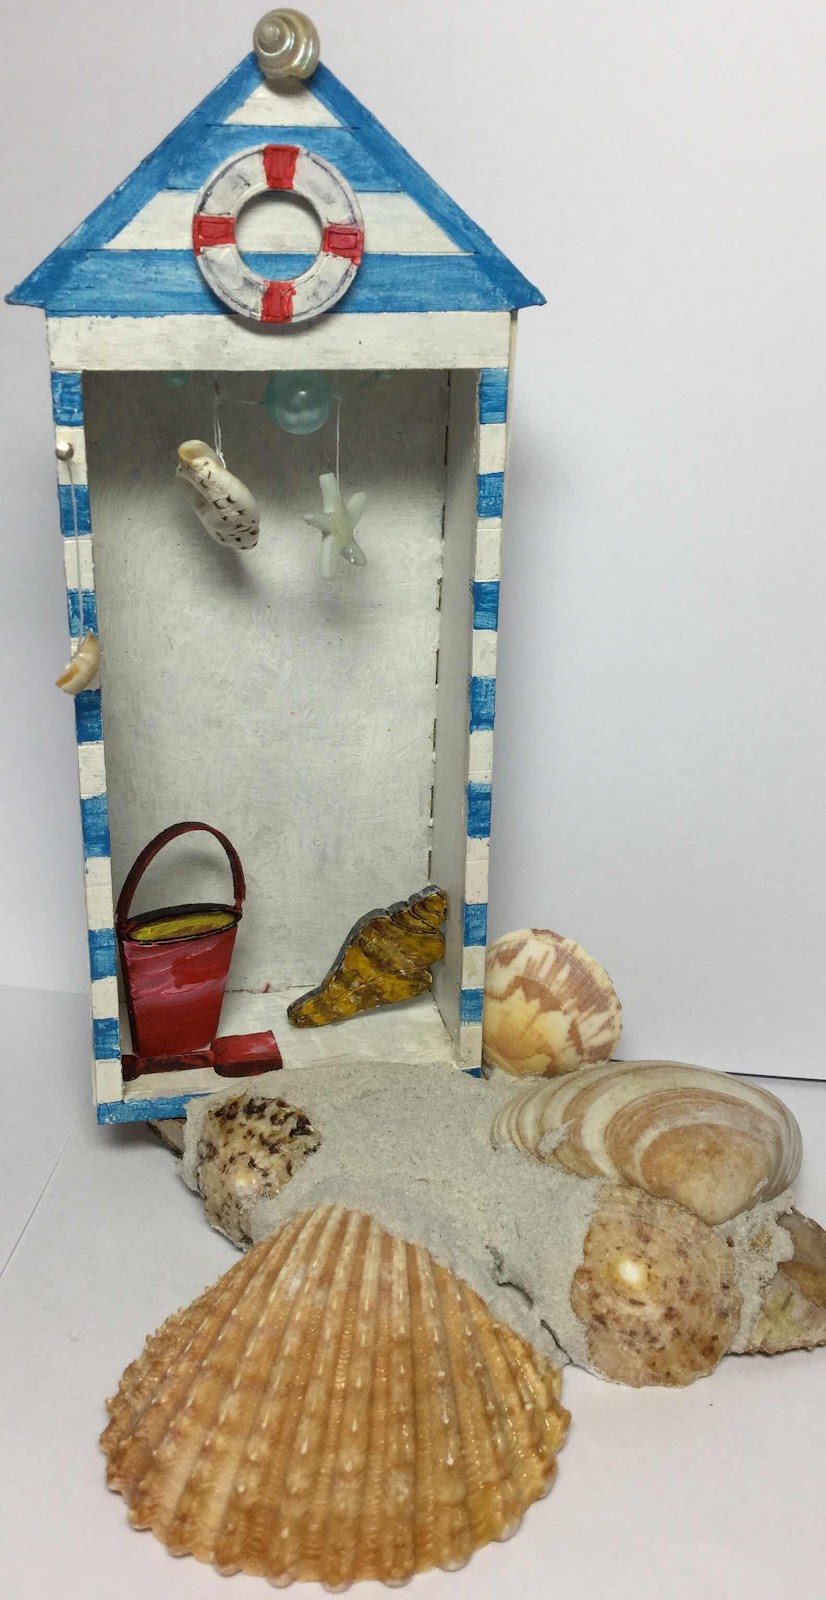
After painting the beach hut I used a pokey tool to make a small hole in the front of the hut and pushed a piece of wire into it. I have a collection of shells, and picked out a tiny one to hang from the wire, and adhered another one no the very top of the roof. The beach hut also comes with a lifebuoy ring which I adhered to the top. 


I glued the beach hut together and hung some shells inside and painted a bucket and spade, and a sea shell to sit inside. I used a piece of wood as a base and adhered the beach hut onto it, and surrounded it closely with some shells. I used Decoart Sand Texture paste in between the shells to hold them together. I applied the texture paste quite thickly so I left it to dry overnight. The following day I painted over it.


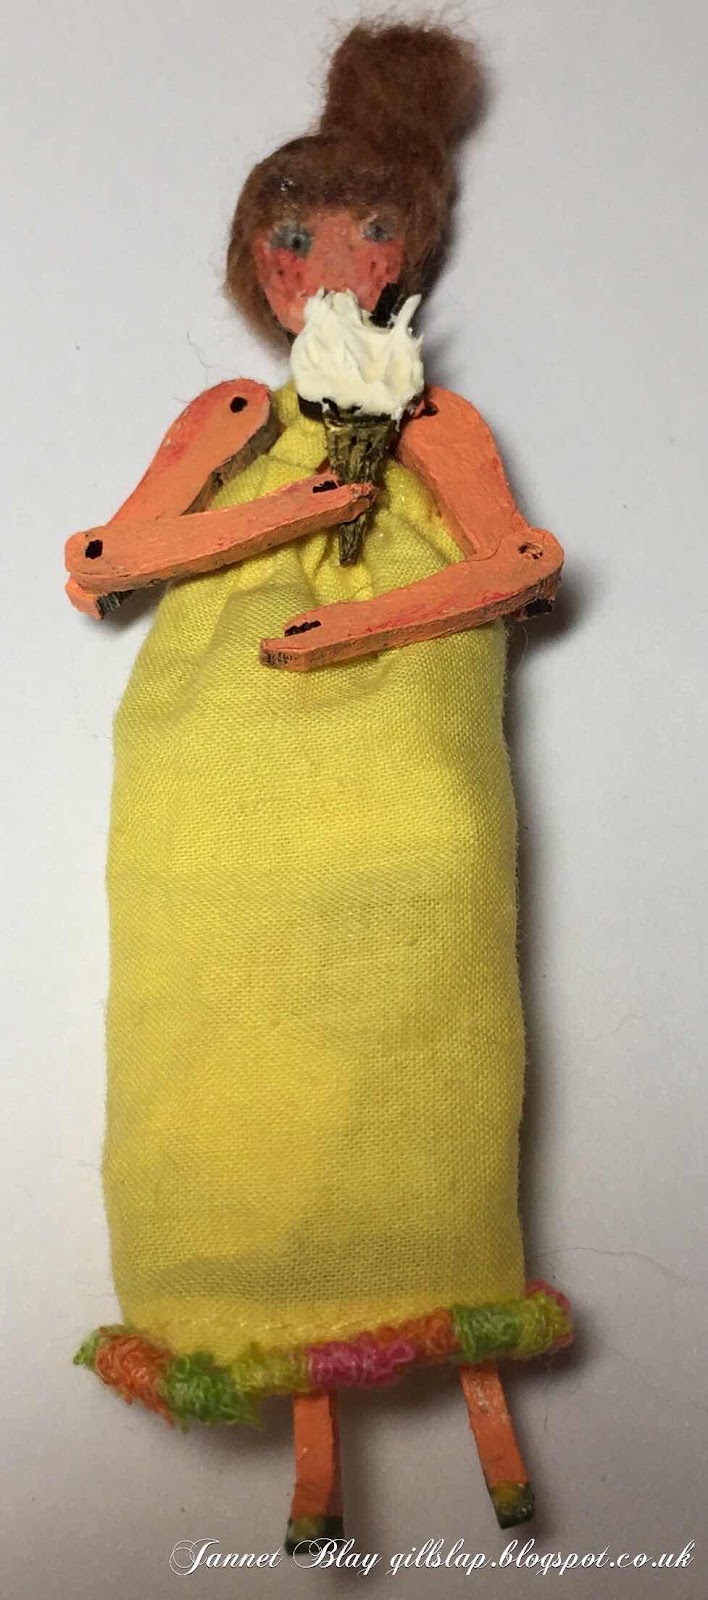
My small art doll said she wanted to wear a summer dress to the beach, so I found some scraps of fabric and made her a little dress, and used some fibres around the hem. She reminded me that she needed a Beach bag to carry her towel, sun cream etc to the beach, so I quickly made her one with some ribbon. It was a hot day so she wore her needle felting wool hair up in a bun.  After painting the cone, I added some cream paste to the ice cream which swirled nicely like a real ice cream - yum! 


I adhered the little lady in place, and set her beach bag next to her, she is there for the day now! 

I love Calico Craft Parts art dolls, there are lots of different shapes and sizes to select from, and you can easily transform them into so many different characters.

Calico Craft Parts used


Monday, 18 May 2020

Alice In Wonderland Tea Party by Jannet

.

I am sorry that I have been absent for a little while, the post in London has been very random which is understandable in these very sad circumstances. So my Calico Craft goodies took some time to find their way to me, but oh my goodness  they were well worth waiting for! 

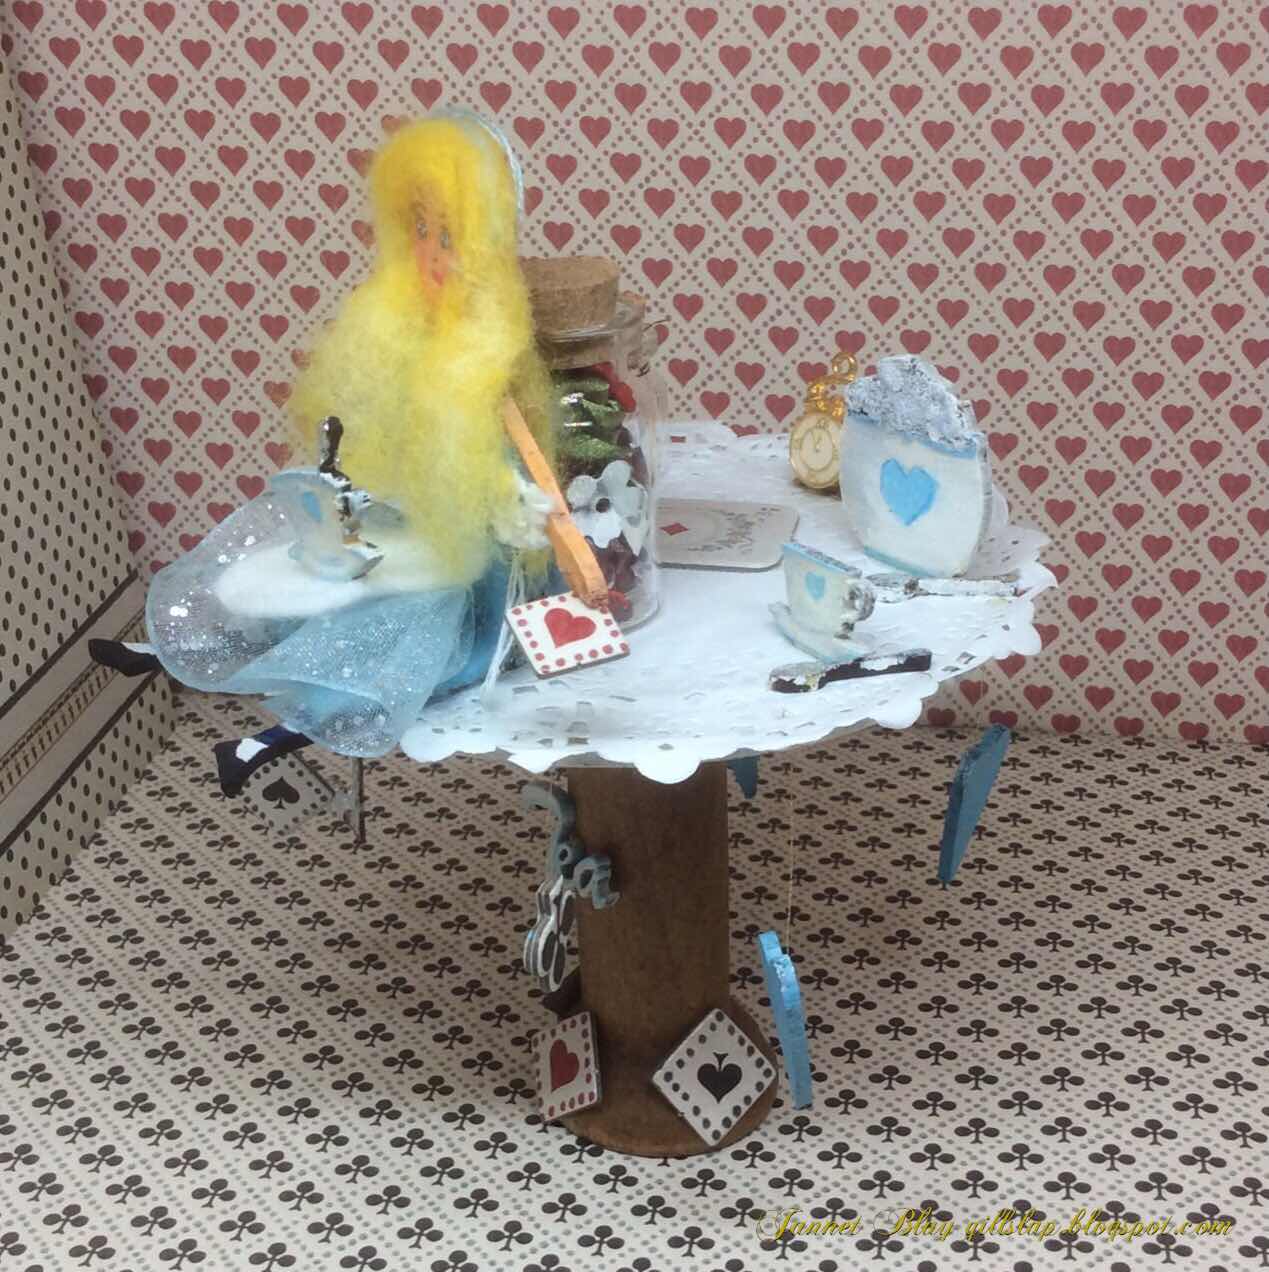
As soon as I saw the 100mm tall art doll, I knew it would be perfect for Alice In Wonderland of course after she had consumed  the “drink me”  drink. 


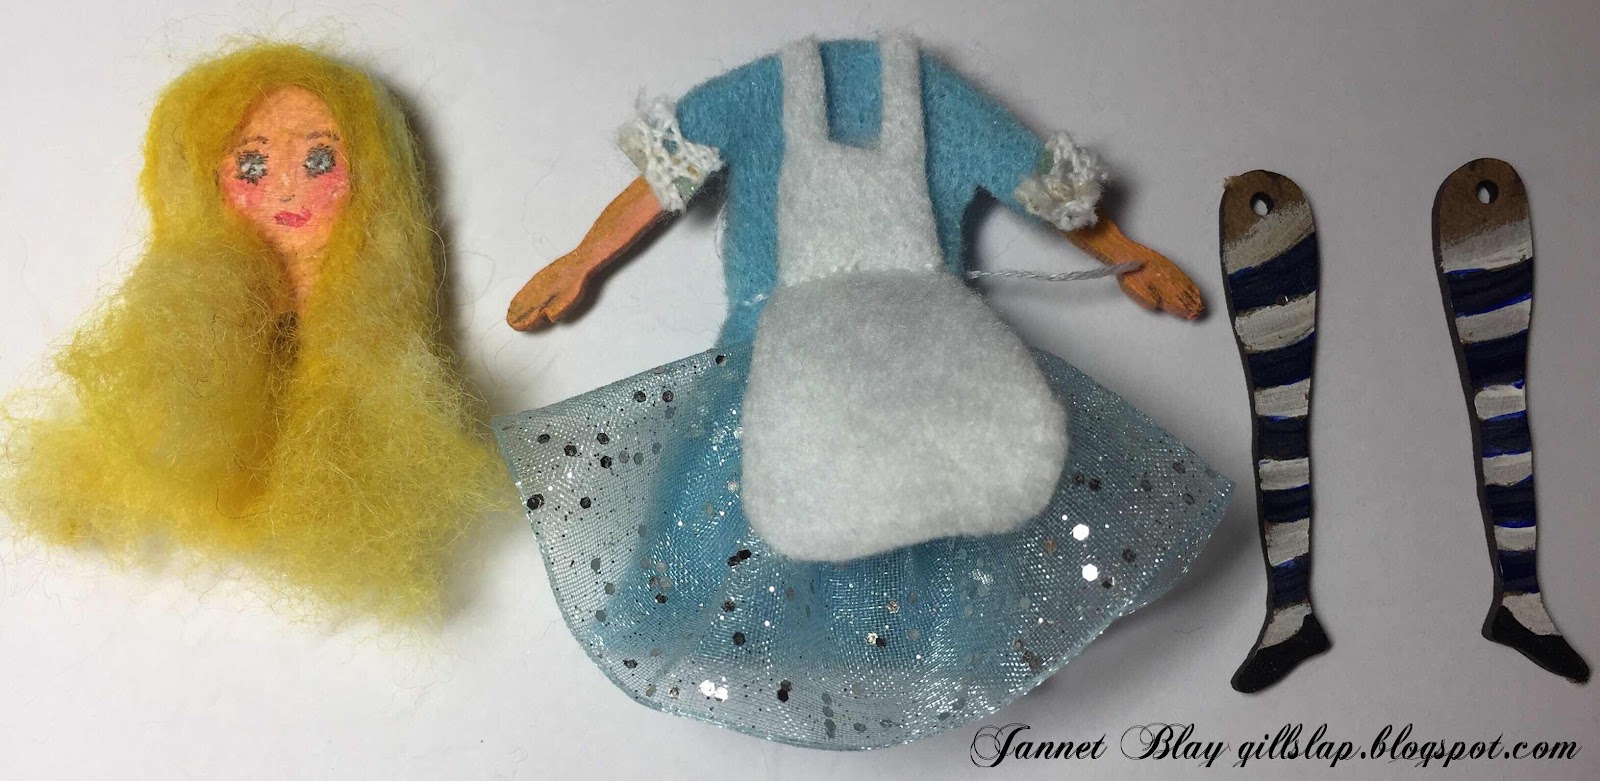
I began by painting her face and arms, and giving her legs stripes for her traditional stockings. She needed golden locks which I made from some needle felting wool.I used her body to measure, and cut a dress from blue felt.I added a ruffle of ribbon to give Alice some dimension. Her famous white pinny completed her look. 


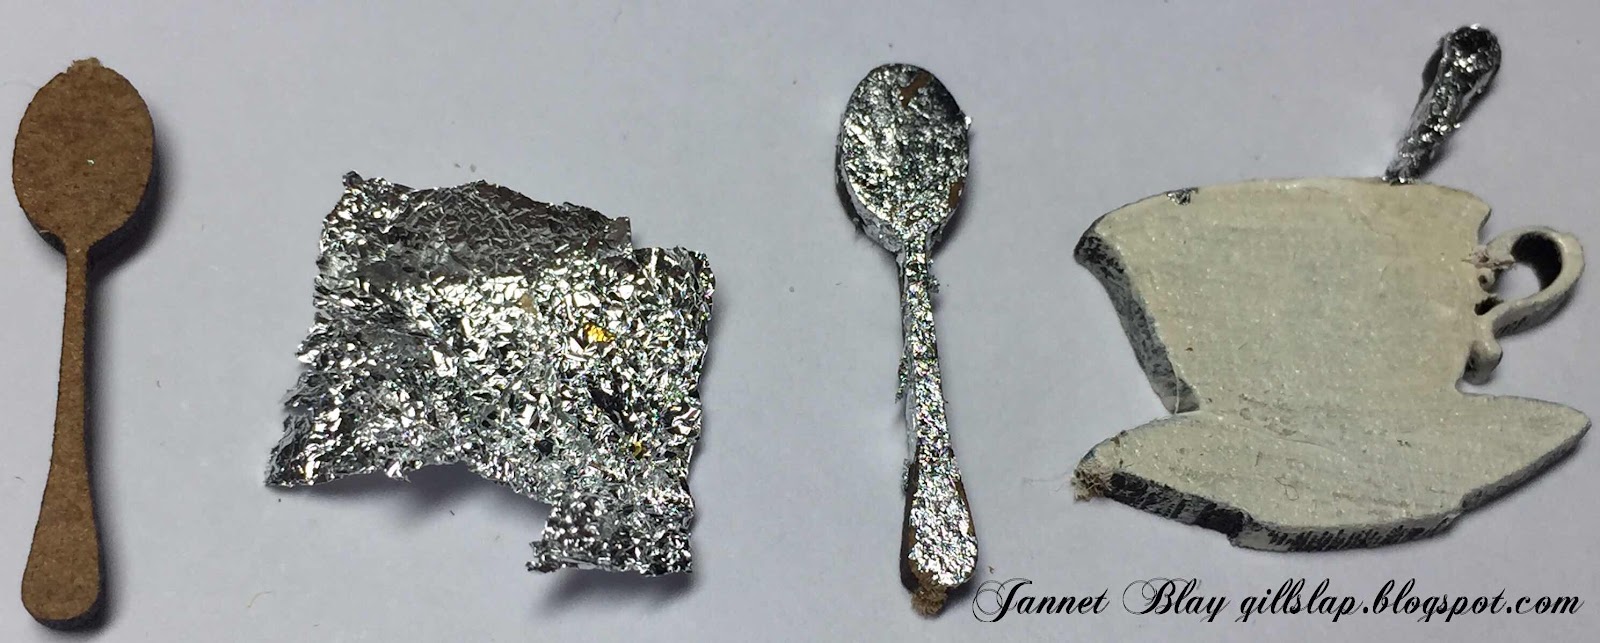
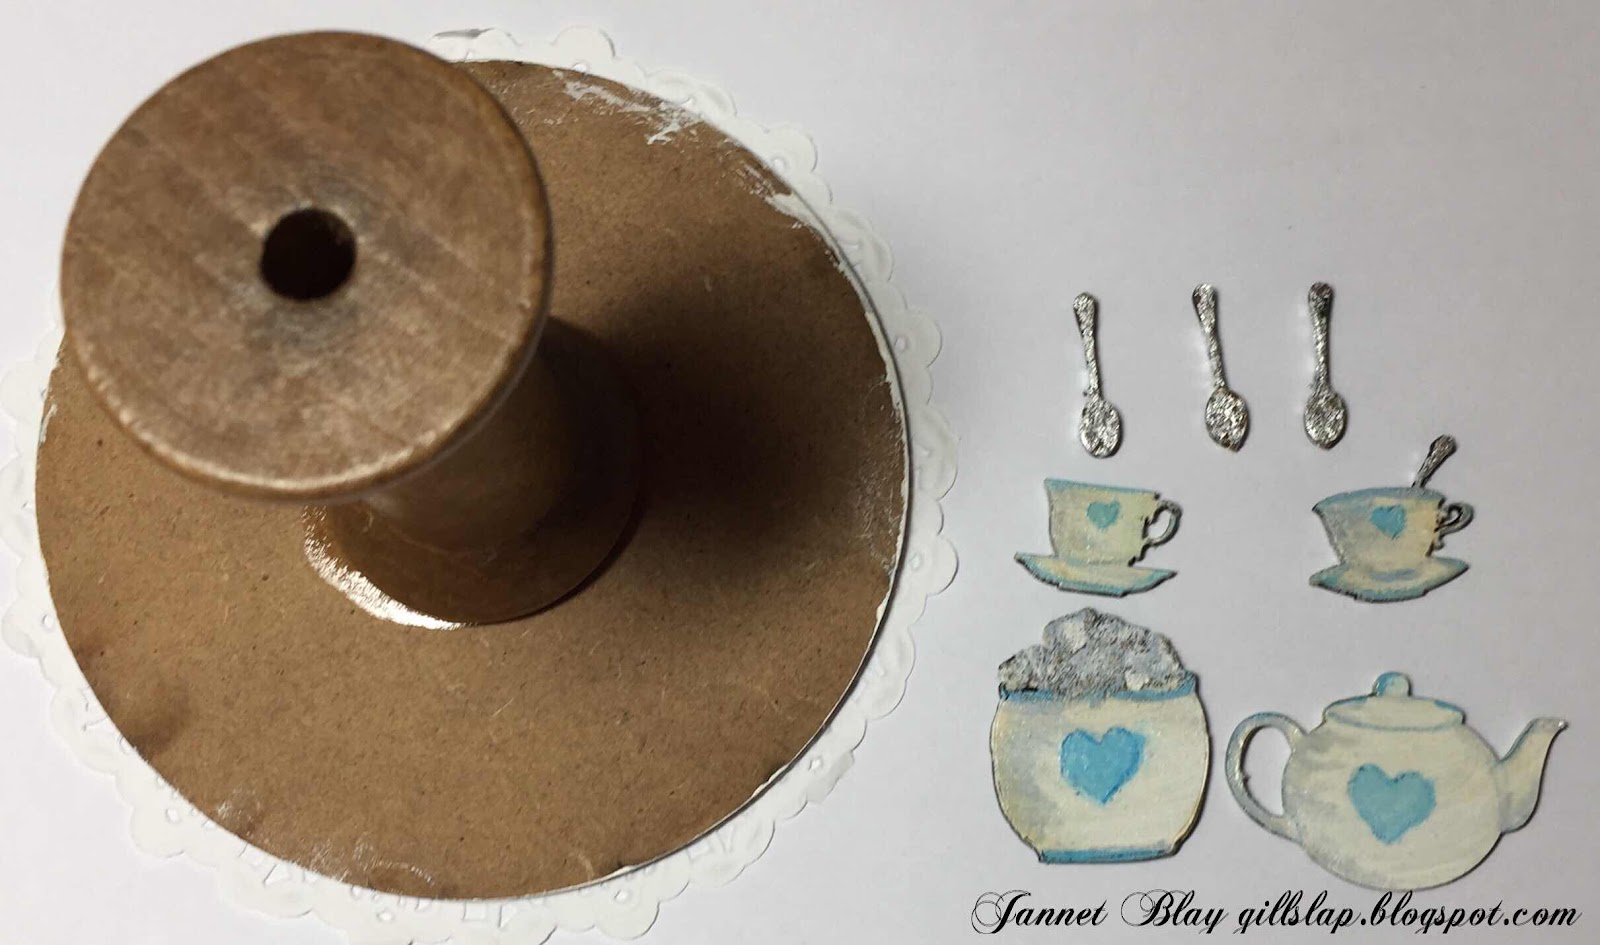
As soon as she was made Alice decided that she needed to have  tea. I found the lovely tea set which comes with lots of cups, teapots, and little tiny spoons too! To give the spoons a metallic shiny look I foiled them with some silver gilding flakes. I covered the spoon in glue and then laid the foil over, and after it adhered I buffed it up to get a silvery shine.I then  painted the cups and teapots and added some Decoart texture paste to the sugar cubes to give them a gritty sugary look.  You can paint any design you like to the tea set, I choose to do a simple blue heart. 

The tea set needed a table, so Alice could sit down and enjoy her tea. I used a 100 mm mixed media circle for the top of the table and a cotton reel for the pedestal. After painting some mini hearts I hung them with some golden thread and adhered them onto the top of the table so they would dangle down from the table.  A doily made a pretty table cloth. I adhered Alice and the tea set in place. I used a plastic bottle to sit Alice against for support. I added lots of little Alice embellishments, a clock, a bottle with “drink Me “ stamped onto it’s label, and some playing cards. There are many things you could make to go with Alice, roses, jam tarts, toadstools..... so many possibilities. I finished by painting the word Tea, and adhering it to the pedestal 


Of course you can turn your art dolls into any character you want to, maybe you could make one to look like a friend or relative that would be a very personal and lovely gift. The art doll kits  come in various shapes and sizes, you are sure to find just the one you need. 
Take care xx

Calico Craft Parts Used


Monday, 5 August 2019

Bathing Beauty at the Beach! - by Claudia

Hi, servus and I hope you are all enjoying a beautiful summer at the beach (or lakeside...or in your swimming pool)!

I am sharing a beach themed project today that somehow "happened" while browsing all my Calico Craft Parts boxes (yes - by now I have three of them...one for the Mini Craft Shapes Sheets, one for the larger wood shapes and 3D kits and one for a wild mix of smaller craft shapes that are too small to store in one of the other two boxes).

I browse these boxes from time to time to keep up to date with what I have...and often I find wood shapes I had almost forgotten about...and on that occasion often a project forms in my head that I would not have thought of - simply because I rarely look at all the craft parts I have at one time and see them all side by side. Most of the time I just focus on the ones I most recently ordered to use in a specific project. And when I change my mind (which happens quite often honestly) and create something totally different (because another genius idea just hit my mind so I just have to do that project first) some of these pieces go to the side for later use...and that over time generates a mix of craft parts that sparks new ideas too. ;)

So this beach plaque with a bathing beauty in her gorgeous swim suit was one of these projects...I had a palm tree, some left over tiny shells and a dolphin from Mini Wood Shapes Sheets, a sheet of beach themed Word Elements, the newly ordered art doll kit and some gorgeous beach sheds...et voilΓ‘!


Her bathing cap seems to be a bit tight....lol.
That reminds me...I have only recently seen that these seem to come into vogue again! Really???!!!

From my point of view retro fashion only feels fashionable (which from my understanding includes "good looking", too) to those who see and wear that style for the first time! And to those who wear it of their own free will!

We were made to wear bathing caps back in my days! (OMG...am I sounding as if I were in my seventies? Must be the heat...)
No one cared if that made you look like a complete wally. I remember my mom even wore one monster of a bathing cap when she went swimming in a lake (to protect her expensive perm) . It was a bone-ish beige colour and made from strangely smelling thick soft rubber and had massive soft rubber flowers of the same colour and material all over it. It had a very high cringe factor for my sister and me (especially as our bathing spot was quite small and everyone knew us there so we couldn't pretend to be the kids of some other family there).
 Oh...well...at least that made me feel thankful that I just looked like a chubby-faced egghead wally when wearing my sportier version with no flowers (YESSSS!!!!) and just a red stripe.

Erm...I seem to have wandered from the subject here...(must have been the shock of the unexpected lively reminiscence)...back to my bathing beauty at her beautiful, hot, sandy beach!
I love that you can put the art dolls in almost any posture you want. And when I found the beach themed word element I knew I wanted her to casually rest on it in front of a dream beach scenario. ;)


Calico Craft Parts used:

- Fancy Birch Ply Wood Plaque - Style 2
- Striped Beach Hut with Flag Wood Shape
- Sheet of Mini MDF Nautical Motifs - Style 6
- Sheet of Mini MDF Nautical Motifs - Style 1
- Standard Jointed Art Doll Kit - Style 1
- Palm Tree MDF Wood Shape
- Word Elements - Summer & Seaside


The background on the birch ply wood plaque was done using DecoArt media Texture Sand Paste.
To get a neat straight edge between sky and beach I used some masking tape.


The Texture Sand Paste was scraped on with a palette knife and I removed the masking tape while the paste was still wet.


I used the masking tape to also mask the beach edge when painting the sky. To create the summer sky I used DecoArt Chalky Finish paints "escape" and "timeless" both wet on wet. I also used "timeless" alongside traces of "Golden Straw" Americana acrylic paint to paint the sand.


The other wood shapes were primed with a dry brushed layer of "timeless" Chalky Finish paint. On top I used DecoArt media fluid acrylics (pure and as washes) and Americana acrylic paints to create my bathing beauty, the palm tree, the beach hut, the dolphin, the shells and the word band.


To layer my bathing beauty accordingly I used tiny cut off pieces from left overs from Calico Craft Parts Mini Wood Shapes Sheets. I always keep these for that purpose as they have the perfect depth for stacking the craft parts.


This image shows the depth of the created layers and also the lovely texture from the Texture Sand Paste.

To finish off the beach scene plaque I added some black line drawing with a PITT artist pen.


Have fun at the beach!
Claudia
xxx


Wednesday, 24 July 2019

Sadly time to say goodbye ..... Jennie

Hello to you all and welcome to this my final post for Calico Craft Parts. I have been on the team here since January 2017 and have had a wonderful time creating alongside my lovely team mates and friends Louise, Lesley, Julie, Claudia and Kerstin.

Sadly I have had to make a decision to leave but because my life is moving into a new area - my handspun textiles - and I need time to explore and experiment what I can achieve in this medium (before I get too old!).

I have, and always will be, a lover of Calico Craft Parts. I love being able to create something totally unique from the lovely kits and embellishments which suit everyone's style. Today I thought I would share a few of my most favourite of the Calico Craft Parts products.


February 2017

My Gibson Girl has to be one of my absolute all time favourites. She sits on my desk! I have made other art dolls but she has not been supplanted yet!


November 2017

The Beer Mats have been one of my favourite go to pieces. I love that you can throw so much at these wonderful mixed media boards and being able to use some of the smaller steampunk and mini pieces.


July 2018

The fabulous range of ATCs has also been one of my go to pieces for a project. I have a huge collection made over the last two years. This is a favourite - made when I really had lost my mojo after a long holiday and which got me back on track!


May 2019

And then there are the wonderful kits - always a joy to create with and open to so many wonderful ideas and techniques. This is one of my favourites. It really was like playing dolls houses!

I shall really miss the team and all your wonderful comments but I am also very excited about starting something new. I will still be around creating in mixed media so do hop on over to my blog now and again to see what I am creating and of course I will still be in touch with many of you on social media.

As always thank you for joining me today and thank you for all your love, friendship and supportive comments during my time here on the team.

Jennie x


Sunday, 30 June 2019

Day and Night in the Enchanted Forest - reversible box canvas by Julie Ann

Welcome to Calico Craft Parts Blog on the first day of July! I hope you're enjoying a great summer, if it is summer in your part of the world. Today I have a miniature box canvas to share with you. And - because I like to get the most out of my art supplies - it's a reversed canvas that tells a story whichever way you look at it ...


Night or Day!


Because my canvas is deep and chunky, you can stand it on a shelf and turn it whichever way you choose to  tell a different story about the enchanted wood, where wood-cutters' cottages wander on their own 2 feet day or night.


To create the Night-time surface of my canvas, I applied a thick layer of Gesso with a piece of old credit card. I lay the card flat in places, lifting it  quickly to create the impression of branch shapes in the Gesso. When this was completely dry, I painted with a combination of Paynes Grey, Cadmium Yellow, Titan Buff, Pthalo Blue and Burnt Sienna Acrylic paints and  spattered some diluted paint onto the surface with a tooth-brush.


A touch of gilding wax accentuated the branches and roots and helped to create an impression of moonlight.


Now it was time for a sprinkle of imagination in the form of Calico Craft Parts. I constructed 2 of the little cube house kits and gave them a coat of Gesso.


In the past, I have collaged my own printed out artwork onto Craft Parts and enhanced the image once it's glued into place; but for this project I painted characters straight onto the houses. If you preferred, you could create characters with stamped images. Whatever you choose to do, don't worry about mistakes. You can always collage or Gesso over what you do and make a new start.


I Gesso'd over the reverse side of the canvas and the tiny aperture within, before using the top layer of a napkin to create a day-time background.


Leaving the roofs open meant that all manner of wild life could leap or flutter out to explore in the woods.


In this enchanted forest the Woodland Sprites take the form of homes that can walk, run or fly among the trees, 


scattering flora and fauna in their wake.


These tiny feet with their leafy slippers are created from paper-clay. By fixing the rabbits to the inside of the house on tiny MDF scraps, they appear to leap from within.


I think there is interest from every angle!


It's fun to create the miniature portraits too! I used Acrylic Paints and Acrylic Inks, adding finishing touches with water-colour pencils.


Thank you so much for stopping by today and joining me in the Enchanted Forest!

Calico Craft Parts used in this Project
Block Style Cube House Kit (Mini)
MDF Angel Wings - Style 4
Standard Jointed Art Doll Kit - Style 1
Mini Owls Wood Bird Shapes
Sheet of Mini Hares
Word Elements Blank