Showing posts with label Skulls - Skeletons - Zombies. Show all posts

Saturday, 1 October 2022

Halloween Decor by Kerstin


Welcome creative friends!


I was inspired to create a Halloween - Welcome door sign in 3D look.

here you can also leave your keys 

for practical reasons :-)


 I worked with a background paper, some cutting dies and some suitable

assescoires.

In the center you see the awesome

which was created with rusty acrylics and some texture.

In the middle of the frame I attached a small MDF part as a shelf.


some close up's


used MDF shapes from Calico Craft Parts


I hope you find inspiration!


Thanks for stopping by...until next time


Kerstin


Saturday, 17 September 2022

Creepy - Halloween Tag


Welcome creative friends!


Today a new Halloween tag created with some MDF shapes
 from Calico Craft Parts
and suitable cutting dies and stamps ( Tim Holtz).


I was inspired to split 

 Zombie Horde

and let them dance around the coffin.


some close up's


used MDF shapes from Calico Craft Parts


MDF and Birch Ply Tag Shapes - Classic Rectangle

Coffin Silhouette

 Zombie Horde

 Creepy - Halloween MDF Wood Word


I hope you find inspiration!


Thanks for stopping by...until next time


Kerstin


Saturday, 30 October 2021

Beware Dementors by Kerstin

Welcome everyone!


Have you seen the latest Hanging kits on Calico Craft Parts???

Awesome πŸŽƒπŸ‘€πŸŽƒ, such a lot of creative possibilities!!

 Today the third variant


 Some of you may remember on my Pirate curse project

for which I also used this Skull & Ghosts Hanging kit.


These floating ghosts reminded me of dementors known from the Harry Potter movies. 

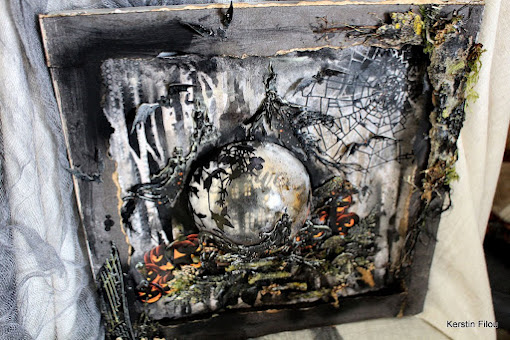
I was inspired to create a shadow frame with an illuminated 3D effect in mixed media style. For this special effect I used half a transparent acrylic globe 

and thought about the magical shield around Hogwarts.


Skull & Ghosts - MDF Halloween Hanger Kit


 one becomes two πŸ˜€


Beware Dementors

They have the ability to drain men of their happy memories

 until they have to relive their worst moments over and over again.

! Maximum scary factor !

- only happy memories can help -


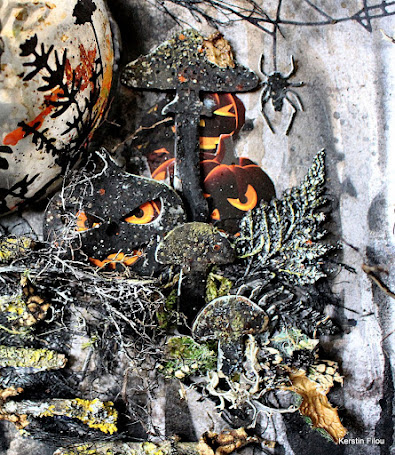
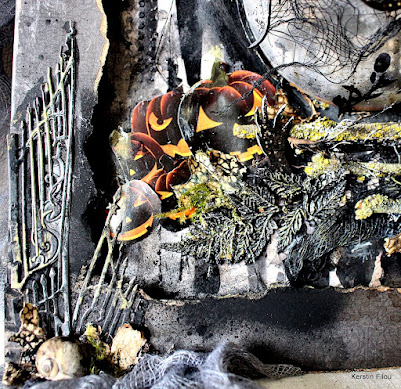
some close up's


used MDF shapes from Calico Craft Parts


Skull & Ghosts - MDF Halloween Hanger Kit

Mushrooms - Fungi MDF Wood Shape - Style 12

 Zombie Arms and Boots - MDF Add On Sheet


Thanks for your visit!


Happy crafting!

Kerstin


Saturday, 23 October 2021

Skulls and pumpkins and ghosts, oh my! by guest designer Lori Woods

 Hello friends! I'm back with my second guest designer post for October!


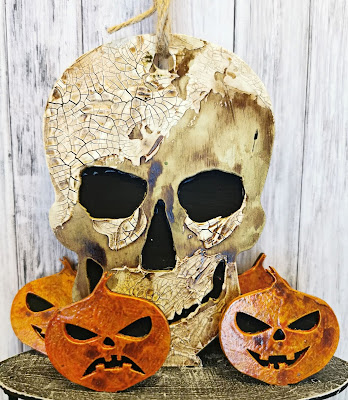
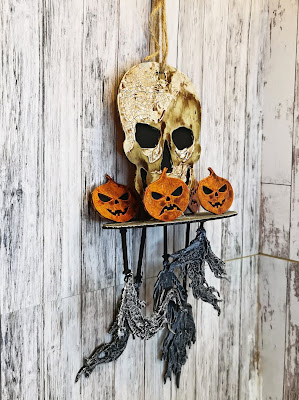
When I got the Skull & Ghosts Hanger kit, I knew I wanted to keep the decoration quite simple and concentrate on making it look as creepy as I could!

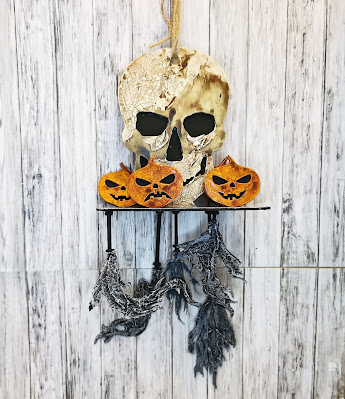
For the skull I painted the base a cream colour and then added areas of crackle paste, which I made quite thick so that the crackle would be more obvious. Once dry, I went over the skull with a watered down brown acrylic so that is filled all the cracks and also pooled over the other areas to create an old and dirty look. I then covered the back with black card to really emphasis the eye, nose and mouth holes.


The pumpkins were painted pale orange and again, I used watered down brown acrylic to create an old, shabby look and black card to emphasise the eyes.

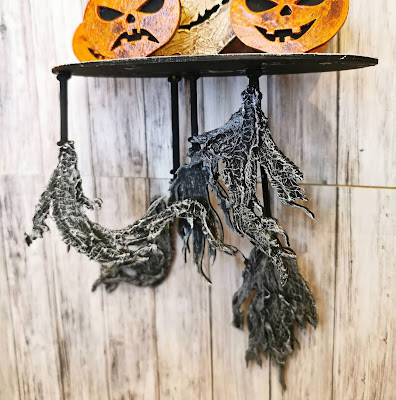
The ghosts were covered in cheesecloth, painted with black gesso and then dry-brushed with white gesso to bring out the texture and give them a more ethereal look.


I hope this gives you some ideas on how you can make a spooky decoration with just a few simple techniques!

Saturday, 9 October 2021

Oh mummy! by guest designer Lori Woods

 Hello friends! I'm super happy to back with another guest design post for you and since it's October, I went super spooky!


The Standing Skeleton kit is a fantastic 3D kit that has so many possibilities but I decided to make a creepy mummy with mine. Once I had assembled the skeleton, I gave it a quick coat of white gesso. Next I created two eyeballs from clay and glued these into position in the skull eye sockets. Now came the fun part, wrapping the mummy!


I made a mix of watered down white glue- I used PVA but you could use any kind of glue that has a nice runny texture as the idea is to saturate the fabric with it. I cut strips of muslin and gave them a good soak in the glue mix then squeezed out the excess. Then I began wrapping! It doesn't have to be neat and tidy and you can miss out areas of bones like the hip bone and some ribs to give the effect of an ancient old mummy who's starting to unravel a bit!


Once the wrapping was finished and the bandages were dry, I took some watered down brown acrylic paint and used this to create some areas of shadow and a little green paint to create an effect of some moss growing on the mummy. A quick dry brush of white gesso and some red paint for the eyes and the mummy was finished!

Although the kit does stand by itself, I wanted to give the mummy a base so that I could position him in a sort of lurching stance. I used an oval MDF board, painted it green and glued on some art stones to create a bit of texture. I then positioned the mummy in the stance that I wanted and using a strong glue, attached him to the MDF board.


I hope this gives you some ideas on how versatile this kit is and inspires you to create your own creepy cute Halloween decor!


Friday, 10 September 2021

πŸŽƒPumpkin Jack and The Groovy Zombies! By Kat Hazelton.

Hi everyone, I am delighted to be asked back to do another guest spot for Calico Craft Parts blog page. Today I am posting two 'Kat makes'

I thought it would be lovely to kick-start the beginning of Autumn with a nod to the pumpkin fields growing up and down the country. A sure sign that Halloween is around the corner. So my first 'Kat make' is a friendly Scarecrow called Pumpkin Jack.

Jack stands proudly guarding the pumpkin patch in the local farmers field. Jack is a kind and gentle soul though maybe a bit too kind as the crows instead of being scared by him like to nest in his waistcoat pocket.

To make Pumpkin Jack you will need.

Art Doll Kit

Carved Pumpkin Skull Shape

Mini Wood Shapes - Birds, Crows & Ravens

Selection of paper and fabrics

Scissors, string, glue, crayons or orange paint, black paint, pencil, drawing pens, card, paper and buttons.

To make Jack's clothes I drew around the art doll pieces to give a guide to form a pattern. I created sleeves, shirt body, waistcoat and trouser legs. I used a range of handcrafted papers you can use felts, fabrics or patterned paper. 


To create Jack's beautiful head I coloured the mdf shape with a distresed orange crayon and added fine details with an art pen. To give Jack deep dark black eyes and mouth I drew around his head onto a piece of card. Which I cut out and painted with matt black acrylic paint. I then glued Jack's head onto the cardboard backing and then onto the mdf head shaped that came with the kit.


Those little details, to make Jack's clothes look more scarecrow I drew on little stitches with a white pen. I also added little pockets, patches, buttons, handkerchief and straw. The straw is dried sweetcorn husk. Notice the little crow has already moved into Jack's pocket. The crow was coloured in with a black crayon and highlighted with a white pen. 


To put Jack together I used string threaded through the pre-drilled holes. 


For that added touch I made Jack a scarecrow perch by gluing two sticks together. 
Jack is now ready to watch over the farmers pumpkin field until harvest time. 


My second 'Kat make' is a fun light hearted take on Halloween Zombies. Instead of scary flesh eating Zombies you see in the movies these Zombies are a group of happy Hippies from the 1960's! They enjoy dancing, picnics, and picking giant groovy flowers! Oh and they are all vegetarians so you are all safe. 

To make The Groovy Zombies you will need. 

Bright coloured acrylic paints, white paint and a white pen for adding details. 
Assorted papers flowers, glitter, gemstones, moss plus ribbon for hanging


Firstly I detached the mdf shapes and painted with a base coat of white acrylic paint. 
Once dry I painted them with bright acrylic paints. Then added fine details with a white pen.


Using the same paint I splatter my paper flowers and added a sprinkle of glitter.


My Zombies now painted are ready to assemble. 


Once assembled I decorate the base with flowers, moss and added a ribbon for hanging. 

My Zombies are all done and having fun! 


Well I hope you enjoyed both 'Kat makes' and I hope they inspire you to have a go at creating. If you have any questions please get in touch I am always happy to help if I can. 
Happy making, 
Kat 😊

My next 'Kat make' will be on the 25th of September! This one will be an extra spooky Halloween one wahahahahaha! (Evil laugh) πŸ¦‡πŸ¦‡πŸ¦‡πŸ¦‡πŸ¦‡πŸ¦‡πŸ¦‡πŸ¦‡πŸ¦‡πŸ¦‡


Saturday, 17 October 2020

Spooky Night by Kerstin

 Welcome!

 I'm a big fan of the Pirates of the Caribbean stories, I don't know how often I have seen the films, but the imaginative ideas and the thematic realization always fascinate me.


This time I have created a shadow frame in mixed media style.


 I've used a similar technique as in this project here: 'In the witch kitchen'


Some close up's 


Calico Craft Parts used :


Owl & Spider - Halloween Wood Corner

 Galleon Boat MDF Wood Shape - Style 3

Skull wearing Crown

Spooky - Halloween MDF Wood Word


Many thanks for your visit!


Happy crafting!

Kerstin