Showing posts with label Printers Trays & Trugs. Show all posts

Thursday, 29 July 2021

From Me To You by Liz

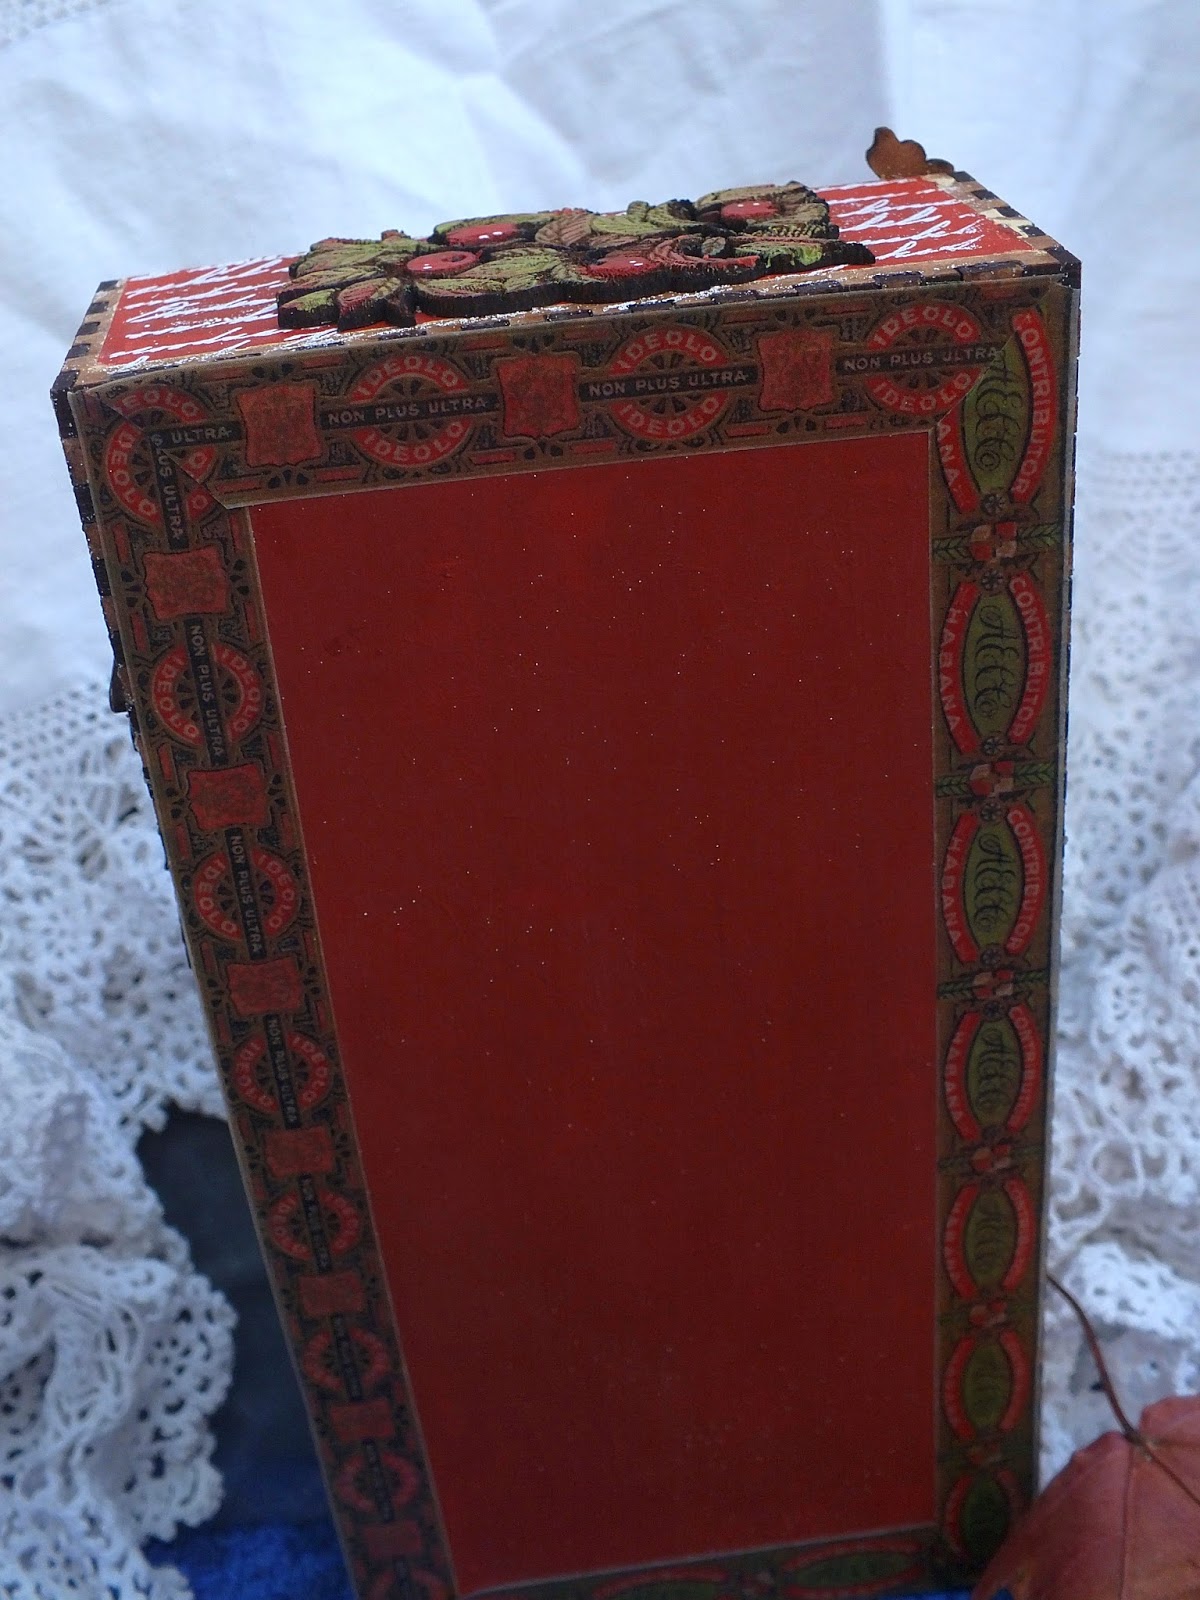
  Hi Guys, I want to show you a MDF Trug from Calico Craft Parts that  I've put together which I think would make a lovely gift for anyone special,


I put it together then gave it all a coat of white gesso, when dry I went over with two layers of acrylic paint,

I took a stamp from my stash and randomly stamped a little text here and there on all four sides of the Trug,


I then took a Rose flower head stencil I have in my stash and with some transparent medium stencilled the Rose heads here and there too,


When all the media was dry I added this lovely MDF Ashleaf and twig keeping it in it's natural colour as a focal point for the front,

MDF - Trug 

MDF - Ashleaf and twig 

Happy Crafting!!

Hugs Liz xx

Wednesday, 9 September 2020

Where words fail, music speaks...

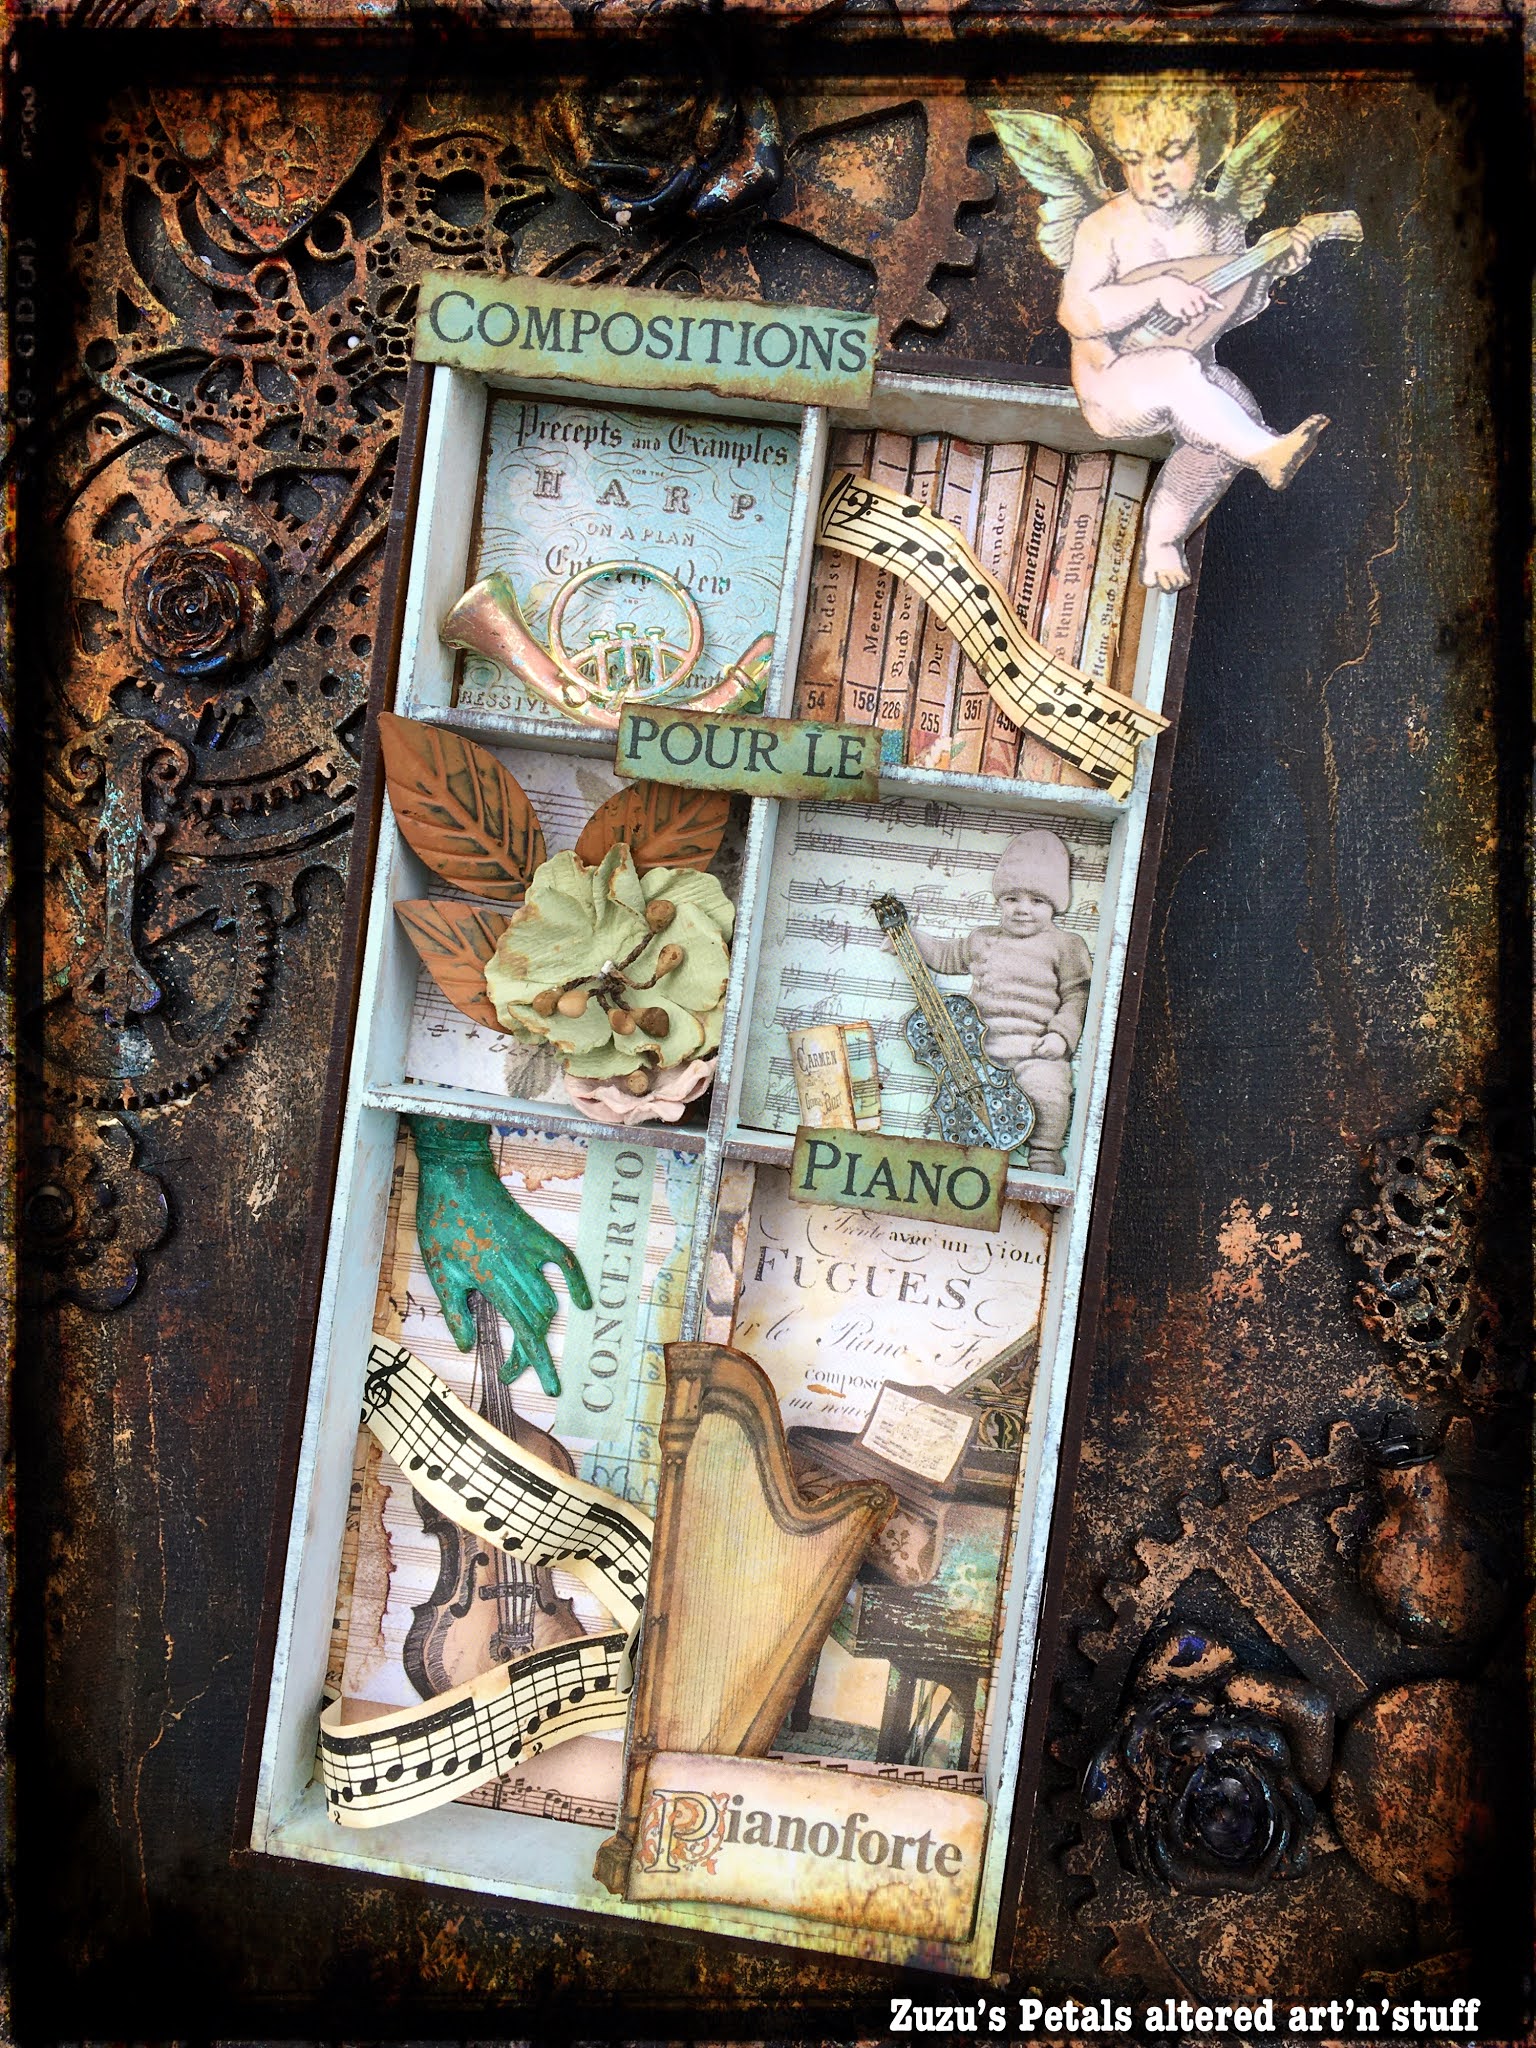
I don’t do too well at making cards but I like to hand over some substitute when I am able. This is for a talented, music Making and music loving friend For her birthday to go with a small gift I made. 

The bonus is, if she wants to keep it she can display it after her birthday. If she doesn’t, she can give it back to me to recycle...win win. lol

I used one of the little PRINTERS TRAYS

 It was Very much a case of leaving the external tray just wood and painting the internal compartment section a shabby chic duck egg kind of colour. Then most everything else was cut out from scrapbook paper and scraps of sheet music and I added a few metal and paper embellishments I had in my stash.

Z x
 

(* PS...The little quote in the title is by Hans Christian Andersen.)


Monday, 10 February 2020

Valentine Animals Printer Tray by Jannet


I am so happy to join the very talented Calico Craft Parts team.

For my first project I decided to make a printers tray with a topical Love theme. I adore animals, so the the gorgeous mini Calico animals are the focus of my tray. 


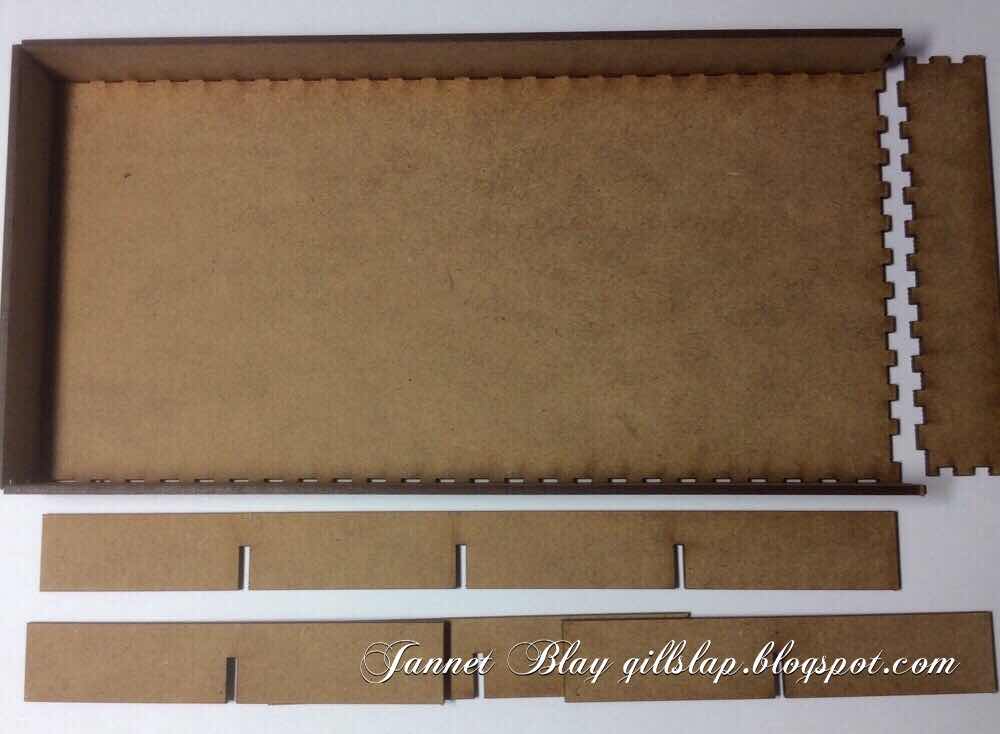
It takes no time at all to assemble the printer tray. The pieces pop out really easily, and then they slot together perfectly. You can also add an optional frame to the tray.


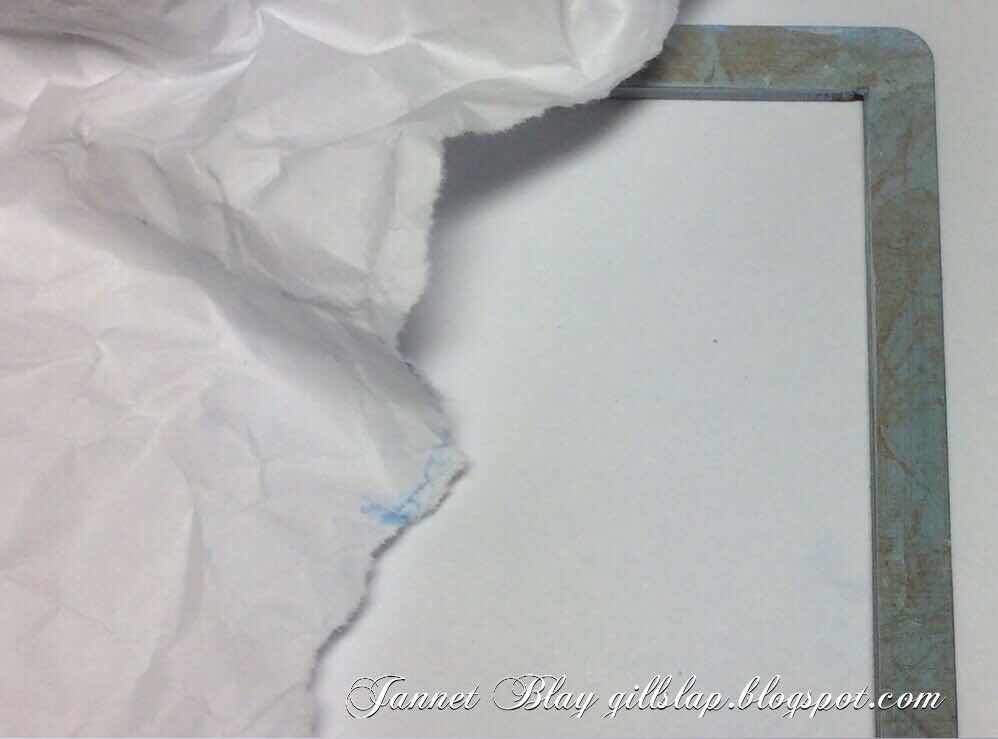
I used acrylic paints to add some colour, my favourite technique to add some texture to the painted surface is to scrunch up some plain paper and then unfold it before pressing it
 down onto the wet paint. It leaves lots of lovely lines and textures. This also works well with water colour paints.


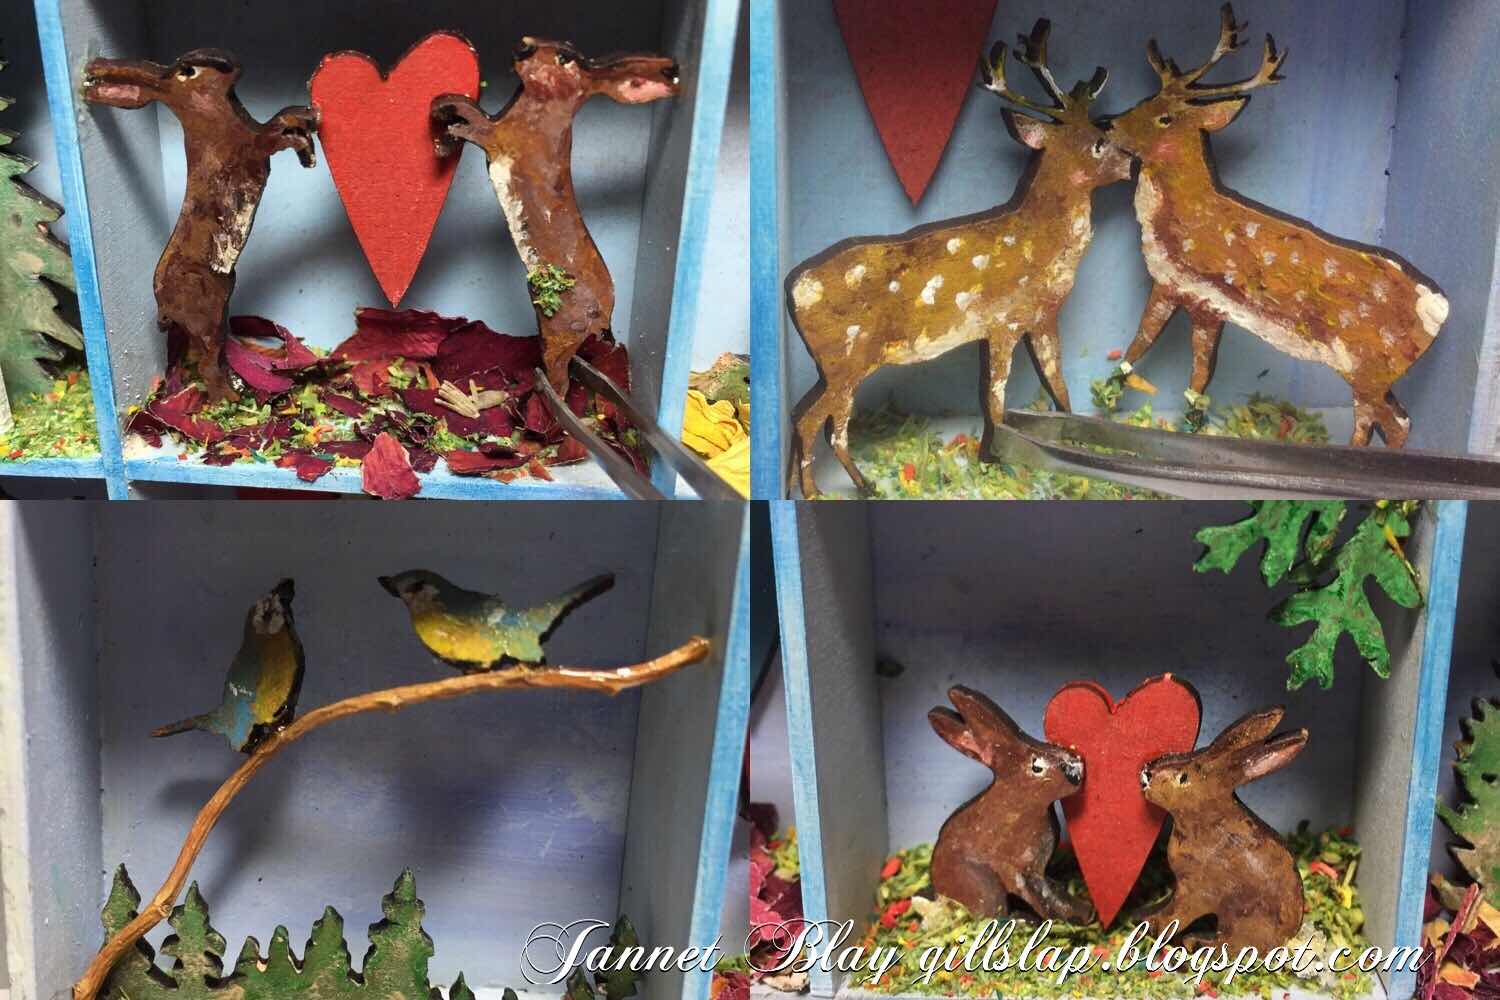
I decided to create a small scene in each section, using the animals and spelling out the most important word LOVE. I enjoy painting details onto the animals, but they can also be painted in a solid colour.They look fabulous as silhouettes.There are also larger sizes of the cute animals available.

Luckily I had some tiny stamps of various animal paws and hoofs, so I stamped them as if they were wandering around the edge of the frame. 


 I adhered the animals and elements into the sections, holding each piece carefully with tweezers until they could stand alone. For the floor coverings I used torn little pieces of dried rose petals, sunflower petals,and dried lavender.

I finished my printer tray by adhering the frame onto the tray. 

There are so many different themes you can use in a printer tray. A special birthday, anniversary, beloved pet, favourite hobby, new baby. You can make it as simple or as detailed as you wish. 

It was a lot of fun to make xx 

I used the following Calico Craft Parts


Wednesday, 17 April 2019

Dressing Table Tray by Jennie

Hello and welcome to another of my "useful" makes!  Today I am using a printer tray and some rather swish Art Deco ornament shapes which I thought looked like handles!


I really love the fact that so much of the wonderful MDF pieces at Calico Craft Parts can be utilised in so many different ways.


I started with the inside of the printers tray giving it a crackle finish using DecoArt Weathered Wood over acrylic paint. I was then able to layer a lovely napkin over of the top and the crackle still shows through.


I then glued the tray together and painted the outide in the same acrylic paint adding a Word Element onto the front of the tray. I always edge everything in gold metallic paint to try and give it a shabby feel. However my hand is not that steady these days and so I am always going over the edge!


And then the Art Deco Ornament "handles" were painted lightly to retain the etched pattern and stuck onto the sides of the tray.


Somewhere to keep all my little bits and pieces of jewellery on the dressing table - so useful !!

I also plan to make another tray for the sitting room table to hold some small candles and artifical flowers. There are quite a number of different Art Deco Ornaments which can be used as "handles" - so plenty of choice!

As always thank you for joining me today and happy crafting!

Jennie x


Calico Craft Parts used:


Thursday, 7 March 2019

Bloom Like A Rose Printer Tray by Jennie

Hello to you all and lovely to be back here at Calico Craft Parts with another project for you.

My grand-daughter asked me before Christmas if I would make her a "grown up" present for her bedroom (she is five!). And so here it is. She's a lover of pink and she is also a very good gardener having grown seeds for the last couple of years to glorious blooms and wants to grow Roses this year.


I thought an open printer tray would provide a good base for showcasing some roses in various different forms.


An appropriate stencil! ......


..... and these Rose napkins have been used so often but are absolutely glorious! I have crackled the surface but it is difficult to photograph well.


The printers tray Rose Bramble fitted the bill too and makes a lovely frame for the box. And any ivy flourish as a backing to two paper roses.


And then of course it is always possible to personalise any project using Calico Craft Parts Create Your Own Word. I rather love this font which fitted nicely with the letters of her name.

I think she will love this and hopefully will inspire her to grow her Roses.

As always thank you for joining me today and happy crafting.

Jennie x

Live The Dream

Calico Craft Parts used:


Saturday, 30 September 2017

Once upon a time - GD Kerstin

Welcome!

Kerstin is back with a new mixed media fantasy project.
 It's an artist trading block and my inspiration was a very romantic fairytale.
 Can you guess which story I mean???
A little bit difficult, isn't it? 

...Lost in the forest, Belle's father Maurice seeks refuge in the Beast's castle, but the Beast imprisons him for stealing a rose. Belle ventures out in search for him and finds him locked in the castle dungeon. The Beast agrees to let her take Maurice's place.... 


How I did it:


before and after


Colour technique wooden shape 

  1. firstly a thin layer of diluted grey and black acrylic paint
  2. clear DecoArt Crackle Glaze  on some places
  3.   DecoArt White and Raw Umber Antiquing Cream diluted with water for creating drip lines with a brush
  4. sprayed with water to make them run and spread


 some close up's 


side views


+++++++++++++++++++++++

Witching Hour
 and another inspiration for you

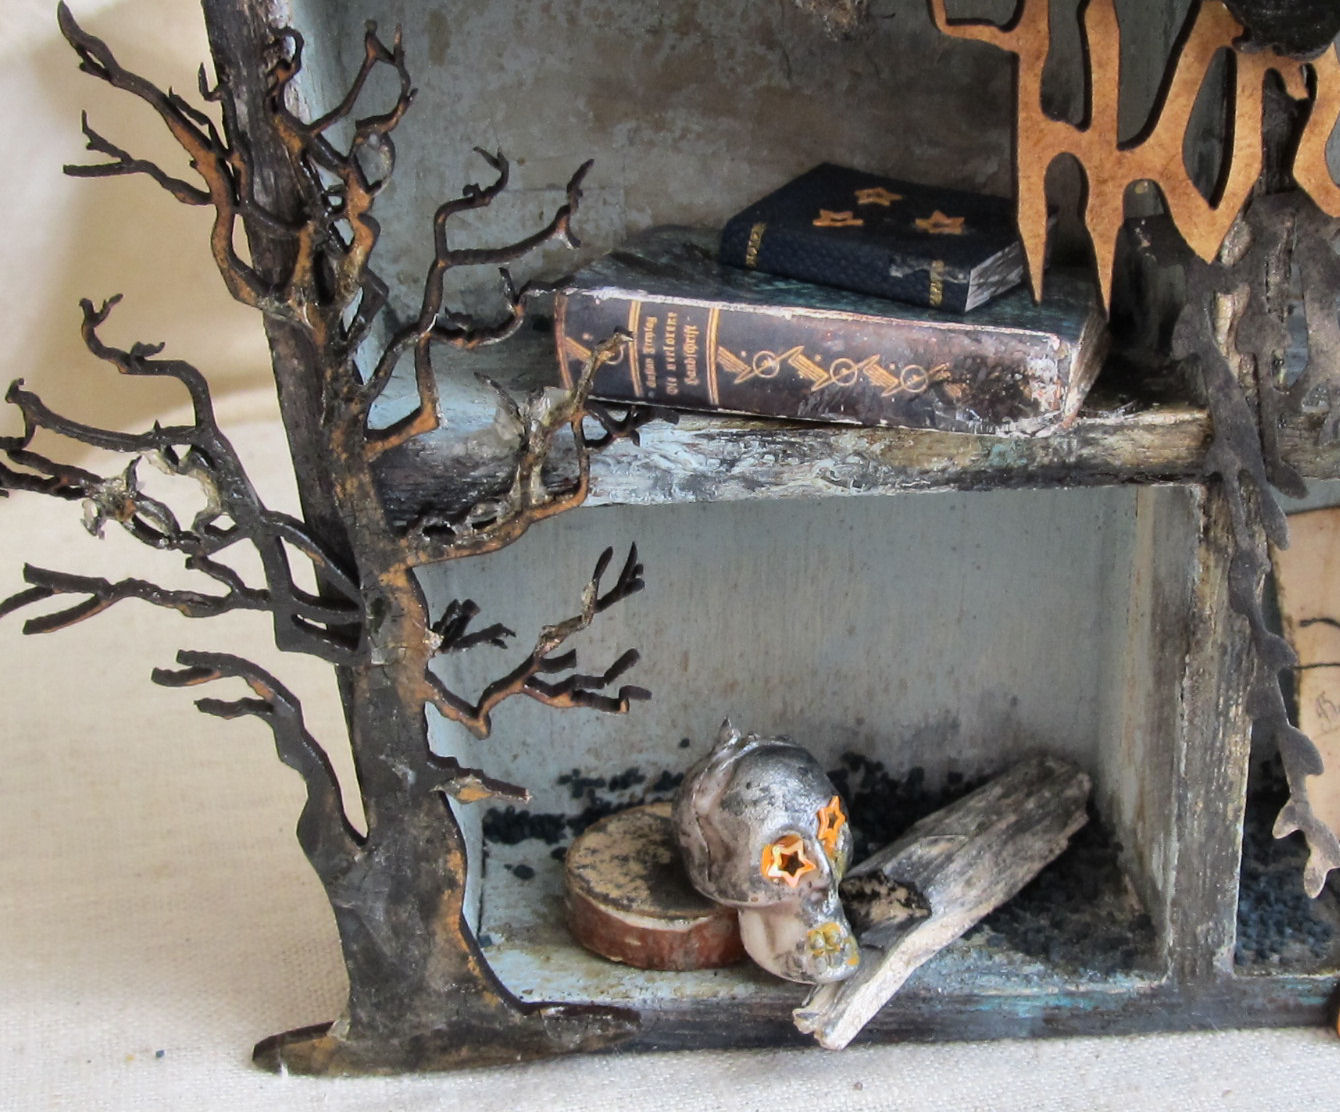
I live near the  'Harz' mountains. Their highest peak is the 'Brocken' and it has always played a role in legends and has been connected with witches and devils.  I love these fantasy stories about spooky forests with misty figures and phenomenons, where the fog creates eerie visual  effects.
Halloween time is near and so I had a lot of fun to create a little witches house with the amazing wooden shapes from Calico Craft Parts.


Calico Craft Parts wood shapes used:


this is how it looked before I started with decoration and painting

mainly painted with DecoArt Chalky finish Paint Vintage   and Glimmermist 'Woven Burlap'
plus a little bit diluted black paint


some close up's


I'm  always fascinated from this natural wooden shape look and I think it isn't always necessary to paint them, or?!
I only used orange and black acrylic colors, 
the classical Halloween shades with a little bit shimmer, to paint some wooden shapes


oh what is that??? a phenomenal magic effect ;-)


an old weathered roof


a long post with a lot of inspiration for you, I hope :-)

I really had a lot of fun to work with the amazing Calico parts and I am sure 
(in preparation for the time for creating Christmas gifts) it will certainly not be my last order.

Thanks so much for your invitation as your guest designer this month,
it was a pleasure for me!!!!

Happy crafting!
Kerstin


Sunday, 10 September 2017

Autumn Flight - Printers Tray by Julie Ann

Hello Everyone. I can hardly believe we are entering the 'Season of Mists and Mellow Fruitfulness' already! It only seems a moment ago we were welcoming Spring! I do love the colours, sights, smells and sounds of Autumn so I decided that I wanted to capture a sense of this highly atmospheric season within one of the new, deeper Calico Printers Trays - and here it is.


The depth of these trays gives lots of scope for experimentation. I chose the 4cm depth, but I'm looking forward to creating with the 2cm and 3cm sizes soon too. For this project I chose not to use the shelves that come with the tray.


I aimed to create the hazy light at the close of an Autumn day. I began by first painting the background of the Printers Tray a neutral colour and then adhering torn scraps of tissue, napkins and stamped tea bag papers.


For a misty, twilight effect, I tied everything together with washes of blended acrylics diluted with an acrylic glaze.


A scrap of cheesecloth, some stamping and a beautiful Calico owl in flight along with some Fungi wood shapes helped give a definite autumnal mood.


For the reverse side of my tray, I chose a warm shade of terracotta acrylic with white embossed script. To create interest I decided to add a miniature Autumn house, which I created using one of the Block Style Wide House Kits and my own art work.


I like to block off the edges of the kits with masking tape so that the paint doesn't get into crevices and make the edges difficult to glue in place. When the kit is completed you can use a decorative tape to give a neat finish to the project.


Calico have so many beautiful Autumn embellishments, I had a great time painting them and adding them to the project to create seasonal detail.


I kept the roof open to display these painted twigs and to give the impression of the owl flying into the night sky, possibly having roosted in the roof of the little tumble-down house in the woods, where wild creatures find shelter as the days grow colder.


Perhaps in the white embossed script, there is a suggestion of snowy days to come...


...when the moon will make frosty leaves glitter and the owl will be grateful for the shelter the abandoned fairy cottage provides.


Autumn leaves are one of the loveliest aspects of the season and Calico have some beautifully detailed leafy embellishments just waiting to be given touches of flame. Golden sunsets setting the skies ablaze suggest Autumn to me as well, so I added splashes of melted gold UTEE to the sides of the Printers Tray.


I particularly love these acorns and oak leaves. I wanted to create the impression of leaves taking flight along with the owl!


Thank You so much for stopping by today. I hope as the days shorten you will enjoy a few more sunny days and some beautiful walks through carpets of crisp, autumn leaves. Have a creative time until we meet again.
Calico Craft Parts Used
MDF Printers Tray Kit Style 1
Block Style Wide House
Sprig of Oak Leaves and Acorn
Apple Tree Branch Motif
Flying Barn Owl Style 4
Wood Maple Leaf and Twig
Sugar Maple Leaf and Twig
Wood Beech Leaf and Twig
Wood Sweetgum Leaf
Sheet of Mini MDF Acorns and Oak Leaves
Wood Mushroom Fungi shape

Monday, 4 September 2017

Specimen/Fossil Tray - by Claudia

Servus and welcome to today's inspirational Calico Craft Parts post, dear friends!
I am sure most of you have already seen our new fabulous Printers Tray Kits - I love them to bits as they come in many different insert styles and - if needed - there's also a stand available as well as beautiful frames to add that special final touch.

I for my part fell in love with them especially for their perfect size to (finally!) store my collected fossils in and have them at display beautifully too!


Ah, well, ....yes, there's a bit of a natural sciences geek in me too (when I was little I dreamt of becoming an archaeologist once...but looking back at that wish now I guess it was rather a geologist I wanted to be - being more interested in traces left behind by plants and animals than humans).


I just love to have my collected treasures finally stored like this (having that bit of museum feel to it ;). But of course you can use this kind of display or storage for other beloved bits 'n pieces as well! My fossil tray is really quick and easy to make - I promise!

Calico Craft Parts used:

- MDF Printers Tray Kit with Insert - Style 6 (I chose the 2cm depth, but they're also available with 3 or 4cm depth!)
- Sheet of Mini MDF Label Holders Wood Shapes


Other materials used:
- matte DecoArt Decou-Page
- Dremel or small drill
- DecoArt Americana Chalky Finish paint "lace"
- DecoArt media Antiquing Cream "Raw Umber"
- tissue wrap
- soft brush
- thin jute string
- baby wipes


This is how the printers tray kit and stand look like:


As you can see there's a bit of air left between the outer frame and the insert - perfect for my idea of making handles using thin jute string and fixing it with a single knot inside the tray's frame!


I first glued the outer frame together and set it aside to dry:


In the meantime I painted the inner sides of the insert with the Chalky Finish paint. Instead of trying to get neat and even coverage I added my  two layers of paint quite loosely, making sure I rather stippled on the paint than leaving even brushstrokes. This way I got a a more shabby and worn look. I also painted the frames' outside this way once the glue had completely dried.


I didn't care a lot about how much paint also got on the thin front sides of the frame and the insert during that process as I knew I was going to wipe it off with a baby wipe afterwards (which not only removed the paint but also toned the front sides down a bit).


I didn't even have to hurry much as the solvents in the baby wipes also remove already drying paint.


To tone down the inner bottom of the tray's frame I applied some Antiquing Cream with a soft brush.


Then I drilled the holes for my string handles using my Proxxon (which is pretty much the same as the Dremel tool) using a very thin drill (as I was going to use a very thin jute string so the knots would not be too big).


The jute string was a bit fiddly to insert so I simply wrapped some adhesive tape around its ends to form a sturdy and pointy end. These ends were cut off after I had tied knots into each end once the handles were in place.


A label holder was toned down with Antiquing Cream too and I wrote a small label (by hand) onto a cut to size piece of dictionary page paper.


Label and label holder were glued in place. Then I put the insert into the tray frame and filled the compartments with crinkled tissue wrap to put my fossils in. 


Et voilá!


My first piece for my "private museum storage" was done! I am really happy with how it turned out! And I can see so many variations - different colours instead of the shabby "lace" white. Maybe some Weathered Wood crackle on the outside....well, you know what I mean...the possibilities are endless...but in this case I wanted nothing to visually compete with my fossils. But I love how the tray and the fossils have become one beautiful visual unit! I hope you like my fossil tray too!


Thank you for stopping by and - as always - 

hugs and happy crafting!
Claudia
xxx