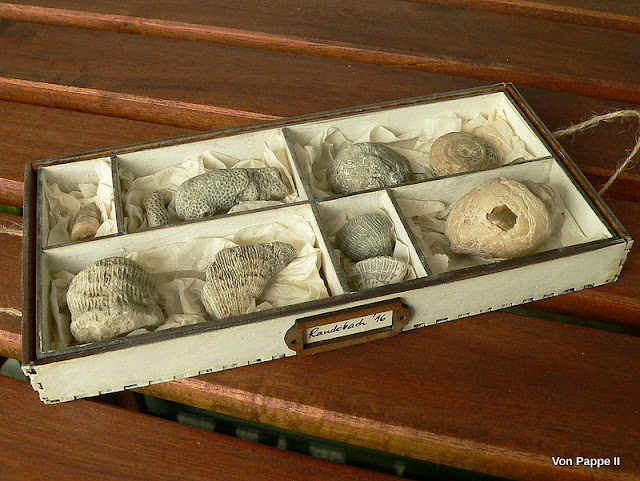
I am sure most of you have already seen our new fabulous Printers Tray Kits - I love them to bits as they come in many different insert styles and - if needed - there's also a stand available as well as beautiful frames to add that special final touch.
I for my part fell in love with them especially for their perfect size to (finally!) store my collected fossils in and have them at display beautifully too!
Ah, well, ....yes, there's a bit of a natural sciences geek in me too (when I was little I dreamt of becoming an archaeologist once...but looking back at that wish now I guess it was rather a geologist I wanted to be - being more interested in traces left behind by plants and animals than humans).
I just love to have my collected treasures finally stored like this (having that bit of museum feel to it ;). But of course you can use this kind of display or storage for other beloved bits 'n pieces as well! My fossil tray is really quick and easy to make - I promise!
Calico Craft Parts used:
- MDF Printers Tray Kit with Insert - Style 6 (I chose the 2cm depth, but they're also available with 3 or 4cm depth!)
- Sheet of Mini MDF Label Holders Wood Shapes
Other materials used:
- matte DecoArt Decou-Page
- Dremel or small drill
- DecoArt Americana Chalky Finish paint "lace"
- DecoArt media Antiquing Cream "Raw Umber"
- tissue wrap
- soft brush
- thin jute string
- baby wipes
This is how the printers tray kit and stand look like:
As you can see there's a bit of air left between the outer frame and the insert - perfect for my idea of making handles using thin jute string and fixing it with a single knot inside the tray's frame!
I first glued the outer frame together and set it aside to dry:
In the meantime I painted the inner sides of the insert with the Chalky Finish paint. Instead of trying to get neat and even coverage I added my two layers of paint quite loosely, making sure I rather stippled on the paint than leaving even brushstrokes. This way I got a a more shabby and worn look. I also painted the frames' outside this way once the glue had completely dried.
I didn't care a lot about how much paint also got on the thin front sides of the frame and the insert during that process as I knew I was going to wipe it off with a baby wipe afterwards (which not only removed the paint but also toned the front sides down a bit).
I didn't even have to hurry much as the solvents in the baby wipes also remove already drying paint.
To tone down the inner bottom of the tray's frame I applied some Antiquing Cream with a soft brush.
Then I drilled the holes for my string handles using my Proxxon (which is pretty much the same as the Dremel tool) using a very thin drill (as I was going to use a very thin jute string so the knots would not be too big).
The jute string was a bit fiddly to insert so I simply wrapped some adhesive tape around its ends to form a sturdy and pointy end. These ends were cut off after I had tied knots into each end once the handles were in place.
A label holder was toned down with Antiquing Cream too and I wrote a small label (by hand) onto a cut to size piece of dictionary page paper.
Label and label holder were glued in place. Then I put the insert into the tray frame and filled the compartments with crinkled tissue wrap to put my fossils in.
Et voilá!
My first piece for my "private museum storage" was done! I am really happy with how it turned out! And I can see so many variations - different colours instead of the shabby "lace" white. Maybe some Weathered Wood crackle on the outside....well, you know what I mean...the possibilities are endless...but in this case I wanted nothing to visually compete with my fossils. But I love how the tray and the fossils have become one beautiful visual unit! I hope you like my fossil tray too!
Thank you for stopping by and - as always -
hugs and happy crafting!
Claudia
xxx


Such a lovely idea to use the Printers Tray for displaying your fossils, Claudia. One of my favourite places to linger in the Natural History Museum in London and I could easily imagine what you have created fitting in perfectly there. It has a wonderful, understated vintage charm and shows your collection off to perfection. xx
ReplyDeleteAw! Thank you so much, Julie Ann! I love the British Natural History Museum! My husband, my son and I spent a whole day there and enjoyed it so much! I am so happy that you think my tray would fit in there! Mwah! XXX
DeleteWhat a beautiful collection of fossils! You made here the perfect nest for them. Ready for admiring.
ReplyDeleteThanks for the tips. I'm going to make one to display shells and seaglass.
ReplyDelete