
"Roll up, roll up, get your palm read, gaze into the crystal ball or have a tarot reading! She sees all, knows all, please come in and have your future told!"

This fun project was inspired by a book I own called The Fortune Teller and Dreamer's Dictionary by Madame Le Marchand. In this wonderful book it shows you all sorts of different ways to tell fortunes from tarot cards to reading tea leaves. However, it is the wonderful front cover that I particularly love. Instead of traditional imagery on the cover it has a fortune telling witch sitting on a chair gazing into a crystal ball! This gave me a fantastic idea and using a wonderful witch sitting on a chair from Calico Craft Parts, I made Madame Maud's Fabulous Fortune telling tent!
Firstly to make my Madame Maud a tent I used a piece of cardboard to create the back of the tent, you could use a flat piece of mdf. This was firstly painted with white gesso and once dry I used distressed crayons to create the traditional Circus/Fairground red and yellow stripes. I also added some dark brown crayon round the bottom to make it look mud splattered. To add some extra Circus details I researched online for posters. I resized the images to make them smaller, then printed and glued them onto my tent wall. I then made a start on painting some accessories and making the tent curtains.

To make the curtains I used stiff grey board, the type you often get in packaging. I often recycle old packaging to use in crafting especially cardboard. With a pen I drew a rough curtain shape. To make sure I could see Madame Maud I used her as a positioning model.
I painted Maud using acrylic paints. Instead of painting her in traditional witch clothes I painted her in brighter colours with the addition of glittery 'bling' to make her look more Fortune Teller in appearance!
To give the curtains folds I used sculpting paste and a cocktail stick. I applied a thin layer of sculpting past onto the curtain area and using the cocktail stick as a tool I addes fold lines.
Once dry I painted the curtains with red acrylic paint.

Once the paint was dry I glued on some small mdf circles on the back to help to give the scene a raised 3D effect. I also did the same for Madame Maud.
I also added a string of real mini battery operated lights! I wrapped these around the backboard and taped them into place on the back.

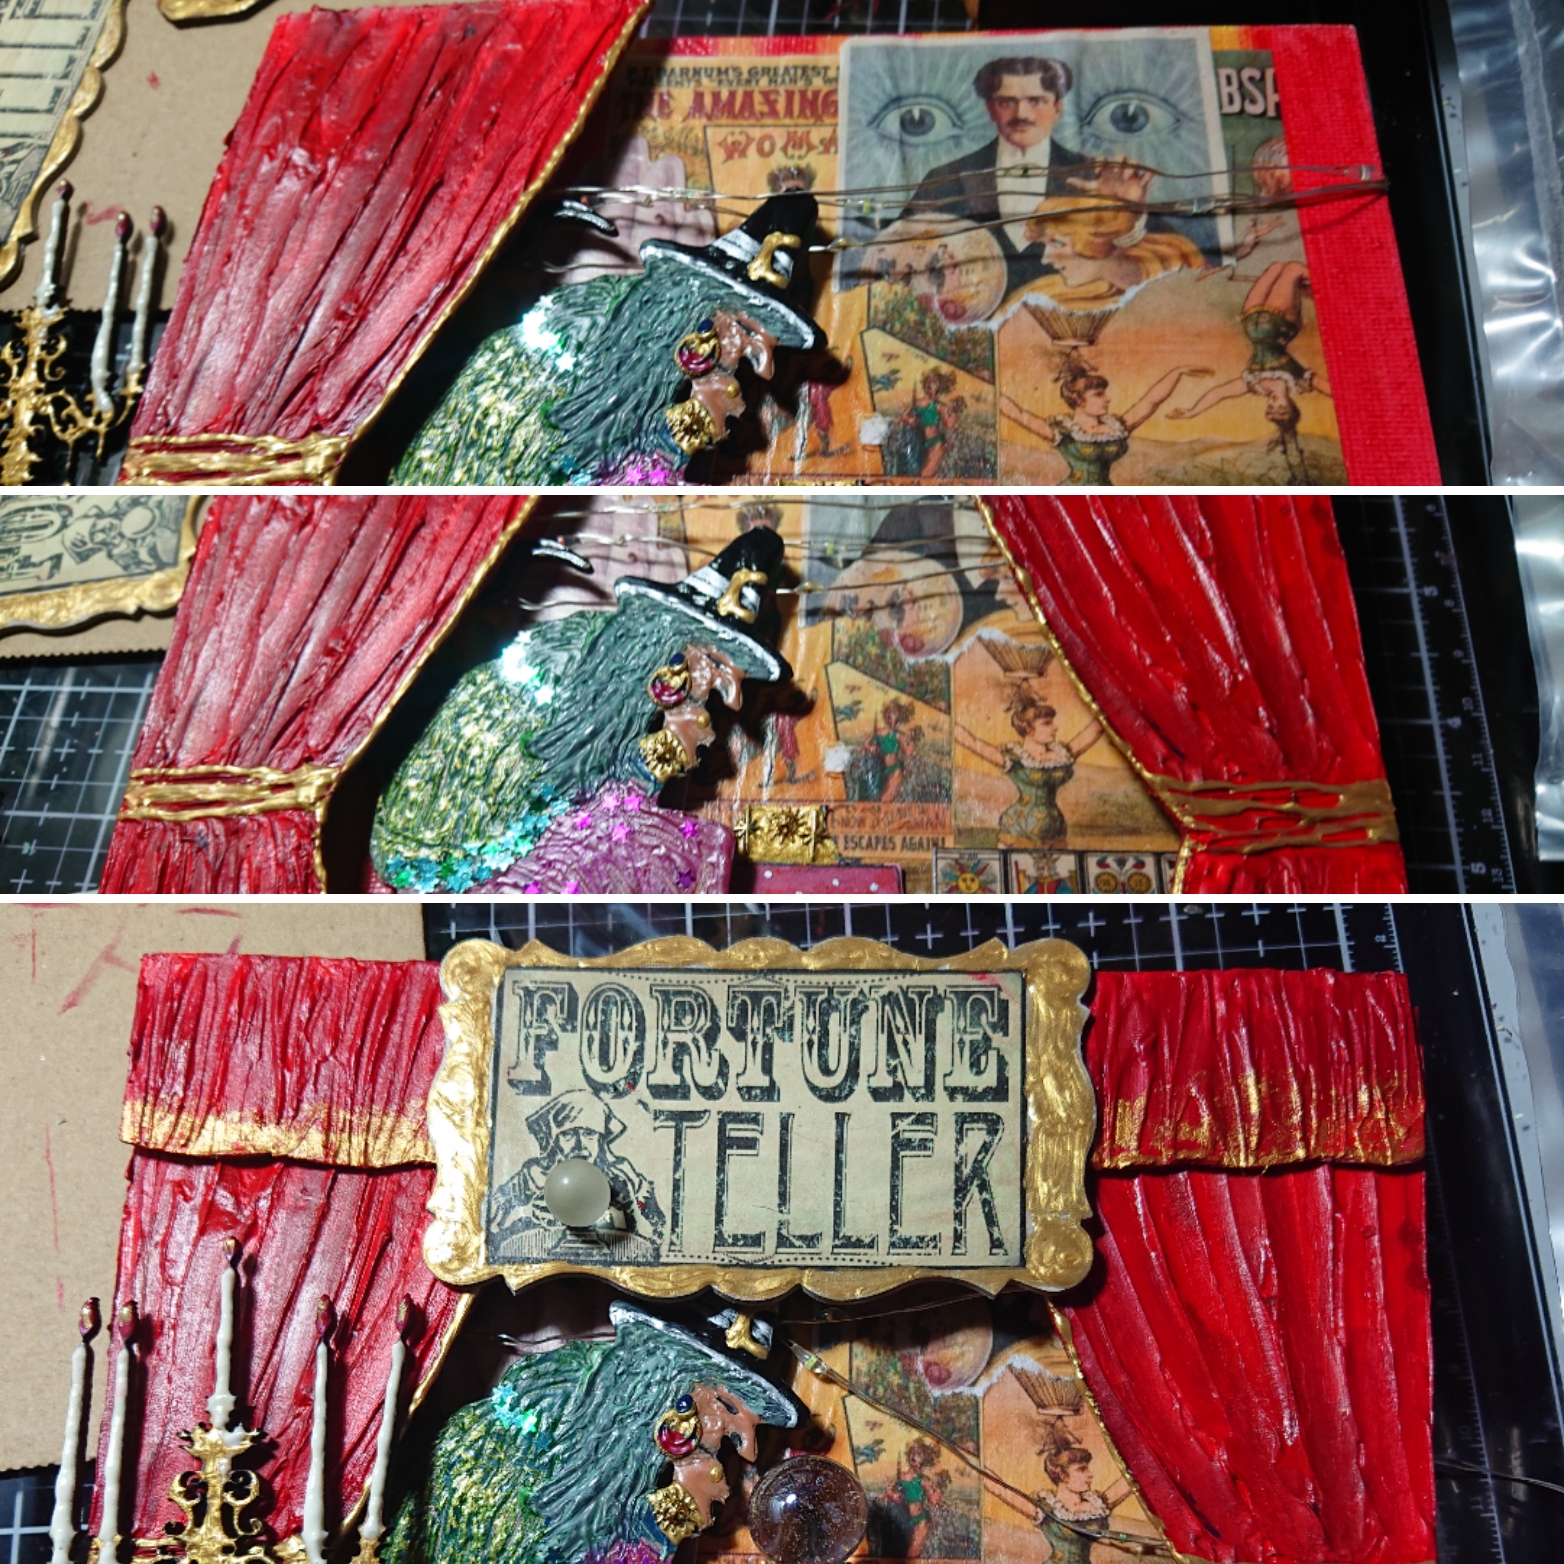
Once Maud and the curtains were glued in place I added lots of other details including a beautiful candelabra, sign, crystal ball and curtain pelmet, made in the same way as the curtains. The crystal ball was a pretty marble gifted to me by my friend Debbie. Thank you Debbie it makes a perfect crystal ball!


Lights on!
Madame Maud is now set up and ready for business!

Will you have your future told?
Well I hope you all enjoyed another 'Kat Make' if you have any questions please do message me and of course if you like it please do let me know. Always nice to hear from you.
MDF shapes used.
https://www.calicocraftparts.co.uk/circle-shape-mini-mdf-wood-plaques.html
https://www.calicocraftparts.co.uk/witch-cat-broomstick-scene-mdf-wood-shape.html
https://www.calicocraftparts.co.uk/candelabra-mdf-wood-shape-style-10.html
Love the tutorial, truly inspirational.
ReplyDeleteThank you so much for your kind words and feedback.
DeleteGreat tutorial, Kat. Wonderful final product!!
ReplyDeleteThank you so much LLyn your lovely comment is much appreciated 😊😊😊😊😊
ReplyDelete