Hi, servus and thanks so much for stopping by! It is my turn again to share a bit of Calico Craft Parts inspiration with you and I hope you will like my little "Morning Glory Box" that I have made as a (part of a) present for a dear friend who will soon be celebrating a big birthday.
Calico Craft Parts used:
- Birch Plywood Box Kit - Rectangle - Size 2
- Morning Glory MDF Wood Shape - Style 45
This is how the Birch Plywood Box Kit looks before assembly.
I have used matte DecoArt Decou-Page (my favourite go-to medium for assembling boxes and other MDF or plywood pieces).
I primed my Morning Glory flower wood shape with a coat of DecoArt Americana Alizarin Crimson acrylic paint, that I dry brushed on to not use any detail.
That was followed by a layer of diluted DecoArt media Titanium White Antiquing Cream that I partially dabbed off again with some kitchen roll.
Then I went in with a wash of DecoArt media Gold Metallic fluid acrylic paint and did the same as with the Antiquing Cream.
I repeated these steps, adding and wiping back layers and washes until I was content with the look.
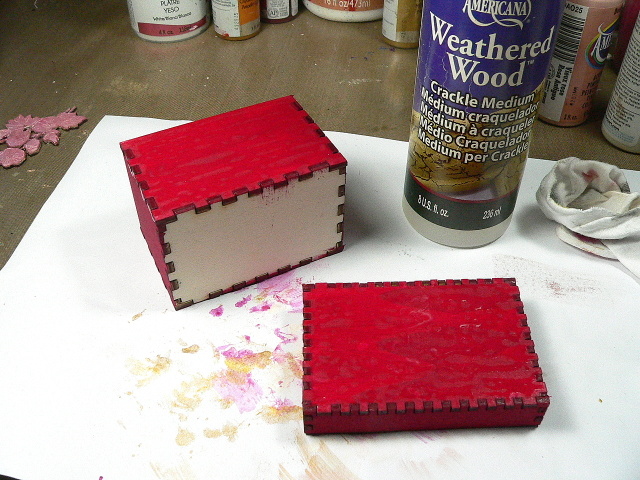
Next I added a base coat of Alizarin Crimson Americana paint to the box and let it dry, before I painted on a thin coat of DecoArt Americana Weathered Wood crackle medium.
As soon as the Weathered Wood had become dry to the touch I lightly brushed on a thin coat of Americana Bleached Sand using a soft wide flat brush.
I let everything air dry and finished my Morning Glory wood shape instead by adding some detail with a thin brush, emphasising the blossoms and leaves with a bit of Alizarin Crimson, Bleached Sand and Dusty Rose acrylic paints.
To make the lovely reds and old rose tones pop, I added a wash of a contrasting colour to the leaves and stems - in this case Sap Green media fluid acrylic paint. I also applied some DecoArt Gold Rush Metallic Lustre around all the edges of the box and also sprinkled some diluted Metallic Gold fluid acrylic paint on the flower wood shape. The box itself was covered with sprinkles of diluted Dusty Rose.
Once all was dry I added a generous layer of DecoArt Americana Triple Thick to the flower woodshape that I had glued in place with matte Decou-Page first.
My box was done - all I had to do was to set it aside to let the Triple Thick air dry. Voilá!
I think it is the perfect box for a small piece of self made jewellery or money to give someone in.
The
Birch Plywood Box Kit comes in
six different sizes - from about six centimetres on its longest side to about twentysix! So whatever you want to put or store in - there's the perfect size for it. See you in two weeks!
Hugs and happy crafting!
Claudia
xxx