Monday, 13 November 2017

"dulijöh" - by Claudia

Servus and hollerei dulijöh!

Yodeling is a very special form of traditional rural singing in Austria, Switzerland and southern Germany and as I am the Austrian chick on the DT I thought it was about time to create a piece that includes not only some yodeling but also a typical subject of Alpine landscape and folklore painting - a roaring stag in front of high mountain tops covered with snow and ice. Hollodero!

To explain how "dulijöh" is pronounced properly I can only give a kind of approach in phonetic spelling, as yodeling is a kind of singing where the singer changes rapidly between chest voice and head voice and there's no way to write that down exactly.
To "yodle" means to utter the syllable "jo" - or variations like jöh, jeh and others.
[doo - lee - yay] may come closest I guess. ;)


Calico Craft Parts used:

- Oval Shape Greyboard Mixed Media Board - Style 22
- Fancy Plaques 3 - Mini MDF Wood Plaques
- Bellowing Stag MDF Wood Deer Shape - Style 11

There are lots of other beautiful deer wood shapes to use for a similar project (or even create a little series of rural landscape wall boards). Click the link to browse Calico Craft Parts deer wood shapes collection.


I started with priming the oval shape greyboard with white DecoArt Acrylic Gesso. I used a wide bristle brush and made sure I created horizontal brush strokes only (as the lines' texture would look more natural with a landscape painting than vertical lines). 

I used a landscape photograph as my model but changed proportions here and there so the mountain top and hills below would be in the right spots (and where's Bob Ross when you would need some help?!)


Well, I used a soft graphite pencil to sketch the landscape and mark the spot where the bellowing stag would be placed later.


I used mixes of DecoArt media fluid acrylics Titanium White, Cobalt Teal Hue, Cobalt Turquoise Hue and Cerulean Blue to paint the sky.


Then I went in with Quinacridone Gold, Burnt Umber, Green Gold, Sap Green and Viridian and painted the mountain and hills. I diluted the paints where needed to create lighter and darker areas from the same colour tone. At that point the texture from the brushed on Gesso started to add beautifully to the painting. 


The trees to the left were painted with short quick vertical brush strokes and various greens. I always mix the colours I have on my palette to get additional tones for more depth. And the good thing is: as the mixes are always done with the already used tones, they all match perfectly and look quite natural.


To finish the background panel off, I painted a thin outline with Burnt Umber (which was also part of the mix that I used to paint the mountain rock).


The bellowing stag was painted using mixes of Titanium White, Quinacridone Gold and Burnt Umber. Carbon black was used to paint the nose and eye.


To make my stag more prominent I added a coat of DecoArt media Gloss Varnish.


I made sure the the colour of the grass to the stag's feet matched the grass on the painted hill!
The dulijöh plaque was primed with a mix of white Gesso and a hint of Burnt Umber. The red outline around the plaque and the dots around the background panel's edge were painted using DecoArt media Cadmium Red Hue.

I used a very fine detail brush to handwrite the dulijöh with diluted Carbon Black fluid acrylic.


Once the painted antlers were dry I added DecoArt media Liquid Glass to them for more dimension. 


The finished plaque and stag were fixed to the background panel with stacked sticky foam pads. 

Et voilá!


Some details:


Djo diri hollerei dulijöh!!! 
So finally it's finished - yay! 


I hope you like my little rural Austrian project! (As I can't yodel at all you're lucky there's no such thing as audible blog posts....giggle...but the Seven Dwarves can....)


Thanks for stopping by!
Dulijöh and hugs and happy crafting! 
Claudia
xxx


Thursday, 9 November 2017

Don't Be A Face In The Crowd- Lesley

Hey people, Lesley here with an altered plaque for you. And its not Halloween......OR Christmas styley!!


I decided to go bright this time......something i struggle with, i'm normally a dark rusty sort of colour girl!
The board was primes with gesso to begin with. And i started building up layers.


Bits of torn up pages from an old book was first......then a printed napkin torn up.


I dropped watercolours on top and added a bit of water and let it dribble about.


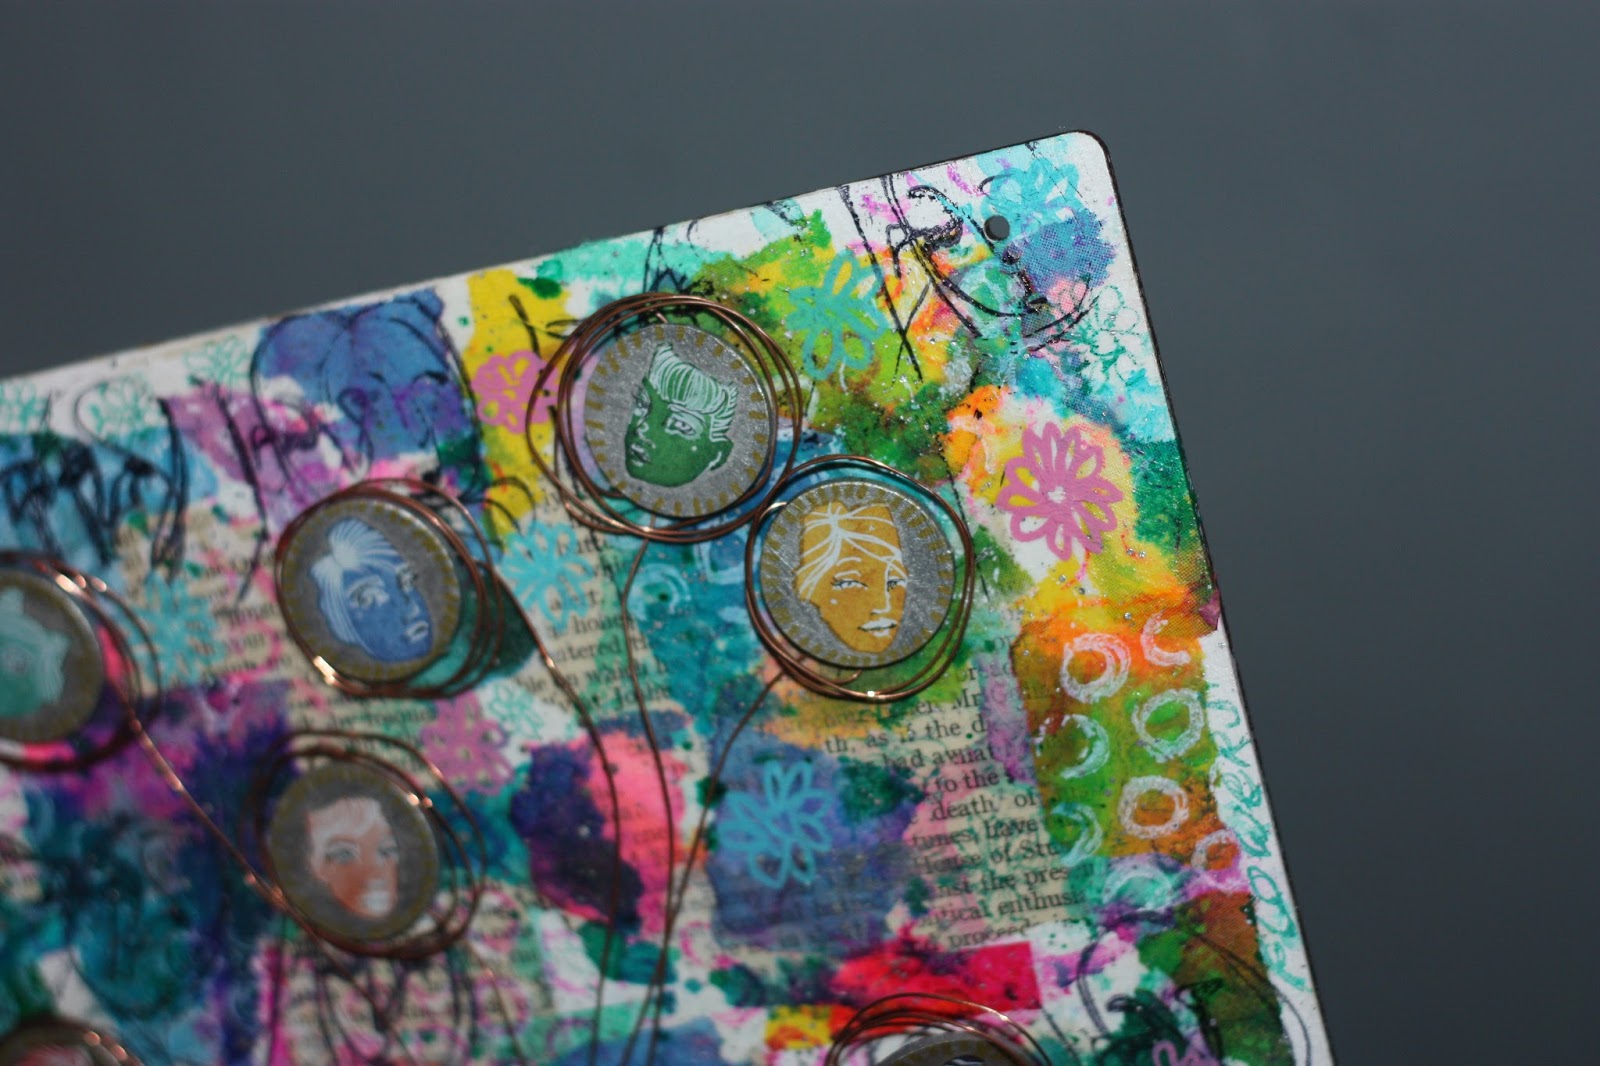
Then i added some stamping. A circle stamp using white ink, and then a face stamp, using black ink.
And then finally, i used an ink pen to doodle little flowers and scribbles.


I painted the mini circles with silver paint and little rub ons of faces on top.
Using wire, i attached the circles to them and then wrapped them around the hand, and glued the arm in place.


I dusted off my Dymo label machine for the wording to finish.


Thanks for reading,
L.xx

Ingredients used
Square birch plaques
Mini MDF wood circles

Monday, 6 November 2017

Follow Your Dream, canvas by Julie Ann

Hello Everyone! It's great to be at Calico Craft Parts sharing a project with you. November is upon us with its dark nights and chilly mornings! It's sad to bid farewell to the autumn colours and those warm, golden days; but every season has its special beauty and I do love winter's colours too. Today I'm sharing a chunky box canvas (125 mm x 125 mm) with Calico Craft Part details and a winter theme.


The canvas is for a friend who lives in the US. The past few months have been very tough for her. Her family home ended up under six feet of water during Hurricane Harvey and she has been in and out of hospital with Sepsis. She is one of the wisest and kindest people I know and I wanted to create something to cheer her up that she could take back with her when she and her family return to their home.


The first step was to take the top layer of some napkin tissue and stick it carefully to the canvas with a fluid matte medium. I wanted to create the idea of branches faintly visible through wintry mist. I chose the word 'Hope' from the napkin because sometimes it's easy to lose all hope when troubles pile up and the way forward is unclear. My plan was to have that word just about visible through the background layers.


This is the effect I wanted to achieve and I was pleased with the result! I applied layers of different blue acrylics and a touch of pale green and pinky tones, blended with glazing liquid. I then added some white tissue with tiny spangles along the bottom to create the effect of snow.


Now it was time to tell my story with miniature MDF pieces. I laid them out on the dry canvas to explore different compositions. At this point I felt my canvas needed something more.


Owls are special and they symbolise a great deal to my friend and to me. I used one of my own MDF miniature houses and brought it to life with gilded Calico Wings, a tiny Calico oak door and my own art work against a background of Japanese paper. There's a tiny silhouette of an owl from a sheet of Calico birds too.


The finishing touch - some tiny pieces of twig fixed with Heavy Gel Medium and sprinkled with a distress glitter. I created the snow-flakes by dipping a cocktail stick into a puddle of white acrylic and dotting randomly over the canvas. I learned many of these techniques in a class I did a couple of years back with Mary Jane Chadbourne.


With these chunky box canvases, I like to extend the design over the edges too. The path to the house, only just visible in the snow is created from a fragment of tea bag.


I hope you enjoyed our winter walk around the canvas I created for my friend, Christine. If we could open the tiny, snow-covered door I wonder what would lie inside? I imagine a place of warmth, friendship and contentment as the gentle snow falls silently and creates wonder. Have a lovely, creative week, whatever the weather where you are.

Calico Craft Parts used in this Project
Sheet of Mini Owls Wood Bird Shapes
Sheet of Mini Angel Wings Wood Shapes
Sheet of tiny MDF Windows and Doors

Thursday, 2 November 2017

Objet D'Art : by Jennie


Hello and welcome! I am so pleased to be sharing with you another beer mat creation today!


I really do love these little mats of creativity and have managed to pack rather a lot into this small space.


A coat of Gesso is all it needs to get started .... and some little pieces of builders mesh and texture paste through a stencil.


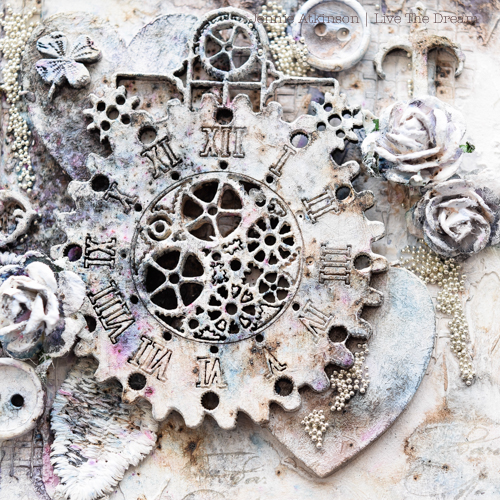
I love going through my little box of Calico Craft Parts pieces to see what I can use. There are some hearts as a base, a mini key, a mini hardware piece, a little flower that had become detached from a larger piece and of course that wonderful steampunk clock (one of my favourite pieces).

I stuck most things down onto the mat but did get some gesso on the hearts before adding the clock as it is very difficult getting a good coverage once everything is stuck down!


A very relaxing time spent painting everything with gesso.


And then in with the colour! This was quite Violet for me! but I love the greys and blues which appear in between. I added a little text stamping in grey ink to fill in some of the gaps.


I couldn't resist going in with a little more Gesso to tone down the Violet! and used the same colours on my word element to maintain the colour hues. The final addition was some swathes of silver micro beads which amazingly stick very well to the textured elements.

A few close ups ......


This really is one of my favourite techniques and I do find that the Calico Craft Parts are just superb for taking the Gesso and water soluble pigments.

As always thank you so much for joining me today and happy crafting!

Jennie x


Calico Craft Parts Used today:


Monday, 30 October 2017

Poisonous Potions and Spitefull Spells - by Claudia

Hi, servus and welcome to my presumably last Halloween project for this year, dear Calico Craft Parts friends!

Have you enjoyed the Halloween crafting as much as I have? Oh, I am sure you have. And as always I started too late...so there are still bunches of Calico's fab Halloween and Autumn wood shapes that I haven't yet used. But somehow after Halloween is before Halloween, isn't it?...maybe I will do some Halloween projects in November still - and by doing so get late again with starting on Christmas projects...lol


I have created this little Halloween mixed media board that was great fun to do. Maybe I will turn it into a book cover...but at the moment I like it as it is. I love to create spells books that might have once belonged to a wicked witch....or maybe a helpful witch (like this potions "book" that I made for Calico Craft Parts last year).

Calico Craft Parts used:

- Rounded Rectangle Greyboard Mixed Media Board - Style 18
- Fancy Plaques 3 - Mini MDF Wood Shapes
- Sheet of Mini MDF Wood Insects - Style 1
- Sheet of Mini MDF Wood Apothecary Bottles - Style 1
- Word Elements - Horror & Halloween
- Skull & Crossbones MDF Wood Shape


The Mixed Media Board was first given a coat of DecoArt Burnt Umber Student Acrylic. Once that was dry I applied a thin coat of DecoArt Weathered Wood with a wide soft flat brush and waited until that was still sticky to the touch. Then I quickly and gently applied a thin coat of DecoArt "primitive" Chalky Finish paint with the same soft wide brush. I set the board aside to dry naturally.


I applied a base coat of white DecoArt media Gesso to the bottles and of "relic" Chalky Finish paint to the skull, word element and mini insects. 


The bottles and insects were then coloured with a detail brush using DecoArt media fluid acrylics Sap Green, Yellow Oxide, Paynes Grey, Quinacridone Gold, Green Gold and a mix of some of them, where needed.

The skull and word element were dry brushed with "primitive" Chalky Finish paint.


I also added a very thin wash of Quinacridone Gold to both.


The bottles had been sealed with DecoArt media Gloss Varnish before I toned them down with DecoArt media Carbon Black Antiquing Cream. 


I only wiped off as much of the Antiquing Cream to leave a kind of dark "shading" around the bottles edges.


I also added a wash of a mix of some of the left overs from the paints on my palette (from painting the insects) to the mixed media board before I sealed that with a coat of DecoArt media Ultra-Matte Varnish. That also helped dull the sheen of the Weathered Wood that still shows through where the cracks are.


I dabbed some Quinacridone Gold around the edges using my fingertip and scraped on a little Green Gold using a palette knife. Once all was dry I toned the whole board down with Carbon Black Antiquing Cream.


I glued all my pieces in place using DecoArt matte Decou-Page. Then I added some DecoArt Triple Thick to the bottles and the wings of the mini insect.


I obviously forgot to take a picture of how I did the mini plaque at the bottom. That was also given a base coat of "primitive" Chalky Finish paint. Then I hand wrote "Vol.31" and drew a thin border on it using a permanent ink fine tip marker. Once that was dry I dabbed on some Quin Gold around the edges and also toned everything down with Carbon Black Antiquing Cream.


I had some left overs from board game chipboard pieces that I used for rivets. I stippled on some DecoArt media Texture Sand Paste and then painted them with Paynes Grey and Quinacridone Gold.


I also love this detail shot because it shows how differently the Weathered Wood turns out when being applied in varying thickness. Where the tiny cracks are, it had almost completely dried (at least that was what I had thought...). They're so cool!


I didn't apply the Triple Thick to the corks - so they look more natural against the glossy finish of the bottles.


Once more the finished piece:


Hugs and Happy Halloween to you all! 
Claudia
xxx


Wednesday, 25 October 2017

Clowns Aren't Scary! - by Lesley

So......over in the shop, we have new stackable boxes in 6 different sizes! Square and rectangle shape!
I have altered one of the rectangle ones for you...........

Now, i know not everyone likes clowns........but this little fella isn't scary, is he?


I started by gluing the box together and painting the entire thing with two coats of red paint.
Liquid glaze was added to the sides and the top of the lid, and then i added some blue paint over the top.


I used the miniature stars as decoration, painting them yellow and blue and adding a coat of glaze on the top.


On the lid, i used one of the large birch stars. It was painted blue and some stars embossed in white, with the clowns head glued on top.


 Some little metal stars were added to the lid to finish off.


Ta for reading,
L.xx

Ingredients used
Birch Plywood rectangle box kit
Mini MDF star shapes
6 pointed star, birch plywood