

Just before Easter in Sweden and Finland there is a tradition for children to dress up as Witches. Very similar to Halloween's trick or treating the children go from door to door wishing their neighbours a happy Easter and handing out handmade cards in return for sweets and treats. The tradition of dressing as Witches goes back to the 19th century though during this time it was generally done by teenagers and young adults.The reason behind this tradition is based on an ancient scandanavian legend. Around the time of Maundy Thursday, the Thursday before Good Friday, it was said that Witches would ride off on their brooms to the island of Blåkulla. Where it was reported they would gather together, feast and dance with the Devil! Villagers worried by this event of 'Witches Night' would lock away brooms and their cattle for fear of witches using them for transport. They also worried that witches would also drink their milk! As a deterant they would also light bonfires to keep the witches away! Even now many centuries later villages often organise bonfires and firework displays over Easter weekend to commemorate this tradition.
To make your Easter Witch decoration you will need.
https://www.calicocraftparts.co.uk/witch-on-broomstick-mdf-wood-shape-style-2.html
https://www.calicocraftparts.co.uk/oval-shape-greyboard-mixed-media-board-style-22.html
https://www.calicocraftparts.co.uk/sheet-of-mini-rabbits-mdf-wood-animal-shapes.html
https://www.calicocraftparts.co.uk/short-haired-cat-sitting-mdf-wood-shape-style-8.html
https://www.calicocraftparts.co.uk/teacup-saucer-mdf-mixed-media-board.html
https://www.calicocraftparts.co.uk/round-shape-greyboard-mixed-media-board-style-21.html
Assorted acrylic paints, metallic paints and brushes.
Sculpting paste.
Liquid pearls or flat backed gemstones.
Either cotton lace or die cut paper lace.
Tacky glue and super glue.
Paper scissors and pencil.
Assortment of marker pens.
Assortment of patterned paper.
Little flower sequins or paper flowers.
String or ribbon for hanging.

Firstly I painted all my mdf shapes with a basecoat of white acrylic paint. I used a matt white.
For my Witches clothes I drew around my witch shape onto several pieces of patterned paper. Using a pair of scissors I cut out a paper hat and skirt.
For the witches face I used pens to draw her features, adding rosey cheeks. After all she is going to be riding her broom in the fresh air!

I then glued on the Witches paper hat and skirt pieces using tacky glue. Using my black pen I added additional hair over the brim of the now paper covered hat.
To add some texture I sculpted her cloak and broom using texture paste. I allowed this to dry for 24 hours. Before I applied the paste I did draw in the broom with a pen this helped to give me a guide on where I wanted the bristles.
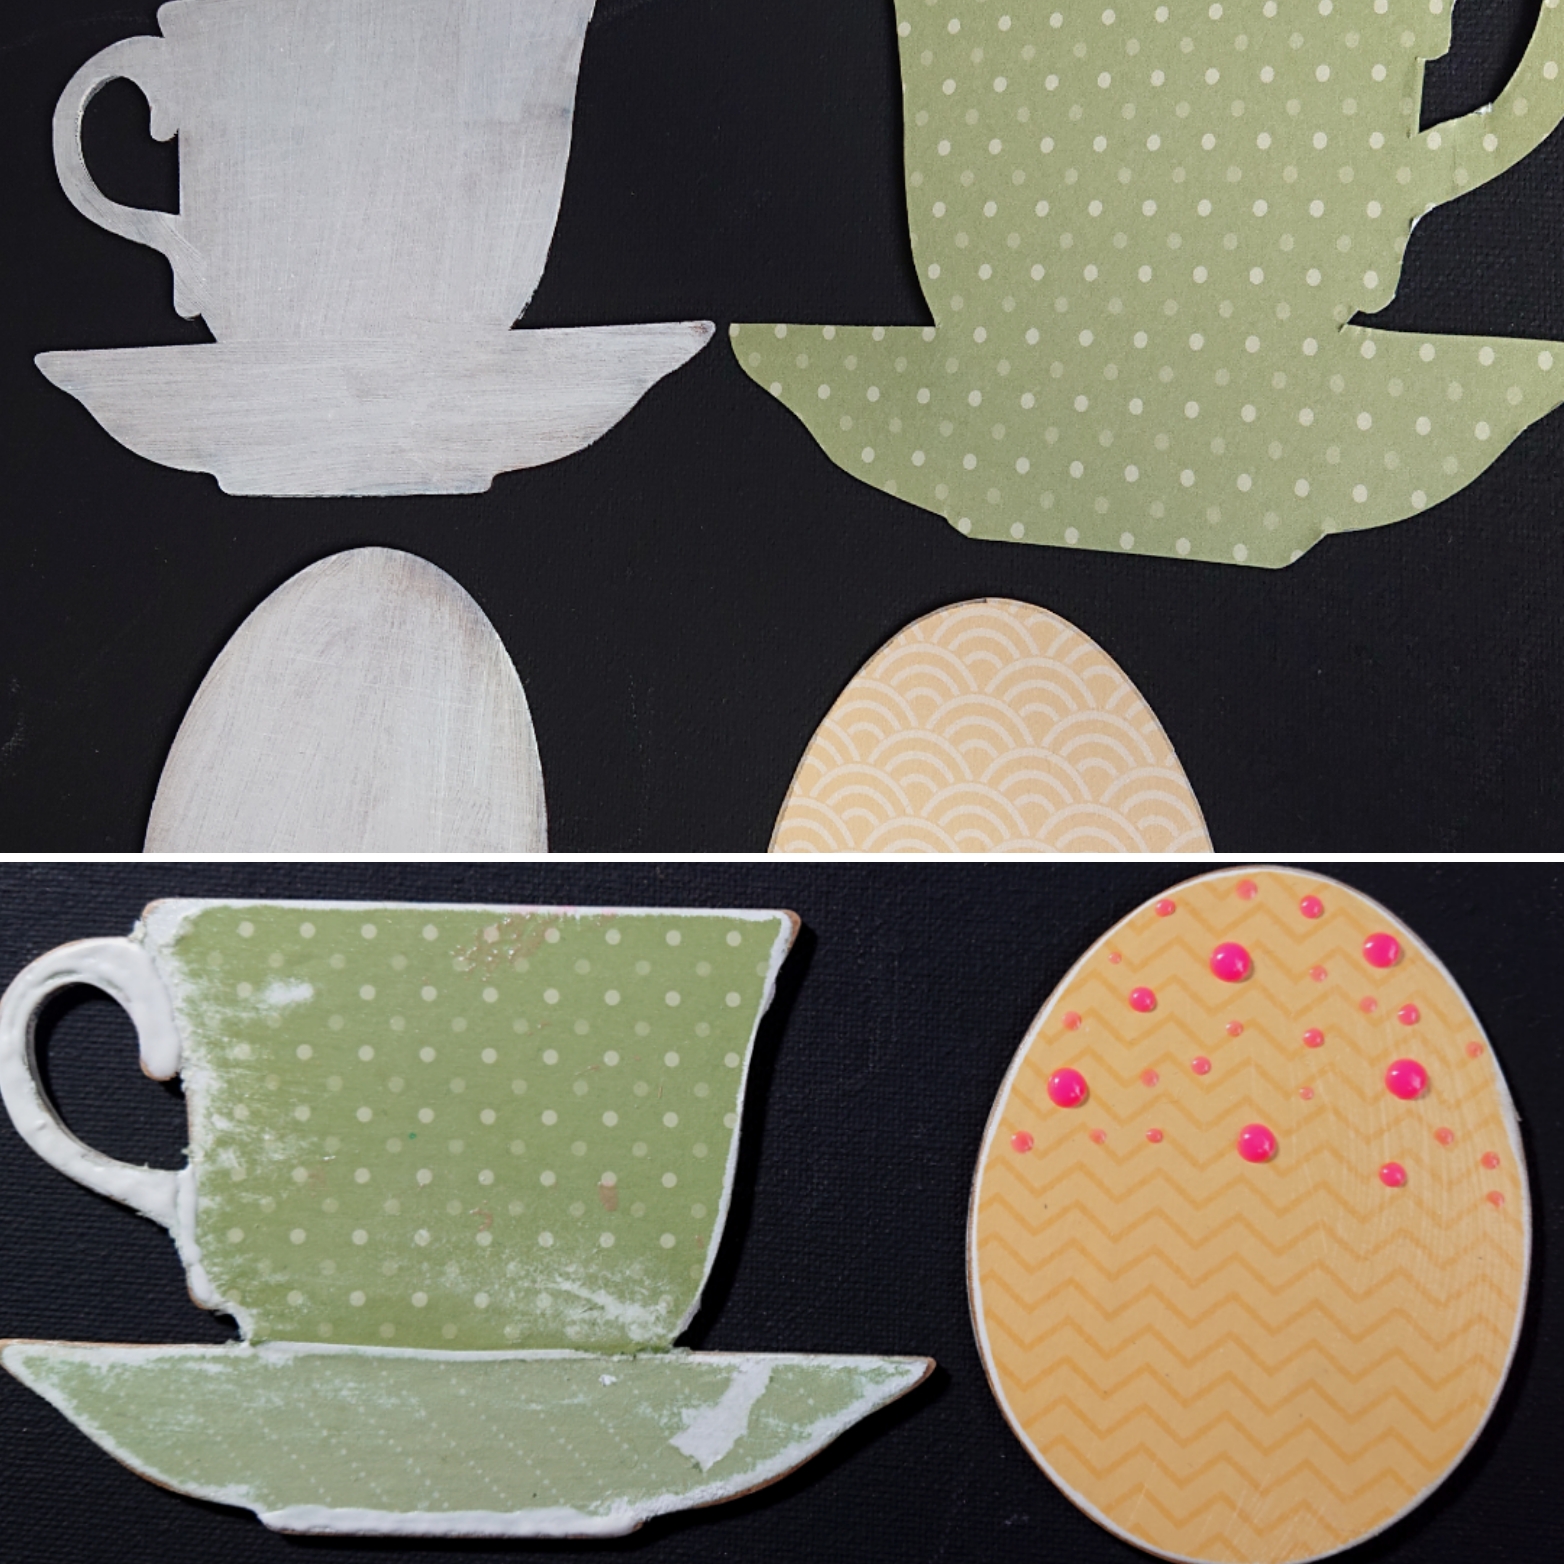
To decorate the teacup and egg I used paper. Using the same method as the witch I drew around the whole mdf shape and cut out and glued with tacky glue.
To add chipped markings on my tea cup I used texture paste and white acrylic paint. I then added spots to the top part of my Egg using liquid pearls. You could use gems or apply spots with a pen.

For the grassy background I painted the round mixed media board with a mixture of metallic green paints making grass like marks with an old paintbrush.
To give the MDF bunnies a bit more texture I used texture paste again. Leaving to dry for 24 hours before painting with a gloss white acrylic paint. To give my bunnies more character I added little pink ears and noses.

I then positioned and glued on all my MDF shapes including my Easter Witch and her faithful companion using super glue. The cat was painted with acrylic paints and I also painted the witches cloak with some metallic blue paint to add a bit of bling!
I then added extra details such a white highlights to my Witches hair, some paper lace trimmings, and pretty flower sequins on the grassy background.
Then to finished off I threaded a length of string so I can hang up my Easter Witch for Easter!

 |
| Well I hope you enjoyed another 'Kat make'. I hope they inspire you to have a go at creating your own. If you have any questions please get in touch I am always happy to help if I can. Another 'Kat make' coming soon. Until then happy making, Kat 😊 |
An Amazing Witch!
ReplyDeleteThis comment has been removed by the author.
ReplyDeleteI have been contacted by a few of you to say you have had trouble leaving comments. Thank you for letting me know it's nice to know you have taken an interest in my tutorials. I shall look in to it and try and work out what the problem is. Kat 😊
ReplyDeletegreat project Kat. xx
ReplyDelete