Hi guys, I'm here again for
Calico Craft Parts with my second GDT spot for this month,
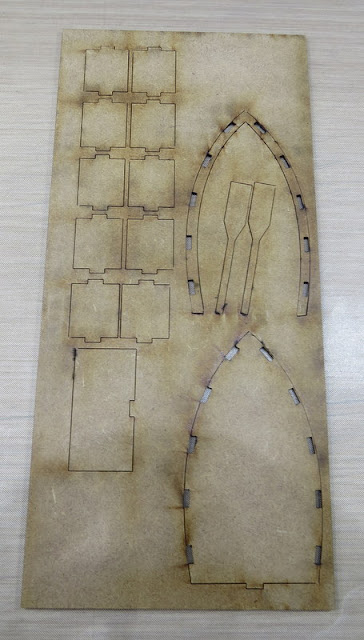
This time I couldn't resist this awesome MDF boat, it comes in a few sizes with or with out a shelf too,
As you can see I chose with out, after taking the pieces out, I glued them together, when set I then painted it inside and out with some white Gesso, leave aside to dry,
Meanwhile take the section of the left over MDF and draw around the shape onto a piece of card, here I drew around the outer edge, but I should have drawn around the inner, so do that, he he
You should have a shape like this, then fussy cut it out,
Next score some lines along the length of the boat shape, here I went every 1cm,
but you could do less or more if you wish, this balanced nicely though,
Fold them on the crease lines so the edges are pronounced,
Take an ink pad and holding it lightly go down the length of the scored lines so the ink catches onto the card here and there,
Then go over the same way with another colour of Ink pad, this time I used an oxide ink pad and it did spread a little easier, to finish it off I lightly swiped here and there with this ink too,
Hopefully you get a worn wood look to the card,
(I got the idea for this off Tracy off the intenet who has fabulous tutorials and ideas),
Now for the next fun bit, here I used the Calico craft parts mini Seagulls and Mini Nautical style 2 wood shapes, these I applied white gesso as before then when dry I went over with some Texture paste, love this stuff, it gives feather effect to the birds and a rusted effect to the anchors,
For the Anchors when dry I then went over with some wax in Old Silver, you can see another mini piece from the sets which I gave the wax treatment too to,
Going back to the boat I painted the whole boat with a light greyish blue to keep in with the colour theme,
So fun part 3!!
I glued the piece of card I had created to look like worn wood to the base of my boat,
I decided to make my boat part of a scene, this could have been created as a stand alone scene which would look just as fabulous or as I decided to do in a exploding box so it can be given as a gift,
I made the base of my scene, with watercolour card stock, which I painted with yellows and beiges for the sand, and a couple of blues and greens for the sea, when dry I glued this in place on my box,
Next I built up around it, by gluing one of the Anchors in front of the boat, a log effect piece I have in my stash to one side onto which I added the finished seagull which I painted over with a little yellow acrylic paint for it's beak and white for the feathers, some shells and other bits, then I added some mini Art Stones to finish it off,
Now for the rest of the box, I downloaded some digi print papers and glued them in place, these kept to the seaside theme,
On the back piece I glued some more of the seagulls, looking like the're flying around the coast line looking for fish, (not a chip in sight) Lol
I created a tag out of the papers and simply added the oars and a shipswheel on the bottom, I kept this just coloured in the white gesso so the natural wood bits showed through, again for a weathered look, they would look fab coloured in bright colours too if that's more your thing!!
Here you can see the Binnoculars I had coloured with the wax in the previous picture, I painted the beach hut in light colours again going for a weathered look, and added one of the adorable little Anchors to the top!!
I love this compass styled one, which I painted with colour then went over with white to soften it, it went brilliant with the background images,
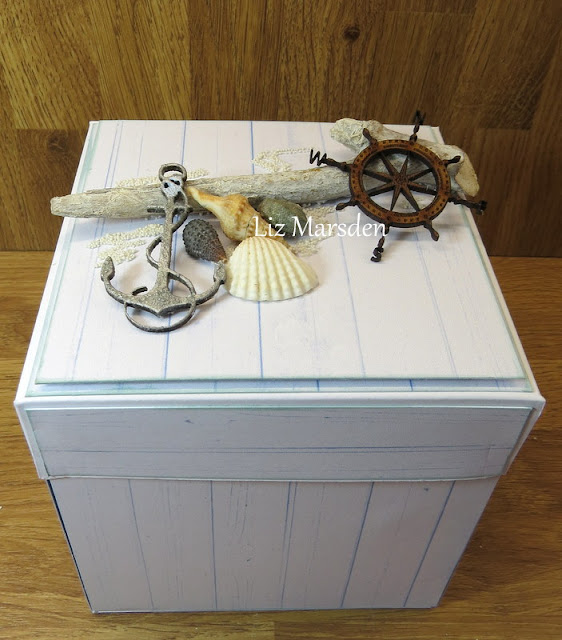
So of course a box has to have a lid!! so I used the same papers for this as inside just using the wood look ones,
Creating another tiny scene of the top, Again using one of the fantastic Anchors, another piece of my wood embellishment, shells and mini art stones, and another of the Calico Craft Parts compass but this time I left that in its natural colour to give a little pop to the neautral colours of the others,
Well I hope this has inspired you , do check out all the fabulous products Calico Craft Parts sell,
Now for some exciting news!!
I have been asked to be a full time member of the design team for
Calico Craft Parts,
so watch this space for more projects from me, Lol
Calico Craft Parts used:
Check out the fabulous projects on the Calico Craft Parts Blog
Happy Crafting!!


No comments:
Post a Comment