Thursday, 30 January 2020

The Handy-man House - by Lesley

I'm currently doing a bit of DIY in my house...….this led me to make a little rusty handyman house...


As usual, the pieces were primed, and then I dry brushed on dark colours.


I used bits from the pipework sheet to decorate the sides and back.


And used the tiny pieces for the roof. These were covered with copper texture paste.


I filled the house with rusty bits and bobs from my stash.


Thanks for reading.
L. x

Ingredients used
Framed MDF tall house kit
MDF pipework maze

Saturday, 25 January 2020

Mixed media canvas - Dream by Kerstin

Hello, creative friends!

I was sick for a long time and am now slowly recovering, so today I dream myself 
with my mixed media canvas collage to a sunny, 
relaxed place on the palm beach with soothing sounds of the sea in my ears.

   
I found this very relaxing photo collage in an old dog magazine and thought,
 it was so funny that I had to use it on a canvas.

After cutting it out I glued it to stable cardboard and only needed
 to attach two eyelets at the right and left to create the hammock.

For the holding bars of the hammock I used two paper straws.


 some close up's


I love to create with crackle medium 'Weathered Wood' from DecoArt
as it always creates a very special effect on the wooden shapes.


After the crackle medium has dried you can influence the forming of the crackle.
The thicker you apply the paint on top of it, the larger the cracks become... 

...like here in the middle of the "Octopussy"


 On the porthole the cracks are very narrow and small.
And for a very old weathered look 
I once again went in with my beloved sandpaper.


Using two colours at the same time on the brush on top of the crackle medium
 

Calico Craft Parts used: 


Ships Wheel Style 2

Ships Porthole

Leaning Palm Tree

MDF Letters & Numbers - Steampipe Font

Sheet of Mini MDF Wood Cogs - Style 11


Thanks for your visit!


Happy crafting!

Kerstin

Thursday, 23 January 2020

Beer mat by Magda

Hello crafty friends!

I wanted to show you something big, the project of my lifetime etc. Unfortunately it was a total disaster. Hopefully next time I'll be back with something bigger and more complicated than today's project.

Here it is, a beer / bear mat.
I used a fantastic MDF Square Beer Mat. So many ways of using it! Not only as a beer mat but for greeting cards, art journals and home decorations. I left it as a beer mat but it can be changed for a wall hanger. Only two holes and a string, so easy.


Magda :)

Monday, 20 January 2020

An Unfortunate Ending - by Claudia

Hi, servus and welcome to my "every other Monday" post and project!

Don't ask me what exactly made the idea for this project spark in my head - must have been something about huntsmen, a species among humans that - at least from my point of view - sees wildlife animals differently and that feels some kind of (for me irreproducible) joy when displaying and looking at their trophies on their walls...(guess it might have been the documentary on some Austrian hunting lodges that once were the playgrounds for old Austrian nobility and that had and still have walls plastered with mounted antlers and deer heads). I also remember I had a colleague back at school who was a huntsman and who once told a story about an old three-legged cat from their neighbours he accidentally shot and he told it as if it was some veeeery funny story to tell (well, I guess amongst hunters it is a funny story...which tells a lot about this particular kind of hunters in fact)....

...so maybe with that in mind my make isn't that weird anymore (I hope). The subconscious definitely took over with this one...


I imagined how the wall of a hunter might look if he were obsessed with hunting whatever animal would meet his path (for more funny stories to tell)....the neighbours' canary for example, a beautiful butterfly in his own garden and - of course - a deer from the woods nearby...


I have to admit though that I love looking at all the butterfly and beetle collections at the Natural History Museum, but at least it wasn't me who killed these specimen to display them on my walls. And I also have to admit that I do have three beetles in a shadow box at home that were souvenirs from a shop in Venice (hm....what does that tell about me I wonder...?). I think I am mainly pushed off by the visible joy of huntsmen when they talk about their hunts (I'm not talking about forest rangers and hunters of course who shoot deer and other animals because of legitimate reasons).

I love and admire the beauty of butterflies, beetles and even deer antlers or skulls being displayed and mounted thoroughly...but to me these are a means to get a close, long look to inhale and admire the wonders of evolution and nature. They're no trophies - and that makes a difference.

I was given some gorgeous Maja design papers by my lovely friend Kerstin and used one of these as wall paper to mount the trophies on.

Calico Craft Parts used: 

- Sheet of Mini Deer & Antlers - MDF Wood Animal Shapes - Style 3
- Rounded Rectangle Shape - MDF Mixed Media Board (150mm x 75mm)
- Sheet of Mini MDF Wood Wings - Style 4
- Sheet of Mini MDF Wood Butterflies - Style 6
- Fancy Plaques - Mini MDF Wood Shapes 
- Oval Shape - Mini MDF Wood Shapes


I used DecoArt matte Decou-Page to glue the (slightly larger cut to size) paper and decorative strip to the Mixed Media Board and then sanded off the excess. Then I inked the edges with brown archival stamping ink and a blending foam. The bird and butterly wings and antlers were glued onto the Mini MDF Wood Shapes and set aside to dry. Then I dry brushed them with DecoArt media white Gesso.


I painted the butterfly wings with hints of DecoArt Americana Primary Red and a wash of media Cobalt Turquoise Hue fluid acrylic, on the Canary wings I used media fluid acrylic Hansa Yellow Medium and on the antlers a thin wash of premium Burnt Umber acrylic paint that I also used directly from the tube to paint the plaques.


The antlers were then covered by a generous coat of DecoArt media Liquid Glass and set aside to have them dry naturally.


I used diluted DecoArt media Antiquing Cream Raw Umber to tone down the painted wings and stamped the specimens' numbers on the "wallpaper" in black archival ink before I glued everything in place.

The word sticker was shaded using my Stabilo All black aquarellable pencil and a water loaded detail brush.


Done!


I hope my slightly grim sense of humour doesn't push anyone off (well, if it pushes off a certain kind of hunters I am totally fine with that...lol). 

Hugs and happy crafting!
Claudia
xxx


Thursday, 16 January 2020

Altered Tea Caddy - by Lesley

Hi everyone. Lesley here with my first post of the year. 
I've had this tea caddy for a while, don't know why I've waited this long to use it.....its fab! Such a brilliant size!
All sides were prime with gesso. And then I picked some colours and dry brushed them on.


I stamped along the sides and added a lightbulb on the top!


I used some of the mini stars on the sides.


The image of the girl was a stamp from my stash, which I stamped onto tissue paper and glued to the front of the caddy. She deserved a mini crown!


Thanks for reading,
L.x

Ingredients used

Monday, 13 January 2020

Matryoshka Storage Door Hanging by Julie Ann

Hello and Welcome to Calico Craft Parts Blog. Today in my first project for January, I've created a piece of storage that could stand on the art room table or hang from a hook.


Ever since I was a little girl I've seen figures and faces in shapes and as soon as I saw the new Door Hanger Box Kits at Calico they just said Matryoshka doll to me!


These box kits can be hooked over a door handle and I did fix the face on with a brad, making  my little Russian Baboshka's head movable...


but the temptation to give her a lacy head-scarf was too great. Without that detail, though, you could have three possibilities: table, hook or door.


I decorated my doll with a combination of Washi tapes, napkin tissues and stencils.


The golden accents reminded me of the sunlight glittering on the Moscow cupolas  against the blue December skies when I visited Russia back in 1987!


Instead of a collection of nesting dolls, my Matryoshka will be storing brushes.


And here she is among some Calico Craft Parts friends in my studio.


Thank you for dropping by today and Happy Crafting in 2020!

Saturday, 11 January 2020

Altered Book - Winter Night by Kerstin

Welcome, creative friends!

I was inspired to create an altered book in vintage style.

I found a very beautiful tissue in my stuff and 
thought that it was the perfect background and addition for our latest winter lantern designs.


some close up's


Calico Craft Parts used: 

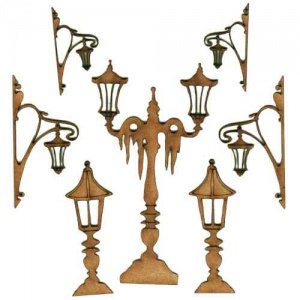
Sheet of Mini MDF Street Lamps


Thanks for your visit!

Happy crafting!

Kerstin

Thursday, 9 January 2020

Dog plaque by Magda

Hello crafty friends!

Do you make or only buy Christmas presents for your family and friends? I've made this plaque for my friend. We both have Hungarian Vizslas. I know that in Calico Craft Parts shop that dog shape is called Weimaraner, which is a little heavier than Vizsla, but it doesn't matter. Orange and brown acrylic paints made it a perfect ginger dog - Vizsla.

For this project I used: