Monday 30 November 2015

Victorian ornaments by Astrid

Hello all, and here we are on the last day of November....

Well perfect timing of course to share some more Christmas ideas.

Those who know me, know that I love vintage, and for Christmas, I adore imagery and styles of the Victorian era, so here are some projects inspired by that....


I made a whole series of Christmas Snowflake Wood-shape ornaments. I used shape 6, shape 7 and shape 8. I made 7 ornaments in all. While I was at it I also altered one of the adorable little 3D Mdf tree wood kits, style 3.


I started by painting all of my pieces with Decoart Americana Chalky finish paint in the colour Whisper. I could have used gesso, but the paint covered them just perfectly. Next I added some Decoart Weathered Wood crackle medium and when that was touch dry a layer of Decoart Media Crackle paint.

The crackle appeared just about immediately. When dry I went over it all with a thin coat of Decoart Media Fluid Acrylic in Titan Buff and then highlighted the cracks with Decoart Raw Umber Antiquing cream, and voila, crackle that almost looks like tree bark I think.


One thing that is really important, - if you want your crackle to stay put, you must seal your project!!! I used Decoart Ultra Matte Varnish for that on these pieces.


The tree got the same treatment, and landed up looking like this

As it is a little kit, it arrives in two parts. All you need to do is slide them together (do this before altering them). I just adore the tiny little ornaments in the tree, so, so cleverly done. I decided to give the little ornaments the glitter treatment for some Christmassy sparkle. 

Anyway, this is how the ornaments were finished:

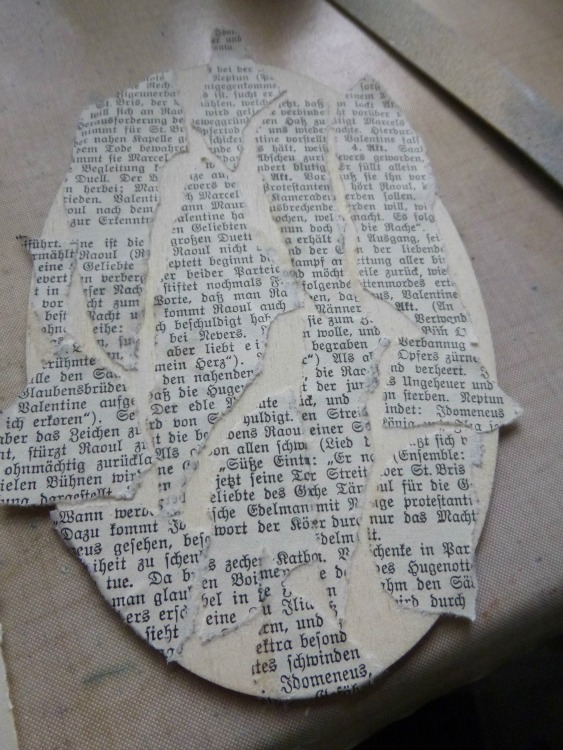
I covered the back of them with scrap book papers, and then added a vintage image cut with a small circle die to the centre of each. Each image was edges with some Antique Silver embossing powder. (This and several of the other images are from a paper line designed by me, which will soon be available. You will be able to find details on my blog in the next few days).
The finishing touches were the addition of a little snowflake from the mini snowflake shapes, all of them are from style 3, plus a bit of beaded trim at the bottom and a little cord for hanging at the top. Below a few more close ups:
Another image from one of my papers.

This one is from last year's Victorian Christmas line by Papermania. On this particular design you can see the backing paper a bit better.


This one was finished with one of the gorgeous Ivy Leaf Woodshapes

And below the final 3 ornaments.

Well, hope you like my little sojourn into Victorian Christmas crafting. If you scroll back you can see some amazing further samples of how all the wonderful Christmas Craft parts can be used. They offer so many different possibilities for whatever style you fancy.

Thanks for your visit today and I hope you have lots of fun with your own yule tide crafting!!!

Saturday 28 November 2015

Wood veneered Christmas card: by Zuzu

 
Hi there. I have been using more of the thin sheets of wood veneer I used last time on the canvas. As a rule, I buy my yuletide cards because I hate inventing stress and pressure when there's enough in the world as it is. how many times do you see a crafting friend typing about how they still have loads of cards to make and not much time and "oh how stressful it is"? its a choice. if you love it then make them. if it stresses you out then just buy some. so simple.
Because I have a nice selection of "posh" cards bought and at the ready, it means any I do make I make for the joy of it. And if I do make any, its usually for the "special" cards for folks like my son, parents etc.
This card was made by staining the wood sheet with paints and sprays and adding some snow-tex on the bottom. I painted the Calico Craft Parts (holly and bird), then it was a simple case of layering all the papers and shapes up.

Calico Craft Parts used:

Bird winter Wood Shape.
Holly style 4 leaf and twig shape.

Thanks for visiting
Z x

Thursday 26 November 2015

Christmas Norman and his pal Eric by Lesley

Last month, i introduced you to Norman. He's here if you want to go say hey.

This week.....he's back! And he has a friend in tow with him in the shape of a moose. And goes by the name of Eric.


For Norman, i began with slotting the star together and then painting it red. I made a hole in the base of the skull and then sawed off the knobbly bit from the top of the star and then glued the skull on. The skull was painted black and then some white paint squished on top. A layer of crackle glaze and a touch more black and white paint rubbed into the cracks, 


Seeing as its winter.......i felt the need to give Norman a woolly hat!


This was stuffed with wadding which i pinched out of a cuddly toy belonging to the twins! I tied the top together with some wool and added a rusty bell and a little holly leaf painted green.


The actual star was coated with a medium that already had the glitter chunks in it,


Eric was done in the same way as Norman, but i used a blob of clay to secure his head to the star base. 


He was originally a boring brown colour so i tarted him up with some paint. 


Eric's star was given some silvery glittery treatment. And i gave him a tinsel scarf with a couple of small holly leaves.


These 3D stars are ideal as hanging ornaments for your tree etc.........but also brilliant as a free-standing ornament! 
Merry Christmas from Norman and Eric!
Thanks for reading,
L.x

Ingredients used


Monday 23 November 2015

Crackled Christmas Plaques - by Alison

Hello everyone, Alison here from Words and Pictures.  Last time I shared some 3D filigree verdigris baubles with you, and today I'm back with some of the two-dimensional versions.  These are perfect to use as a feature on Christmas cards - and you'd still be able to send them as a flat letter through the post.


I still seem to be a reluctant card-maker so I've used mine on three of the Birch Plywood Plaques, and of course I've been at the crackle again!


I started by gluing book pages to the solid baubles.  Once the glue is dry, I usually press down around the edges and then use an emery board to file away the unwanted paper.  These are both the Plain Bauble - Style 1.


I also glued some book page pieces to my Oval Plaque (and you can find the Rectangle Plaques here, as well as many other shapes and styles)...


... before painting all three plaques with various shades of DecoArt paint.  I don't remember all the colours now, but the Rustic Chalky Finish and Media Fluid Acrylic Prussian Blue Hue are both definitely in there!  I put some of the Americana Chalk Crackle Medium over the top and left it to dry.


The top layer is DecoArt Chalky Finish in Lace, a soft warm white which I think looks great with the warm brown of the Calico Craft Parts.  I've added very light washes of Cobalt Blue Hue and Dioxazine Purple Fluid Acrylics for a bluesy look to echo the colour under the crackles.


And because all that paint had covered up almost all sign of the book pages underneath (though they're still adding a lovely textural roughness) I added some book text stamping to get back some of that background detailing.


I gave the book page baubles a wash of white, and added some gentle inking around the edges for extra dimension.


But I was also keen to have some "naked" Craft Parts - so on each of the book page baubles there's one of the fantastic snowflakes from the Mini Christmas Shapes - Snowflakes 1 set.  These are so intricate and delicate - and you get 16 snowflakes in various styles in one sheet.


I "hung" two of the filigree baubles on my plaques too... the Snowflake Bauble Style 2...


... and the Snowflake Bauble Style 4.  Anyone who saw my November Tim tag over at Words and Pictures will know I was pretty taken with the gilding technique, and I couldn't resist adding some here too.


I love it on the "naked" craft parts... especially on the bauble hanging on this very sweet raggedy little tree, the Christmas Tree Style 1.


And I think it looks great around the edges...


... adding a look of gilded antiquity to the crackled, weathered plaques.


I happened upon these fabulous Alphabet Letters - Copperplate Gothic sheets the last time I was browsing on the Calico Craft Parts website... can't believe I hadn't seen them before.


I pressed out the letters for my chosen words (and I've still got lots left to play with - very impressed with all the extra "e"s they provide - that's so intelligent!)...


... and gave those a touch of gilding too.


It's just a hint, but I love how it catches the light and draws the eye's attention.


I drew on some "thread" to hang the baubles up.


And of course I needed some earthy inking around the edges, toning in with the colour of the Craft Parts themselves.


And I'm quietly pleased with the finished effect.


So there are my three Christmas plaques for you.  I hope you like them.  If you're tempted into a bit of Christmas Craft Parts shopping, you just have to click on any of the links in the text and you'll be taken straight to the relevant bit of the Calico Craft Parts website.

Thanks so much for stopping by today, and I'll see you again soon.

Alison xx
Words and Pictures

Saturday 21 November 2015

Pretty little things....3 Festive Ornaments - By Kassa Hayselden


Hi there lovelies - I'm back in with my 2nd and final guest dt piece, thanks everyone for having me and thanks also for everyone who popped by to take a peep at my last post and for the beautiful words so many of you left - if you want to spy my last piece press this link to take you back - See Snowflake Angel HERE


I really, really had tremendous fun creating these Christmas Baubles, I think I'll keep one and use the other two for gifts!

And they were simple to create too!

You can see below I took the 3 mdf wood shaped baubles (large) and covered them with some leftover scraps of pre-painted dry wax deli-paper (adhered with matte medium on both the deli paper and the mdf wood bauble - stops air bubbles forming) Whiten the bauble edges with gesso.


Then I gesso the fronts of the mdf shapes - approx 3 cover light coats.

You can spy....


Once the deli paper dries on the baubles I coat them with an even but fairly thick coat of DecoArt 'One Step Crackle', I then placed my desired centre-piece 'gesso'd' mdf shape into the wet crackle to adhere in place - leave to dry and let it work its crackle lush-magic eeeek! (the piccys below do have the mdf shapes 'gesso'd' in the centres but as you can see the gesso simply soaks into the gesso - hence 3 thin coats)

Note* - bits like the bell, rusty wire and ribbons etc. are painted/attached to the mdf before placing in the wet crackle - and I even 3-d'd the Angel wings and Reindeer antlers! - to adhere these without an ugly step joint I sanded off the join edge with a nail file to a nice soft angle-finished edge - keep filing and fitting till you get the perfect join!


Yum Yum Yum - crackles at their very best when dry- lush or what!


To get the 'soft, weathered ,textured' crackles on the mdf shapes coat with a thin and even layer of DecoArt Americana 'Weathered Wood' crackle medium, when dry apply a thin coat of acrylic paint (contrasting colours make the cracks stand out more) I used DecoArt Americana 'Chalky Finish' paint in 'Everlasting' as I wanted a matte chalky finish so I could colour in the shapes with my colouring pencils once dry.

To create the soft dusty icy feel over the top of the crackle in the baubles and to fill in the lovely large crackles, paint over the crackle with the chalky paint or gesso, wipe off the excess with a wet wipe, this leaves paint in the cracks eeeeek! Once dry go over the shiny crackly surface with a dry paint brush that has a minute amount of the chalky paint/gesso on it (dry brushing) this leaves the dusty look!  the edges are swiped with treasure gold/silver. The hooks/loops I used to hang my baubles from are up-cycled ring-binder wire from an old paper pad!


The bauble above has 'hot glue gun' icicle drips - simply painted with gesso and hi-lighted with treasure silver/gold - oh 'n' a few sprinkles of art-ingredients. the 'Jingle Bells' is typed with my own type-writer onto old book pages! Don't forget to sprinkle glitter onto the antlers!


A few dots of liquid Pearls so transforms the mistletoe berries, they come to life!  And a quick swipe of distress glitter glue on the holly leaves makes you believe 'Jack Frost' has passed by!


I adore soft fabrics and textures in my pieces and thought this would be perfect for the Angel to kneel upon - like a soft cushion of newly fallen virginal snow - I simply gather my scraps of lace, doilies, ribbons, tattered edged paper etc and sew them together in staggered layered strips on my sewing machine - soooooo gratifying! And leaving loads of loose cotton tails (or even sew in extra loose strands of cotton) leaves whisps that move about in the small drafts, you Angel will have a 'floaty like' feel!

I can't decide which is my favourite - ohhhh decisions decisions lol
Have you  a Favourite I wonder???


Till I see you again
or - you can find me at my various other social media sites happily creating away my days :-)
Facebook
Instagram
Pinterest
Blog

Mwah xoxo
Kassa