Saturday, 27 November 2021

Seasons Greetings by Kerstin


Welcome everyone!


:-) It's beginning to look like christmas :-)


Today a DIY christmas gift idea in monochrome style, 

with a lot of structure and texture.


Use a

Gothic Arch Shape - MDF Mixed Media Board

 as base, love this shape it is so universal as you can see here

 with our teamies and guest designers, awesome!!


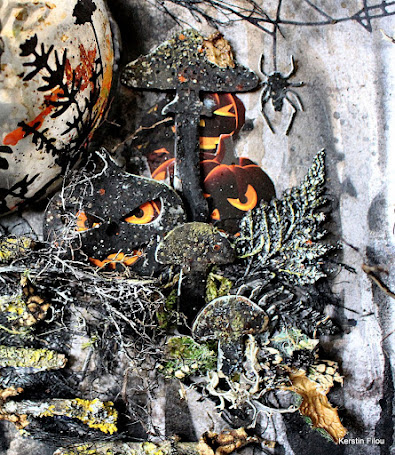
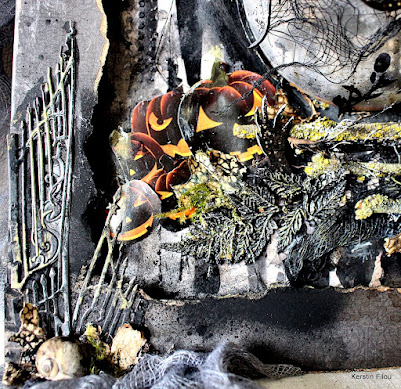
some close up's 


Thanks for your visit!


Happy crafting!

Kerstin


Monday, 22 November 2021

Woodland shrine. By Louise Crosbie


I seem to be a little obsessed with layering up these trees every winter but they are just so perfect for it. Especially as they come in several sizes.

I wanted to do a night sky scene with Santa but at the same time, I still love the natural wood colour. So I’ve combined the night sky on the outside with a more natural woodland vibe on the inside. I gave my shrine little feet using teeny wee thread bobbins so I can stand it on my shelf .


I’ve not been heavy handed with the paints. I didn’t want the colours to be too saturated. I painted it on then dabbed it off with a baby wipe, leaving just a small amount of colour.
The outside part of the shrine was first painted with black gesso. I then added a colour wash of midnight blue before taking sandpaper and sanding back all the edges. I just wanted to see a little hint of the natural wood to help tie it in to the inside part of the shrine.
Then I was able to glue Santa and the front trees into place. 


 It’s quite 3D inside as the shrine kit has a little bit of depth to it. I put the smallest of my trees at the back then layered more in front of them (as ever, I broke the pieces up to suit my desired effect). I glued a little stick half way in to give me something to glue the tree with the deer on to.

When everything was painted and glued, I added the decoArt snowtex and glamour dust glitter to everything along with some white paint splatters to make it look like it is snowing. 

Saturday, 20 November 2021

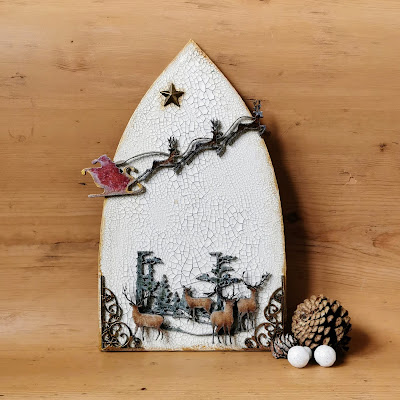
A vintage Christmas plaque by guest designer Lori Woods


Hello creative friends! I'm very happy to be back with my second guest design project for this month. 
For this project I wanted to keep it quite simple and really showcase some of the amazing MDF shapes available. I went for an old fashioned, shabby vintage look and kept the colour palette quite basic.
I started by covering one of the Gothic arch mixed media boards in white crackle paste. Once this dried I went around the edge with some gold paint.   


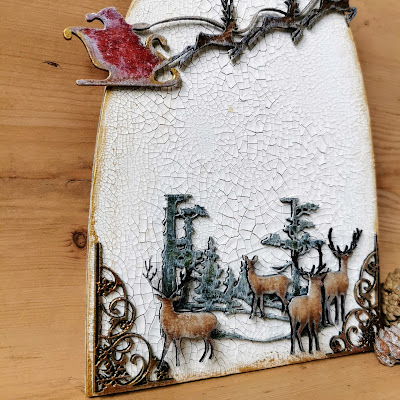
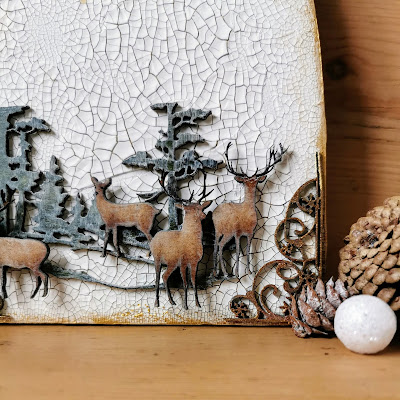
I applied a quick coat of white gesso to the Santa sleighDeco snowflakes corners, and Winter tree scene shapes and then coloured them with acrylic paints. To give that shabby snowy look, I then dry brushed white gesso over the top of everything. For the Mini deer sheet, the colour of the mdf was already perfect for the deer so I just gave them a gesso dry brush.

Then it was time to glue everything to the board. For the santa sleigh and the deer that are at the front of the composition, I layered some thick card underneath them so that they would pop out a little and give the piece some dimension. To finish everything off I added a star embellishment at the top of the arch to guide santa's sleigh! I hope this gives you some Christmassy inspiration for your seasonal crafting 🎄🎅


Thursday, 18 November 2021

Believe In The Magic Of Christmas by Liz

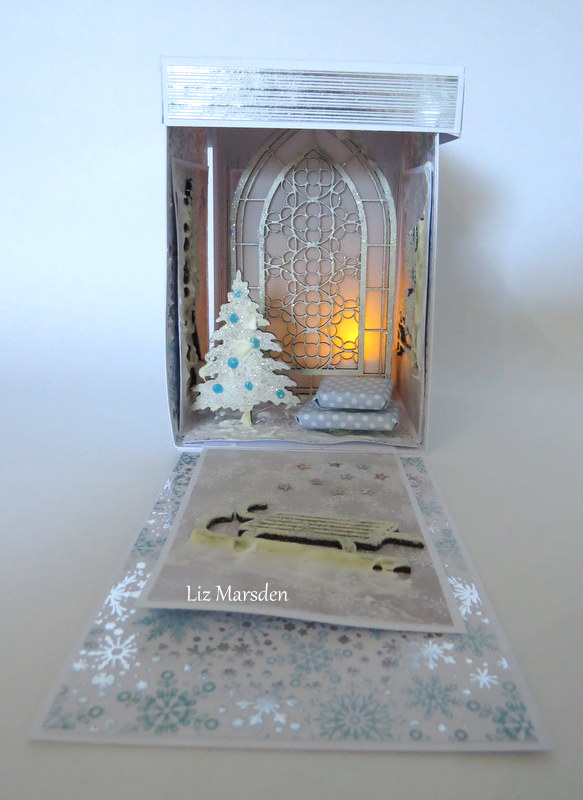
  Hi all, well Christmas is just around the corner, so for one of my projects I decided I'd create another exploding box using some of the fabulous MDF Pieces from

Calico Craft Parts,

So the top has this gorgeous script 

Believe in the Magic of Christmas, in Ancestry Font


All I've done to all the pieces I've used is coat them with white gesso, then when dry add some glitter over the top, the sparkle in real life is beautiful,


On the back section of the box, I used this fabulous Trees scene,

Tall Trio ofWinter Fir Trees


                                              This Child Pulling Christmas Tree on Sled 

 also had some texture paste at the bottom added to give a snow appearance, 


This is one the other side of the box, and features

Snowman and Lamp Post scene

On the front section I added a sled again with the snow effect beneath, this one is a Slatted Sled

For the centre piece I used one of the gorgeous MDF windows,

Gothic Arch Stained Glass Window style 1

I added some white Vellum behind this,


Then added a single Tree in front to create a scene,

Christmas Tree - style 5

then some parcel effects too,


I left enough room behind the window, so I could add a battery tealight, love how this makes the window glow,

Happy Crafting!!

Saturday, 13 November 2021

Let it snow plaque by Louise


Pretty title and much as I love to look at snowy scenes, I don’t much like having to go out in it unless it’s a walk in the woods or up the hills. Shopping and chores are not so great in snow so maybe it could hold off till late  December lol.

I made this plaque inspired by the lovely little sledge shape. I adore winter crafting. Not just christmas (or in my case Yuletide and winter solstice) but I love the snowy scene crafting. Or the cosy fireside images, hot chocolate and woolly socks. Winter birds. 

Ok I’m rambling now. 

Back to the plaque…

I used an ARCH  (large) for the substrate and then by using one of the DOORS, a FENCE, and a TREE along with the SLEDGE and a couple of SNOWFLAKES I created a wintery scene.

I finished it off with the “LET IT SNOW” phrase. 

The Craft Parts used by Louise to create this project are available in a money saving bundle (30% off!) over at the web shop - CLICK HERE to purchase.

I simply used bits of cardboard from the packaging my craft parts came in to cut out bricks to give the impression of bits of a wall. I only added enough to give a hint. I didn’t build the whole house.*

Since Louise originally created this project, we do now have Sheets of Mini Bricks as part of our Architectural Add Ons range.


(I used DecoArt snowtex and glamour dust glitter to creat my twinkling snow ).


Saturday, 6 November 2021

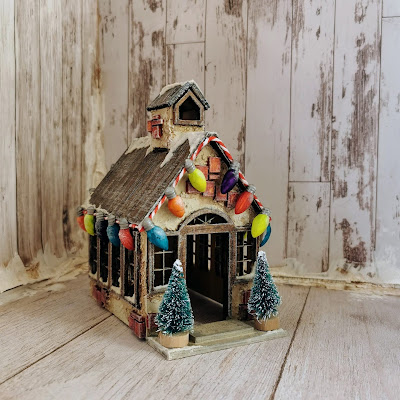
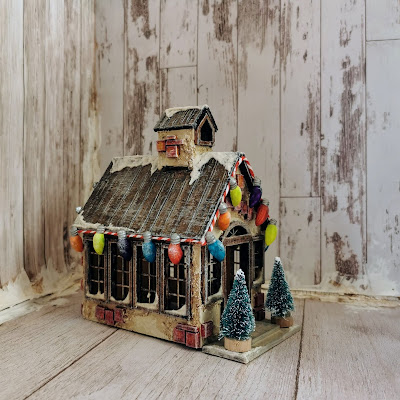
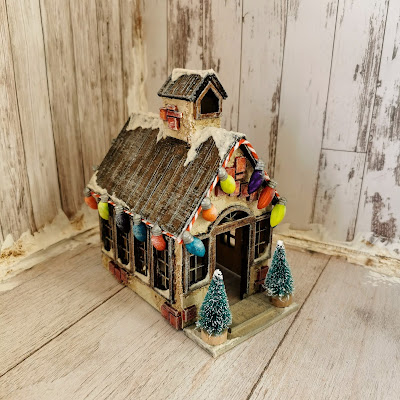
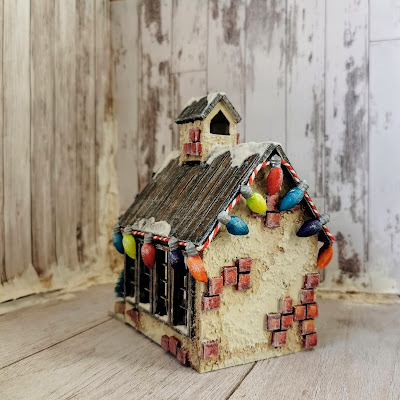
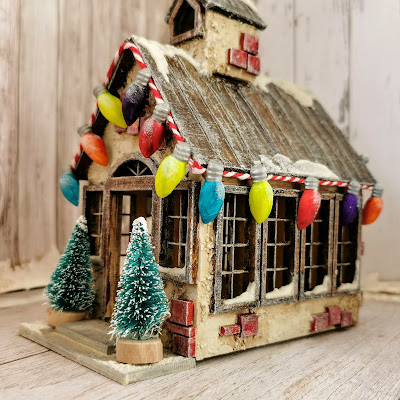
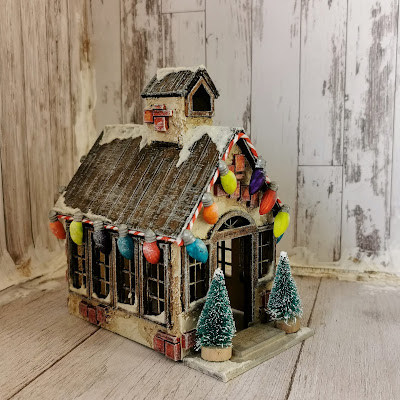
Snowy Christmas House by guest designer Lori Woods

Hello friends! I'm thrilled to be back, guest designing some Christmas crafts for you! 🎄

 I love the house and cabin kits from Calico Craft Parts, there are so many ways to decorate them and make each one unique. Because we're entering the festive period, I decided to create a little snowy Christmas house complete with Christmas decorations!


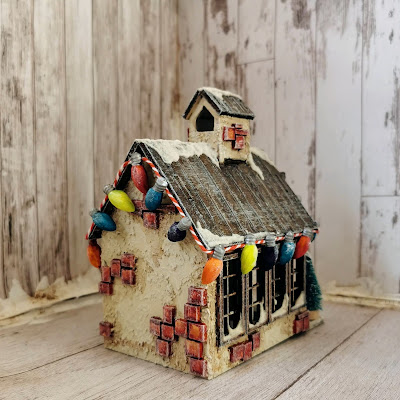
I started by putting together the Church- Schoolhouse MDF kit. The waste MDF from the windows was the perfect size for creating fake bricks on the sides of the house so I glued these on in small groupings to create a brick wall effect. Then I gave everything a coat of gesso.


I used texture paste on the walls to mimic the look of old crumbling plaster and painted it a dirty cream colour to give that extra shabby finish, and painted the bricks a dark red colour. For the roofs, I put down a layer of heavy body gel and scored through this while it was still wet to create the look of wooden planks. When it was dry, I painted the roof and the windows with a brown acrylic paint. I drybrushed white gesso over the entire house to give it a bit of a frosty look and then added areas of snow paste to finish the snowy effect.

To finished everything off I added some twine and colours bulbs made from moulds to look like Christmas lights and placed two little Christmas trees at the front door.

This little house was lots of fun to decorate and I hope it gives you some inspiration for your own Christmas decorations!


Thursday, 4 November 2021

Merry Christmas by Liz

  Hi, well Christmas is fast approaching and so I thought I'd show you one of my makes for this year using the Gorgeous MDF round lace cut bauble with optional backing piece, from

Calico Craft Parts,


I used distress oxides on the base of the card and on the optional base of the Bauble,

then on the top layer after painting with white Gesso I went over with some fine Glitter, this really sparkles in real life, I finished it off with some gems,


Round MDF Lace Cut Bauble with optional backing piece,

Happy Crafting!!

Hugs Liz x

Saturday, 30 October 2021

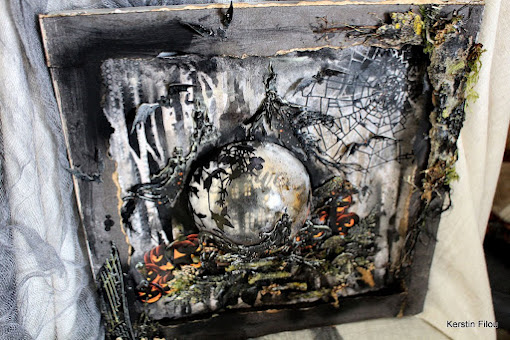
Beware Dementors by Kerstin

Welcome everyone!


Have you seen the latest Hanging kits on Calico Craft Parts???

Awesome 🎃👀🎃, such a lot of creative possibilities!!

 Today the third variant


 Some of you may remember on my Pirate curse project

for which I also used this Skull & Ghosts Hanging kit.


These floating ghosts reminded me of dementors known from the Harry Potter movies. 

I was inspired to create a shadow frame with an illuminated 3D effect in mixed media style. For this special effect I used half a transparent acrylic globe 

and thought about the magical shield around Hogwarts.


Skull & Ghosts - MDF Halloween Hanger Kit


 one becomes two 😀


Beware Dementors

They have the ability to drain men of their happy memories

 until they have to relive their worst moments over and over again.

! Maximum scary factor !

- only happy memories can help -


some close up's


used MDF shapes from Calico Craft Parts


Skull & Ghosts - MDF Halloween Hanger Kit

Mushrooms - Fungi MDF Wood Shape - Style 12

 Zombie Arms and Boots - MDF Add On Sheet


Thanks for your visit!


Happy crafting!

Kerstin


Wednesday, 27 October 2021

Little gothic story plaque. By Zuzu (Louise Crosbie)


My last Halloween project of the year (on to twinkly winter and Yule). 
It’s almost Halloween and I’ve got friends coming over. I love this time of year and I love the traditional telling of spooky stories to try and scare your friends (regardless of our adult age lol).
But I don’t see Halloween as only scary. 8 love the traditional Celtic version of “day of the dead” that it represents. Setting an extra space at the table for any visiting ghosts of your loved ones who have died. Although that’s just a metaphors for taking time to remember that love and how we miss them. 


But as it’s a t8me when the veil between the worlds of the living and the dead is at its thinnest, then obviously there’s room to enjoy the spooky side as who knows what will get through that veil. 
Woooooooooooo (spooky noise lol)


I made this before seeing Kerstin’s fab tag earlier in the season but hopefully they are different enough.
There’s a LOT of glitter involved here so it’s very sparkly. Sadly the camera can’t show glitter as the twinkle is all about motion.  


I have used “parts” of some bits, as I often seem to do. I like to cut them to fit with what I’m making and this also means the shapes go further. 


list of craft parts used

Gothic window: https://www.calicocraftparts.co.uk/stone-mullion-gothic-arch-window-mdf-wood-shape.html

Grass: https://www.calicocraftparts.co.uk/wild-grass-mdf-wood-shape-style-4.html

Toadstool: https://www.calicocraftparts.co.uk/curly-double-toadstool-plain-or-engraved-mdf-wood-shape.html

Red oak leaf twig:  https://www.calicocraftparts.co.uk/red-oak-leaf-and-twig-mdf-wood-shape.html

Bird on a branch: https://www.calicocraftparts.co.uk/bird-on-a-branch-mdf-wood-shape-style-1.html

Grave stone/cross: https://www.calicocraftparts.co.uk/tilted-gravestone-cross-mdf-wood-shape-style-1.html

Flying Bat:  https://www.calicocraftparts.co.uk/bat-mdf-wood-shape-style-1.html

Birch plywood Plaque: https://www.calicocraftparts.co.uk/rectangle-birch-ply-wood-plaque.html


Sunday, 24 October 2021

The (not so) Grim reaper.


The reaper has hung out the bunting and the fairy lights for his favourite night of the year. All his dead pals are going to be visiting and partying until dawn. 


I assembled all the parts then painted it over with black gesso. Then I put on patches of rust paste and sprayed with a water mister to make it run down in streaks. I did the same with some metallique paint in a


nice flame orange. 

I decided to give the reaper more detail so I used a resin bird skull I cast from a mould. Once it was glued to the reapers face, I used black contour paint to make him a hood so his skull face blended in more and I used the contour paint to add some details to his robe. 

I also added an extra row of gravestones using a die cut I cut from black card  


It is categorised as a hanger as it can be suspended by a hook or ribbon if you use them, but as I need daylight to get decent photos and I’ve nowhere to hang it in the garden, I’ve placed it on four large, wide chunky beads to act as feet. 

I’ve used the skeleton tree & graveyard Halloween hanger.