Wednesday, 4 May 2022

The Wishing Well by Kat Hazelton.


There is something wonderfully magical about a wishing well. 
My great grandfather had a wishing well in his back garden which he said had a magical troll living in it! Now I cannot say whether this was true or not having never seen the Troll in person! But who knows he was quite insistant and he seemed a sensible old man! 
Many Wishing Wells in the UK raise money for charities so if you see one pop in a coin or two and make a wish as even if your dreams do not come true someone else's might through your kindness. 

To make a wish visit a well and tell it your desires,
A coin from your pocket the well it does requires. 
If the coin lands heads up then good luck for you. 
If head faces down, your wishes won't come true! 

To make your own magical Wishing Well scene you will need. 


Assortment of inks I used blues, greens and purples. 
Assortment of paintbrushes, splattering brushes. 
White highlighter pen. 
Gold ink or gold pen for adding dots. 
Brown crayon. 
Acrylic paint in matt white. 
Super glue. 


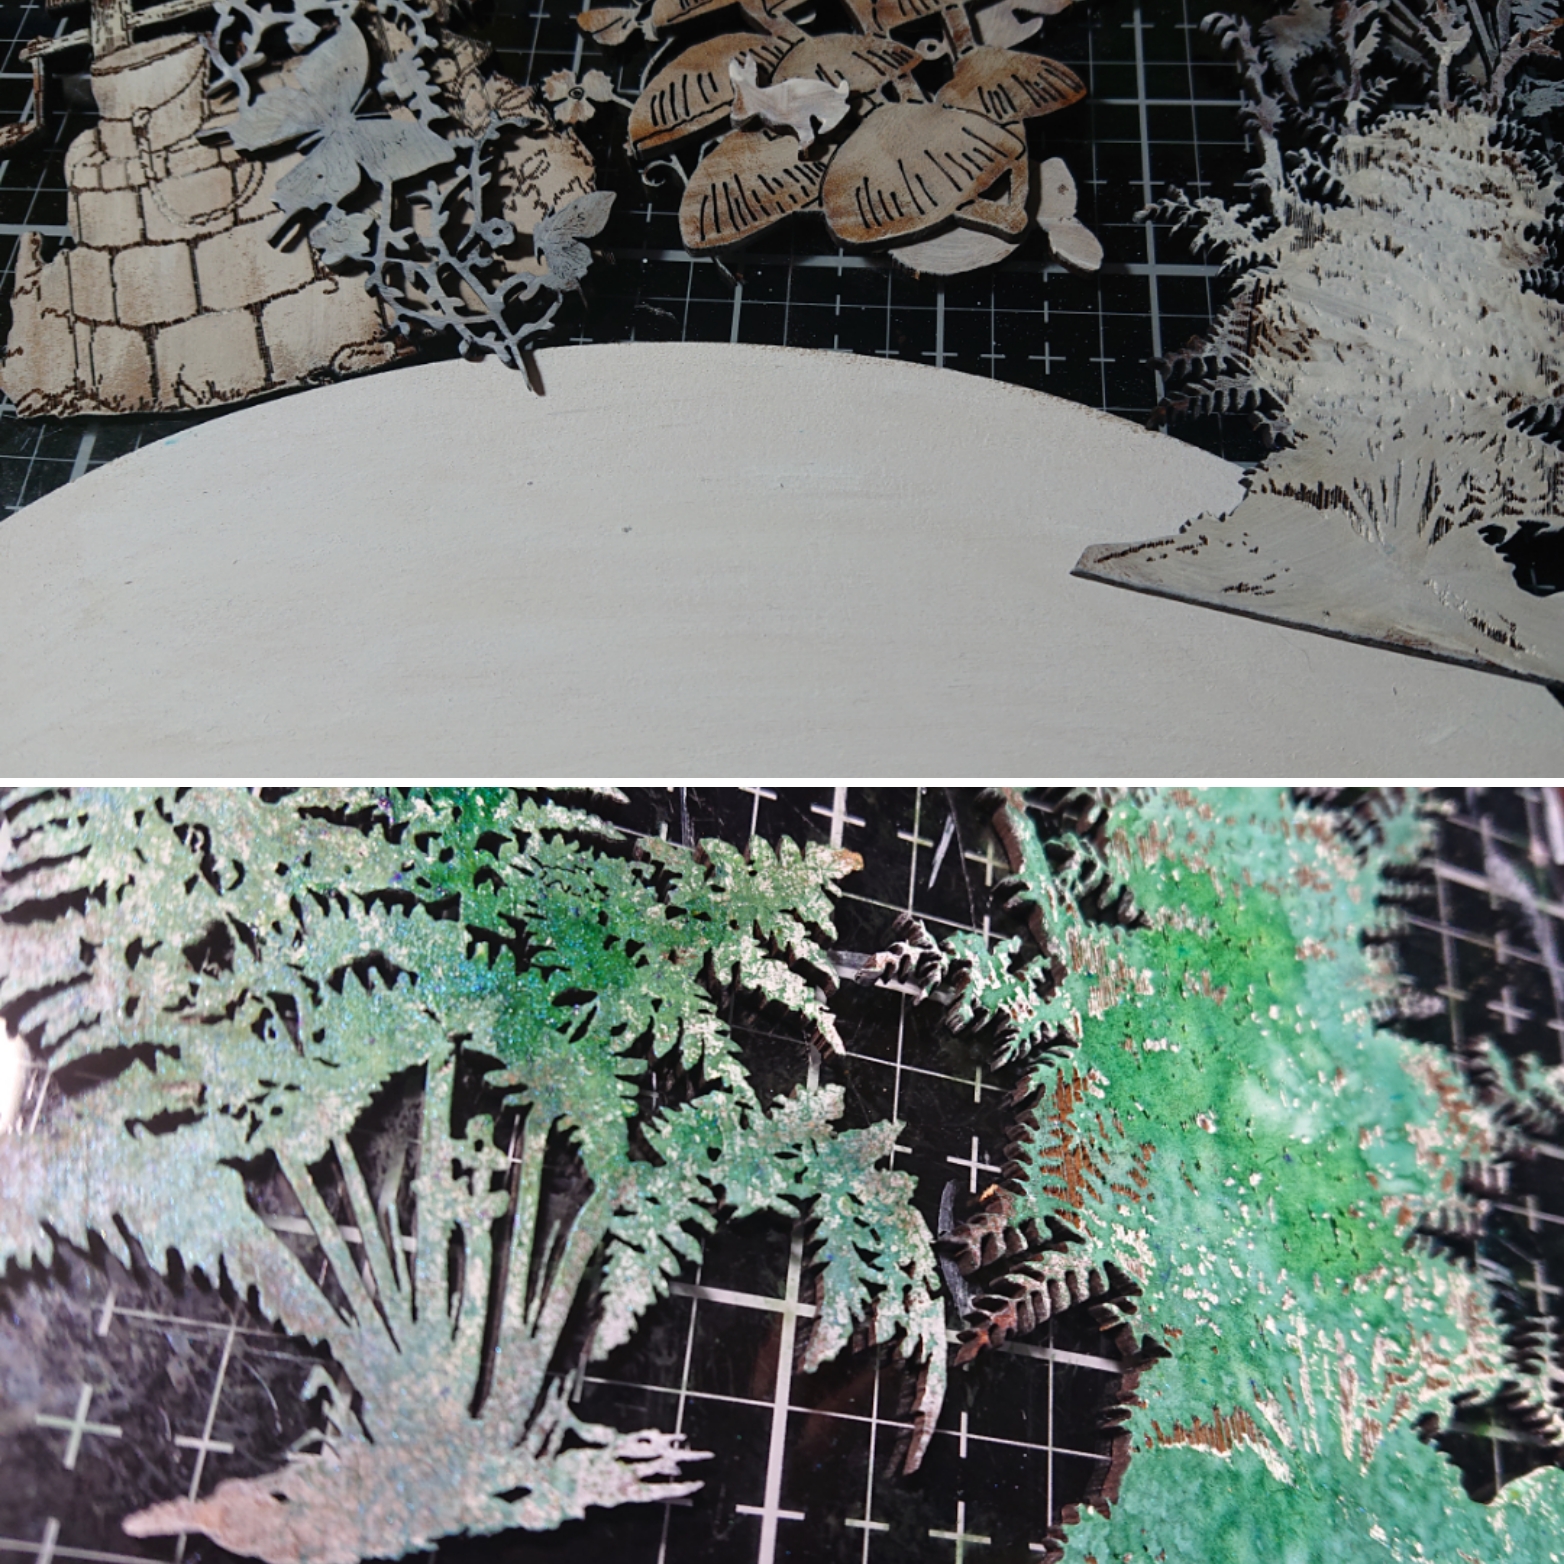
To start off I painted all my MDF and wood shapes with a matt white acrylic paint. This gives a really good undercoat to using inks. 

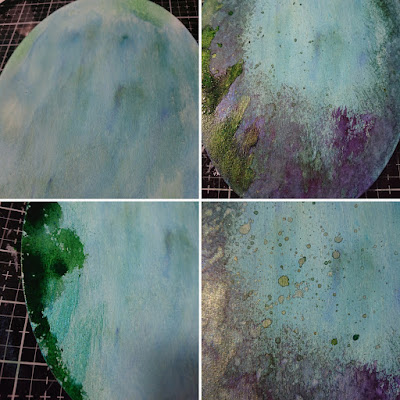
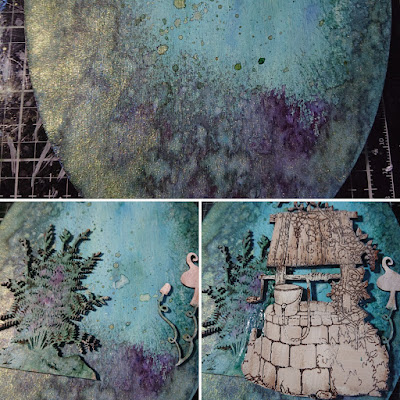
Once the paint was thoroughly dry I started painting the birchwood plaque with my inks. The joy of using ink on birch is they give very soft textural effects. I did a combination of spraying, splattering and gentle brush strokes with a dry paintbrush. I used a combination of greens, blues and purple inks. 

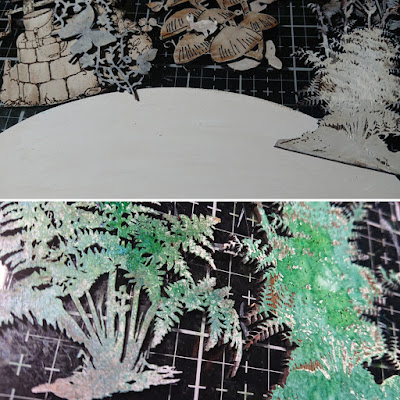
I then painted my ferns with the same mixture of greens, blues and purples. Being MDF these colours came out a little stronger in colour which gave a good contrast to the, softer etherial background. 


To add an extra magical sparkle I used gold ink which I watered down and splattered with an old paint brush. 


To give the Wishing Well a magical other worldly feel I decided not to paint over the ghostly acrylic white undercoat. I also did the same with the rabbits and toadstool. The little extra details were achieved using a white highlighter pen. I also added some definition and shading to the roof and the stonework with a brown crayon. 
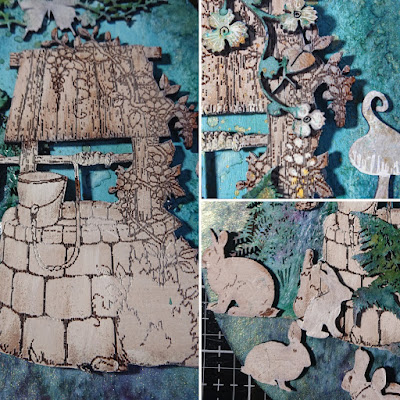

I then assembled all my shapes and once I was happy with the layout I glued them into place with super glue. 
I then finished off the scene with little magical glowing gold orbs which I made using a gold pen. 

✨Now make a wish! ✨


Well I hope you enjoyed another 'Kat make'. I hope they inspire you to have a go at creating your own.
If you have any questions please get in touch I am always happy to help if I can. 
Another 'Kat make' coming soon.
Until then happy making, 
Kat 😊


Wednesday, 20 April 2022

Pigs Might Fly! 🐷


Pigs might fly! The expression is quite easy to understand. Basically a sarcastic remark on something never to happen or something never being done. Where the phrase 'pigs might fly' comes from is something of a mystery though. There are many variables to the phrase depending on what century or country it's used.  Some researchers say the origins of the phrase descended from the Americas, because of the difficulties of farming pigs, others say it originates from Scotland from 1616 list of proverbs by John Withals's English-Latin A Shorte Dictionaries for Yonge Begynners. Where it mentions 'pigs fly with their tails forward'* which became a phrase for many years.  As for the image of pigs flying in the sky going back further into the 16th century a book called 'Life of Gargantua and of Pantagruel' by François Rabelais features a beautiful woodblock print illustration by Paul Gustave Doré of a flying pig monster with bird like wings.

Original translation *'Pigs fly in the ayre with their tayles forward.'

To make your own flying pig hanging Ornament you will need. 

https://www.calicocraftparts.co.uk/pig-mdf-wood-shape-style-4.html

https://www.calicocraftparts.co.uk/pig-mdf-wood-shape-style-3.html

https://www.calicocraftparts.co.uk/sheet-of-mini-mdf-wood-wings-style-4.html

https://www.calicocraftparts.co.uk/sheet-of-mini-mdf-wood-wings-style-3.html

https://www.calicocraftparts.co.uk/rounded-rectangle-greyboard-mixed-media-board-style-18.html

https://www.calicocraftparts.co.uk/wooden-word-elements-blank.html

Assortment of acrylic paints including matt white and metallic gold, plus paintbrushes. 

Crackle medium. 

Texture paste and spatula/tool for applying. 

Gold pen and black pen. 

A slice of wood. 

Glitter or gilding flakes. 

Super glue. 

String for hanging. 


Firstly I painted all my mdf shapes with an undercoat of matt white acrylic paint. This helps to give a nice base for adding lighter colours to MDF. 

I then painted on two coats of a pretty piggy pink paint to my pigs and also their wings. To give my pig wings an angelic look I added gold metallic tips using metallic gold acrylic paint. 


I then painted my slice of wood and word plaque with the same matt white paint. Edging the wood slice with the same gold metallic paint used for my pigs wings. 

Once dry I glued on my largest pig to the wood slice. This will be my centre piece. 


To create the background I painted a mixed media board with light blue sky with fluffy white clouds. Once dry I painted on a crackle medium to create the look of an old painting. I left the crackle to dry naturally for 24 hours before continuing. 
I then edged the whole background with texture paste to create a chunky gold frame. I mixed in gold metallic gold paint into the paste and once dry went over again with metallic gold paint to really make it glisten. 


I then arranged all my MDF shapes and glued in place with super glue. 

I then added texture paste and gilding flakes to the joint of the wings, where the wings would be joined to the pigs body.  I then added little extra details such as face and body shape to the pigs using a gold pen. 

To finish off I added a length of string for hanging and wrote in black pen 'Pigs Might Fly' on the word element. You could of course add a different phrase or glue on typed wording. But I wanted mine to be more hand-made in appearance. 


Well I hope you enjoyed another 'Kat make'. I hope they inspire you to have a go at creating your own.
If you have any questions please get in touch I am always happy to help if I can. 
Another 'Kat make' coming soon.
Until then happy making, 
Kat 😊


Saturday, 16 April 2022

Happy Easter card + Giftbox


Welcome creative friends!


 I was inspired to create a delicate card

as easter greeting. Together with a small box

a beautiful gift to easter.


use this beautiful egg as center point

primed with white gesso

and dry brushed with brown acrylic paint


used MDF shapes from Calico Craft Parts


Easter Egg MDF Wood Shape with Rabbit & Butterflies

 Daffodils MDF Wood Corner Embellishment - Style 22

sheet of Mini Hares - MDF Wood Animal Shapes


I wish you all a very Happy Easter, and together let us

share the hope

to conquer adversity to live in peace with justice and freedom.


Thanks for your visit!

Kerstin


Wednesday, 6 April 2022

The Easter Witch by Kat Hazelton.


Just before Easter in Sweden and Finland there is a tradition for children to dress up as Witches. Very similar to Halloween's trick or treating the children go from door to door wishing their neighbours a happy Easter and handing out handmade cards in return for sweets and treats. The tradition of dressing as Witches goes back to the 19th century though during this time it was generally done by teenagers and young adults. 
The reason behind this tradition is based on an ancient scandanavian legend. Around the time of Maundy Thursday, the Thursday before Good Friday, it was said that Witches would ride off on their brooms to the island of Blåkulla. Where it was reported they would gather together, feast and dance with the Devil!  Villagers worried by this event of 'Witches Night' would lock away brooms and their cattle for fear of witches using them for transport. They also worried that witches would  also drink their milk! As a deterant they would also light bonfires to keep the witches away! Even now many centuries later villages often organise bonfires and firework displays over Easter weekend to commemorate this tradition. 


To make your Easter Witch decoration you will need. 

https://www.calicocraftparts.co.uk/witch-on-broomstick-mdf-wood-shape-style-2.html

https://www.calicocraftparts.co.uk/oval-shape-greyboard-mixed-media-board-style-22.html

https://www.calicocraftparts.co.uk/sheet-of-mini-rabbits-mdf-wood-animal-shapes.html

https://www.calicocraftparts.co.uk/short-haired-cat-sitting-mdf-wood-shape-style-8.html

https://www.calicocraftparts.co.uk/teacup-saucer-mdf-mixed-media-board.html

 https://www.calicocraftparts.co.uk/round-shape-greyboard-mixed-media-board-style-21.html

Assorted acrylic paints, metallic paints and brushes. 

Sculpting paste. 

Liquid pearls or flat backed gemstones. 

Either cotton lace or die cut paper lace. 

Tacky glue and super glue. 

Paper scissors and pencil. 

Assortment of marker pens. 

Assortment of patterned paper. 

Little flower sequins or paper flowers. 

String or ribbon for hanging. 


Firstly I painted all my mdf shapes with a basecoat of white acrylic paint. I used a matt white. 

For my Witches clothes I drew around my witch shape onto several pieces of patterned paper. Using a pair of scissors I cut out a paper hat and skirt.

For the witches face I used pens to draw her features, adding rosey cheeks. After all she is going to be riding her broom in the fresh air! 


I then glued on the Witches paper hat and skirt pieces using tacky glue. Using my black pen I added additional hair over the brim of the now paper covered hat. 

To add some texture I sculpted her cloak and broom using texture paste. I allowed this to dry for 24 hours. Before I applied the paste I did draw in the broom with a pen this helped to give me a guide on where I wanted the bristles. 

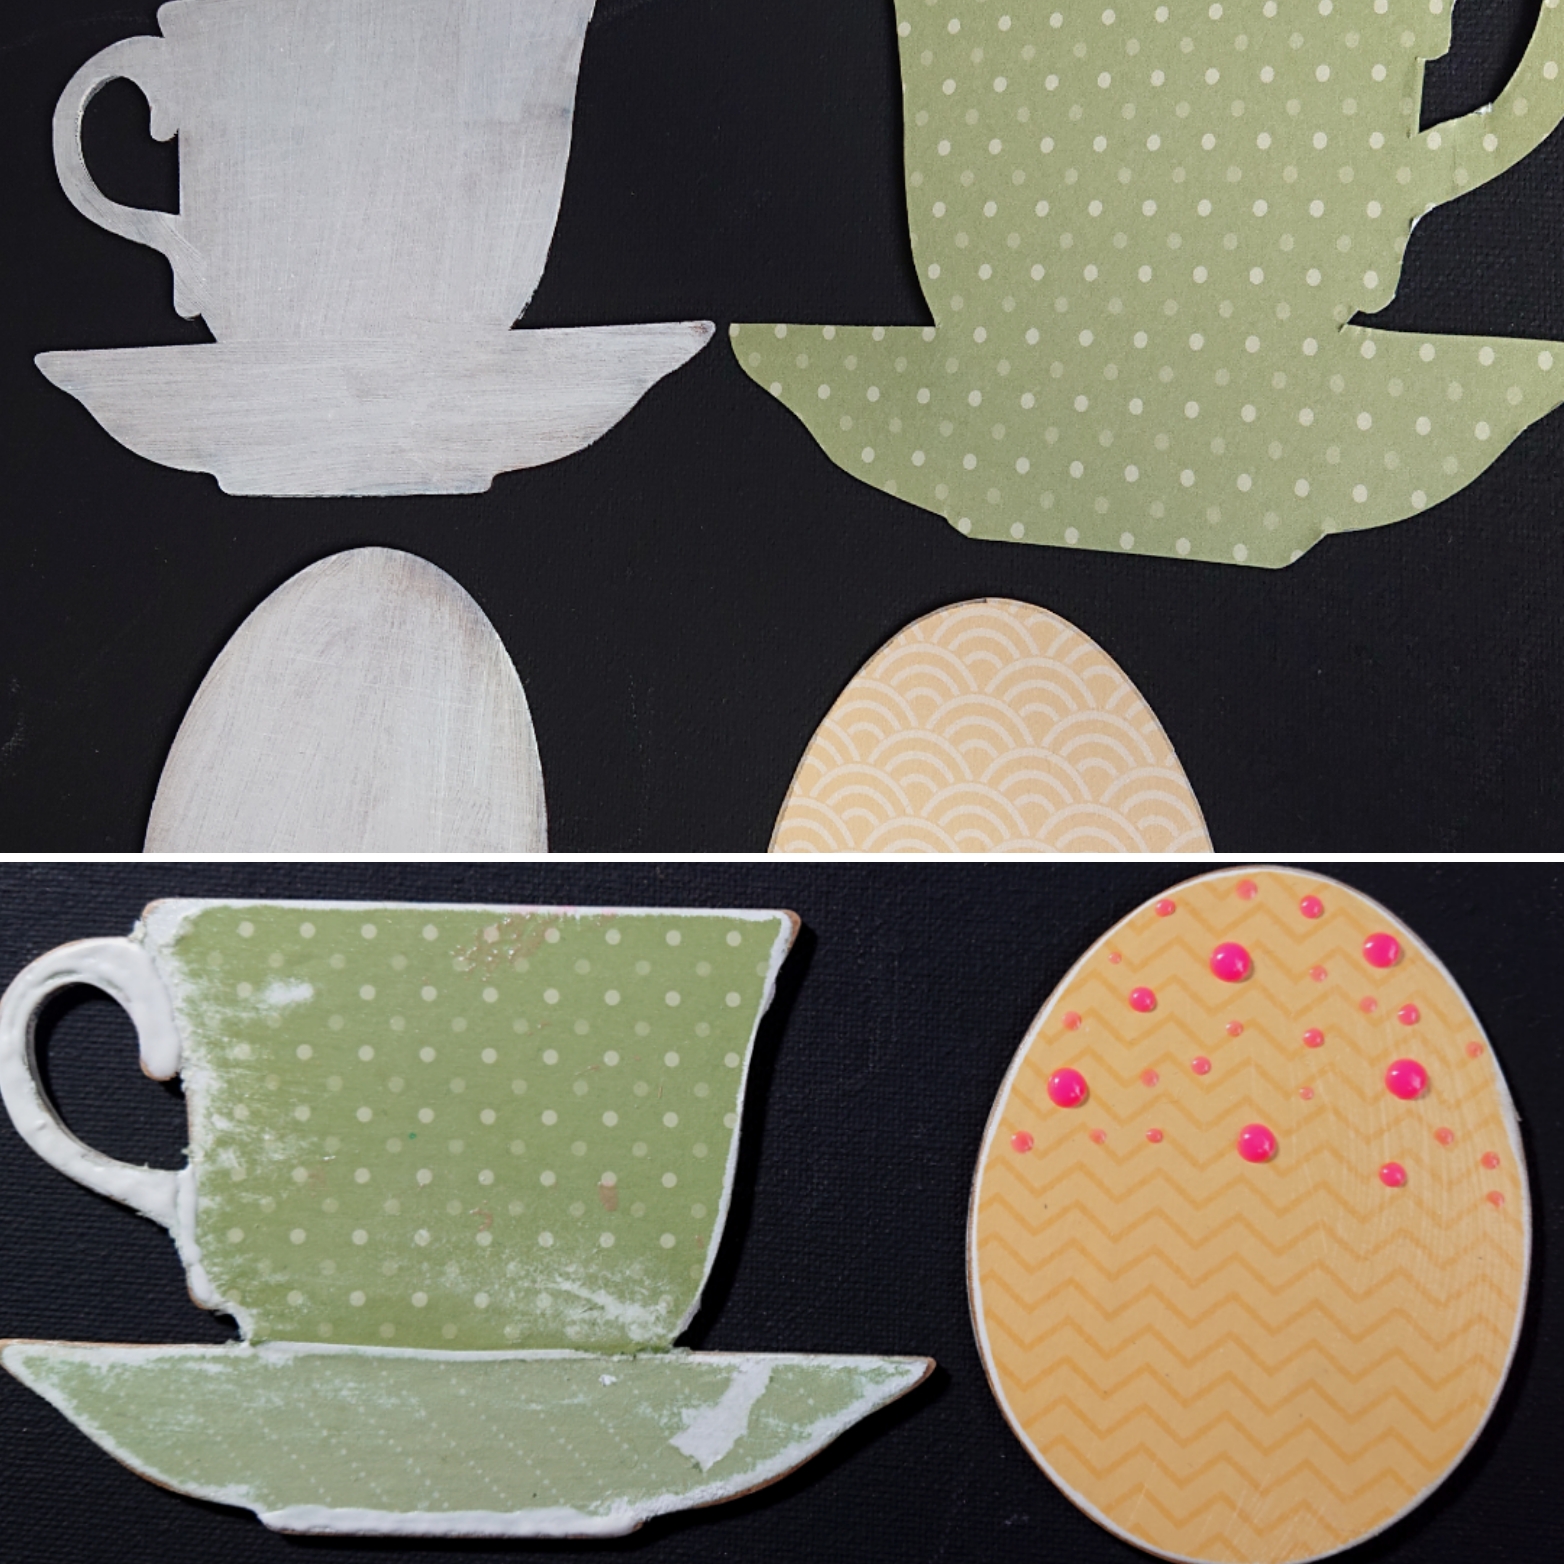
To decorate the teacup and egg I used paper. Using the same method as the witch I drew around the whole mdf shape and cut out and glued with tacky glue. 

To add chipped markings on my tea cup I used texture paste and white acrylic paint. I then added spots to the top part of my Egg using liquid pearls. You could use gems or apply spots with a pen. 


For the grassy background I painted the round mixed media board with a mixture of metallic green paints making grass like marks with an old paintbrush. 

To give the MDF bunnies a bit more texture I used texture paste again. Leaving to dry for 24 hours before painting with a gloss white acrylic paint. To give my bunnies more character I added little pink ears and noses. 


I then positioned and glued on all my MDF shapes including my Easter Witch and her faithful companion using super glue. The cat was painted with acrylic paints and I also painted the witches cloak with some metallic blue paint to add a bit of bling! 

I then added extra details such a white highlights to my Witches hair, some paper lace trimmings, and pretty flower sequins on the grassy background. 

Then to finished off I threaded a length of string so I can hang up my Easter Witch for Easter! 


Well I hope you enjoyed another 'Kat make'. I hope they inspire you to have a go at creating your own.
If you have any questions please get in touch I am always happy to help if I can. 
Another 'Kat make' coming soon.
Until then happy making, 
Kat 😊


Thursday, 24 March 2022

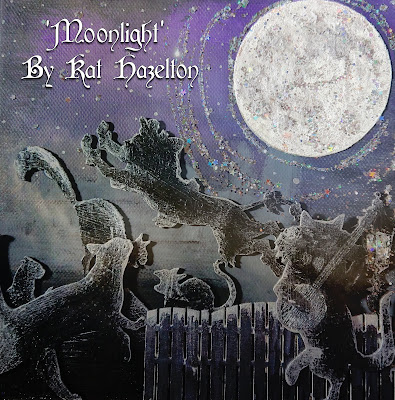
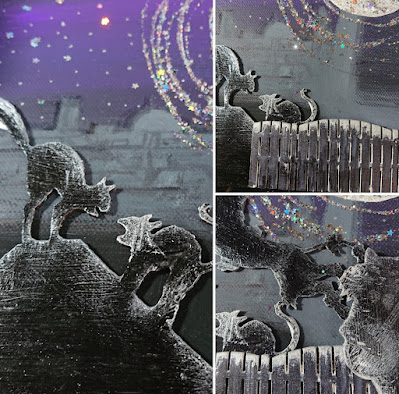
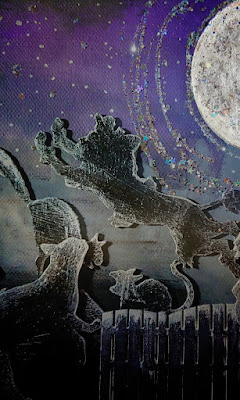
'Moonlight' by Kat Hazelton


Andrew Lloyd Webber musical 'Cats' was based on the book of poems by T. S Eliot called 'Old Possum's Book of Practical Cats'. Written in the 1930's the book of poems centres around the personalities of different cats such as Mr. Mistoffelees, who is a small black cat who can walk on the narrowest rail and do magic. Macavity the Mystery Cat who is a master criminal and referred to as the Napoleon of Crime. A possible reference to Sherlock Holmes calling Moriarty as "the Napoleon of Crime" in The Adventures of Sherlock Holmes, the Final Problem!
In the stage play the main plot centres on the tribe of cats, called Jellicles, coming together for the annual Jellicles Ball to decide which cat will ascend to Heavebside to be reborn. Heavebside being cat heaven. During the stage play an ostracised older cat called Grizabella, famously played by Elaine Paige, sings a beautiful song called 'Memories'. This song was also adapted from T. S Eliot's work a poem called "Rhapsody on a Windy Night". The melancholic poem walks the reader through the spooky dark streets of a town or city lit only by the moon and lamplight.
To make this T. S Eliot's Cats inspired mixed media picture you will need.

https://www.calicocraftparts.co.uk/chilled-out-cat-mdf-wood-shape-style-29.html

https://www.calicocraftparts.co.uk/dancing-cat-with-banjo-mdf-wood-shape-style-37.html

https://www.calicocraftparts.co.uk/cat-scrap-mdf-wood-shape-style-38.html

https://www.calicocraftparts.co.uk/circus-dog-mdf-wood-shape.html

https://www.calicocraftparts.co.uk/triple-convex-picket-fence-panel-mdf-wood-shape.html

https://www.calicocraftparts.co.uk/sheet-of-mini-mdf-street-lamps.html

Canvas or MDF sheet for background. 

Acrylic paints, paintbrushes. 

Gloss varnish. 

Silver metallic flakes and flake glue

Silver glitters including stars. 

Card and scissors. 

PVA glue. 


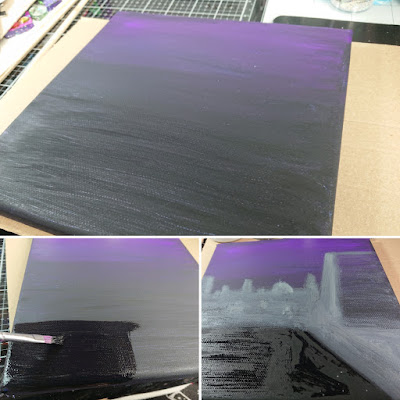
Using acrylic paints I created a moody midnight backdrop.


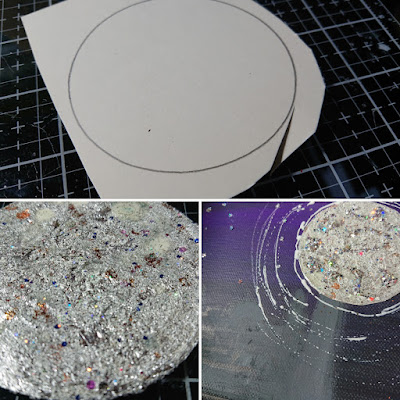
To create the big silvery moon I cut a circle from card. I then covered the moon in glue and silver metallic flakes. Once dry I gently rubbed the flakes into a smoother surface. I then glued the moon onto my nighttime backdrop adding additional glitter and silver stars. 


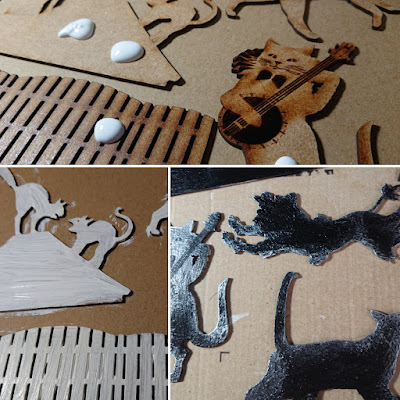
I then painted all my MDF shapes. Firstly with a white base, then with black paint. To finished them off I then painted them all with a layer of gloss varnish and silver metallic highlights. And yes one of the cats is in fact a dog! But when in shadow I thought he bore a resemblance to Rum Tum Tugger! Probably my favourite cat! 


Then I positioned and glued my MDF shapes into place to create my Catty scene. 


Well I hope you enjoyed another 'Kat make'. I hope they inspire you to have a go at creating your own.
If you have any questions please get in touch I am always happy to help if I can. 
Another 'Kat make' coming soon.
Until then happy making, 
Kat 😊


Saturday, 19 March 2022

Easter Decor by Kerstin


Welcome creative friends!


In these gloomy times it's really not easy to sit down happily and relaxed 

at the hobby table, but at some point you have to switch off.


I'm back to share with you my new Easter Home decoration.

I used a simply wooden bunny from an Euro Shop as base.


When I start a project like this I have never a plan, 

I like to go with my intuition.


I choose three spring typical shapes and 

was in love with the daffodils and chickens. 

 For the background I used water diluted chalk paint, 

MDF shapes were painted with acrylics.

Branches on the ears are twigs from a picked tree.


some close up's


used MDF shapes from Calico Craft Parts


Daffodil Flower

 Songbirds in Spring Branches

 Hen & Cockrell Side by Side 

 Skeleton Tree MDF Wood Shape - Style 3


I hope you find inspiration!

Thanks for stopping by...until next time!

Kerstin


Thursday, 10 March 2022

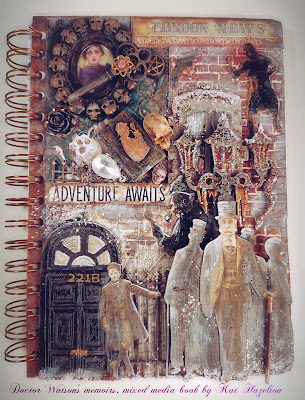
Doctor Watson's memoirs, mixed media book by Kat Hazelton


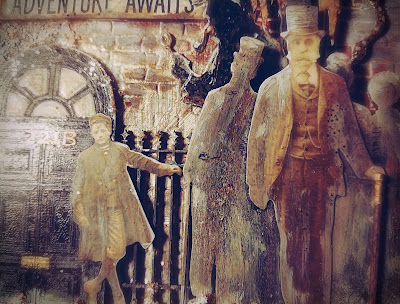
The first 'Sherlock Holmes' novel 'A Study in Scarlet' was published in July 1888 by Ward, Lock & Co. In this novel we get a highly detailed introduction into the world of Sherlock Holmes from the view point of Doctor Watson. In it he describes about himself, his first meeting with Sherlock Holmes and his first visit to 221B Baker Street in London. He describes 221B as an apartment that consisted of two comfortable bedrooms and a single large airy sitting room. Watson states that's its cheerfully furnished and illuminated by two broad windows. Doctor John Watson is presented in the first novel and throughout the series of Doyle's books as the biographer of Sherlocks cases writing down all of their adventures in his memoirs. Sherlock mentions Doctor Watson's memoirs on many occasions, sometimes scoffing Dr Watson interpretations! In 'The Adventures of Silver Blaze' Sherlock confesses to making a blunder quoting that it was a more common occurrence than anyone would think. Basically hinting that Watson memoirs rarely mentioned Sherlock's mistakes! 

Even though Sherlock Holmes is the main character but it's through the clever writing of Sir Arthur Conan Doyle that Doctor Watson's character becomes an essential partner to Holmes. Watson is the one that asks the questions on behalf of the reader. It's through Dr Watson's questions that we get to understand the unfolding of the stories and Holmes's clever methods of deductions. 


To make your own Doctor Watson 'memoirs' book you will need:

https://www.calicocraftparts.co.uk/door-mdf-wood-shape-style-4.html

https://www.calicocraftparts.co.uk/decorative-post-fence-panel-mdf-wood-shape-style-9.html

https://www.calicocraftparts.co.uk/sheet-of-mini-mdf-street-lamps.html

https://www.calicocraftparts.co.uk/window-mdf-wood-shape-style-5.html

https://www.calicocraftparts.co.uk/christmas-carol-singers-group-1-mdf-wood-shape.html

https://www.calicocraftparts.co.uk/sheet-of-mini-mdf-steampunk-motifs-style-4.html

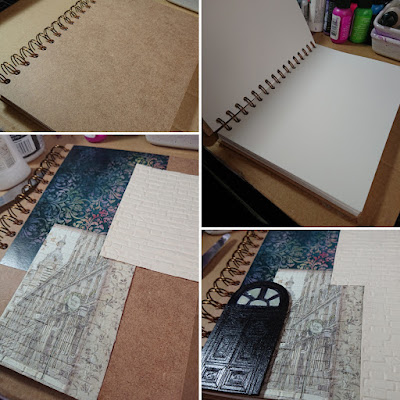
A book to decorate. I used a sketch book so I can use the book for scrapbook and journaling. You could create your own book using MDF mixed media boards, available from Calico Craft Parts, and scrap paper. 

Assorted paper for backgrounds. 

A mixture of paper dolls, cut out shapes, Victorian Ephemera. 

Bits and Bobs. I used beads and jewellery findings in my creation. 

Acrylic paints, gloss varnish and inks. 

Old Paintbrushes to stipple paint. 

Assorted glitters. 

White highlighter pen. 


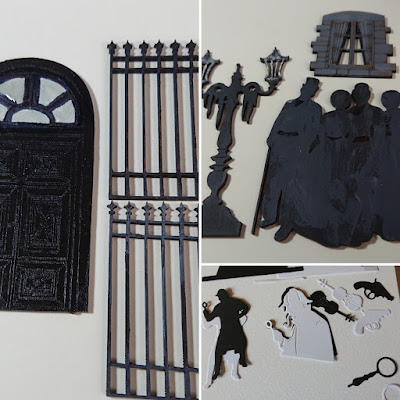
To start off my project I painted my MDF shapes and paper die cuts with black acrylic paints. Once dry I added extra details such as windows above the door. I used gloss varnish to give it a glass look. 


I then started decorating the front cover of my 'Adventure' book. Gluing down a mixture of printed and brick embossed papers. To glue down the paper I used PVA glue. I also positioned and glued the front door this time using superglue. 


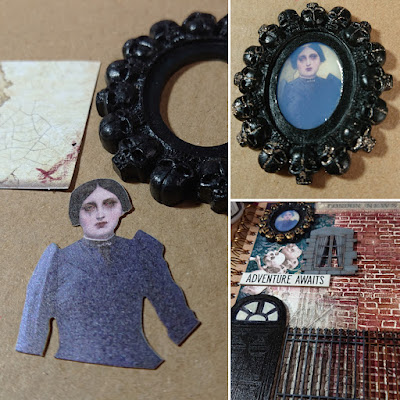
To make my portrait of a Victorian lady I used a paper doll, brooch finding and glossy varnish which went clear when dry. You could use resin or a clear acrylic sheet. 

I added some gold paint to bring out the details on the frame and also added colour to my bricks. 


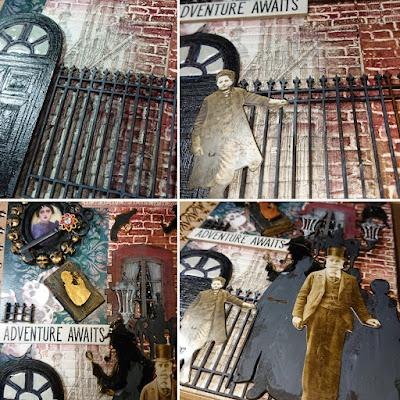
The real fun bit! Adding all my bits and bobs. I positioned and glued down the railings, my Victorian people, including a paper doll which I thought made a perfect Doctor Watson! 


Grunging! 

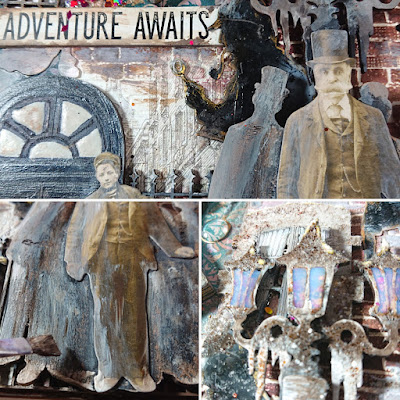
To make my book feel more like a foggy cold Victorian London I used a mixture of white and brown acrylic paint which I dorbed with an old paint brush to dirty down the bricks, people and adornments. I also added assorted various glitters to add a touch of frost. I added a little watered down brown ink to dirty this down. I also added some coloured glitter and gloss to the lamps to give the appearance they are lit. 


Using a white highlighter pen I added little extra details on the characters and around the lamp. 


To give Watson one last finishing touch I added a walking stick. This was made from a cocktail stick painted with brown ink and gold metallic paint. 


Adventure Awaits! 
My Doctor Watson's Memoirs book is now finished and ready to journal my future adventures! 

I hope you enjoyed another 'Kat Make'. 
If you have any questions please feel free to ask. I will be happy to help if I can. 
I shall be back again soon with another make. 
Until then 'enjoy crafting' 
Kat 😊 


Tuesday, 1 March 2022

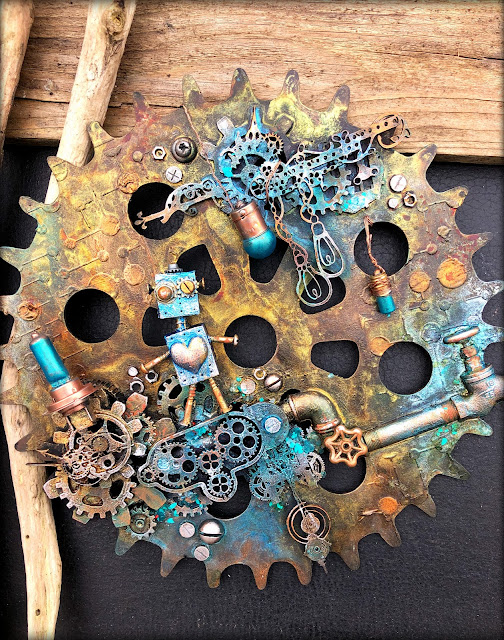
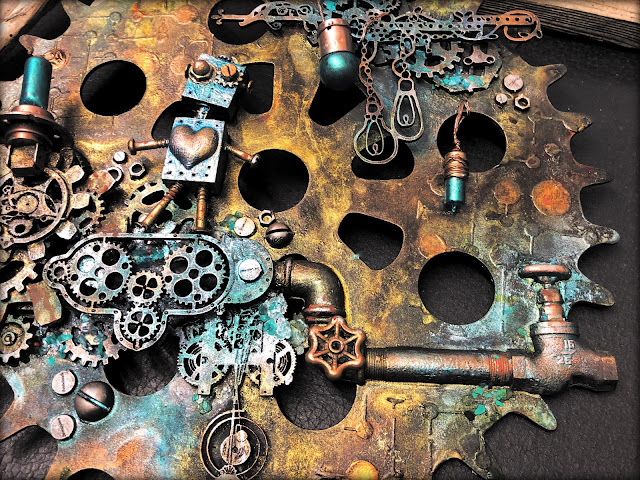
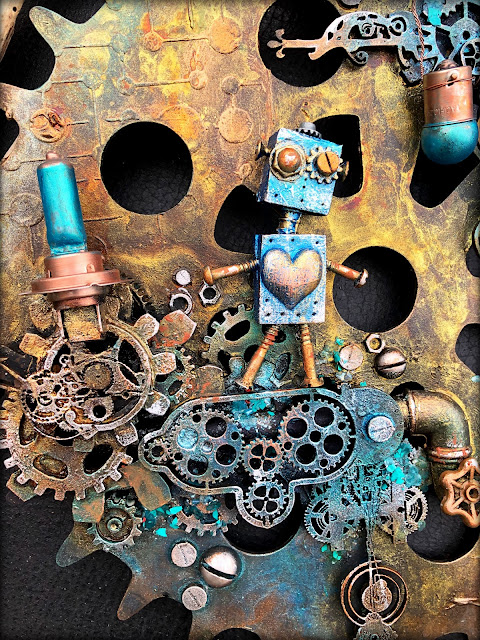
Giant cog - mini robot: by Louise Crosbie (Zuzu)


Hi there folks.

I’m sharing this assemblage that I learned in a class given by Nuneka Box. She used lots of resin pieces and metal embellishments but I decided to try my version using calico craft parts. 

I do love Nuneka’s style and her classes are very inspiring whilst being great fun. This one was part of her patreon membership.

I have used a few bits of resin cast in Finnabair moulds but it’s probably 90%  calico craft parts.


Parts used

Giant cog

Sheet of MDF cogs: 3

Sheet of MDF cogs: 4

Edison bulbs and chains

Mechanical clockwork motif 24

Cogs and clock hands

Mechanical clockworks motif number 16

Mechanical clockworks motif number 27

Sheet of mini hardware