
And the idea to make it look as if it was made from heavy, massive marble got me looking into a faux marble painting technique again that I hadn't used for ages...it was great fun unearthing this oldie but goodie technique from the depths of my arts and craft teacher's past. ;)


You'd better prepare for a long, picture and info heavy post as I admit I was so happy about the outcome of this project that I took oodles of pictures...but there is of course also a detailed step by step, so I hope you just grab a cuppa or a cool drink and make yourselves comfortable and read on.
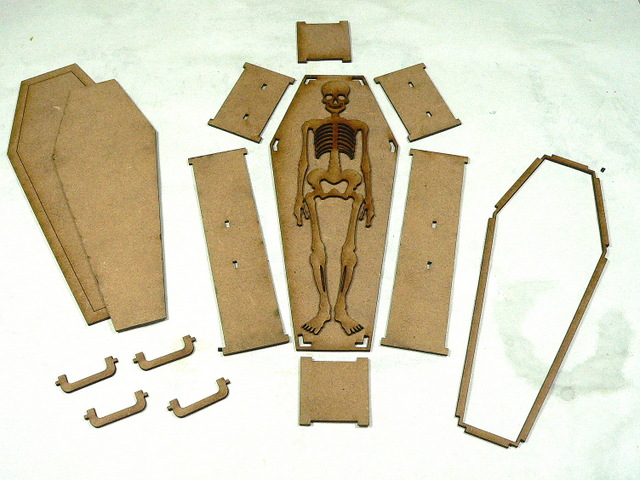
The 3D Coffin Kit comes like this (you can choose to either get it with or without the skeleton shape to put inside) and it is assembled really easily and fast.

I also used loads of other cool matching pieces from the wide range of Calico Craft Parts to create a coffin that looks as if it has been made of massive marble, with spooky reliefs cut out of the heavy stone and the handles make it look even more impressive. The tutorial on how to paint the faux marble effect is of course part of this very blog post, too ;)

Calico Craft Parts used:
- 3D Coffin Kit with Handles
- Ornate Scroll Decorative Hinge MDF Wood Shape - small
- Sheet of Mini MDF Hinges Wood Shapes
- Creepy Halloween MDF Wood Word - medium
- Flying Skull with Bat Wings MDF Wood Shape - small
- Gravestone Border MDF Wood Shape - medium
- Flying Bat Colony - MDF Wood Shapes
- Bones - Sheet of Halloween Mini Wood Shapes
- Sheet of Mini Insects - MDF Wood Shapes - Style 1
- Spiders Web MDF Wood Shape - Style 1
- Sheet of Mini MDF Keys & Escutcheons Wood Shapes

The coffin lid is made of two parts - the smaller one is glued underneath the larger one and there is an engraved line so you make sure it is placed properly. This second smaller lid layer helps the coffin lid close and stay in place securely and it really is a snug fit, so you should not add too much paint to the coffin and the lid - otherwise it may no longer fit into the opening!
While the glued together coffin box and lid were set aside to dry (I hadn't glued on the handles yet), I played around with various Mini Wood Shapes; the Flying Skull with Bat Wings, Hinges, various bats and other MDF shapes from the Halloween and Ironmongery section until I had found the perfect design and spots for them.
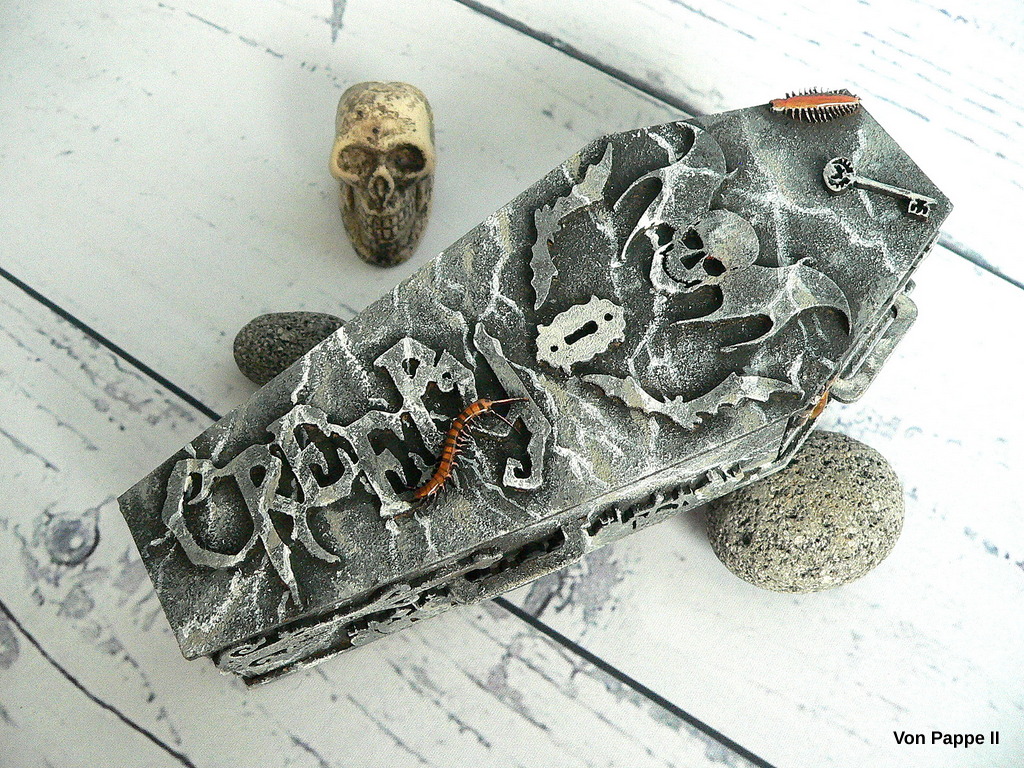
I started gluing the winged skull shape, a little key hole flanked by two bats (of the same shape but one flipped over to create a symmetrical design) and the cool "Creepy" word shape to the coffin lid using matte DecoArt Decou-Page. I like to put whatever bottles I have at hand on top as a weight to make sure the pieces are glued on flat and fully.

Now was also the time to glue the large skeleton shape inside the box and the headstone border, the handles, a skull and crossbones, the hinges and and some creepy crawlies to the coffin's outer sides.
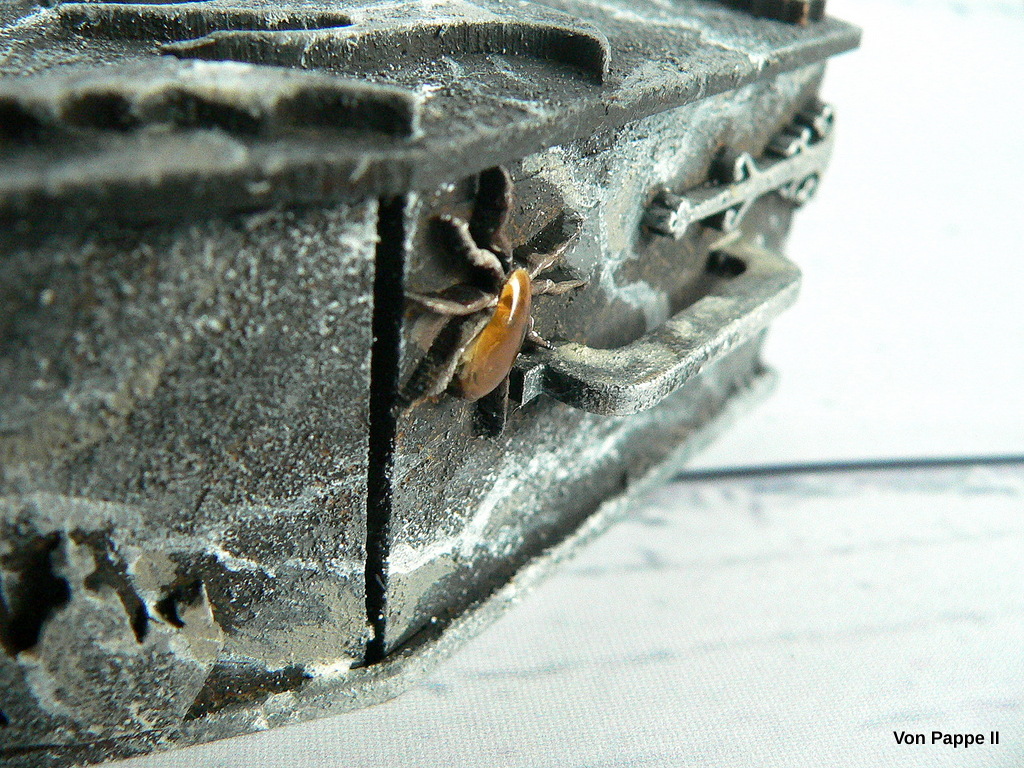
I could even use the cut off part of the spiders web on an other side of the coffin! Yay!

I combined that cut off part with a spider from one of the Mini Insects Sheets. I like to use clothes pins to secure glued on parts in place while the glue dries.

I glued on another spider, a small straight caterpillar (or wood louse?) and only left the bent shaped caterpillar for later as I wanted to paint the marble effect around the coffin before I added that on top of the "Creepy" wood shape.

I added some DecoArt media Texture Sand Paste with a worn bristle brush to the flat areas around the coffin and let that dry naturally.

To create a base layer for my black marble I used DecoArt premium Black Gesso. I stippled that on and made sure I also stippled the paint into all the nooks and crannies. When you do that use a really worn brush that can be discarded afterwards as this way of applying paint will wear it off completely!

Make sure you stipple around the glued on shapes from all angles and directions - otherwise you will find you have missed some tiny spots here and there (which is quite annoying I can tell).

Now on to the
FAUX MARBLE PAINTING TUTORIAL!
(as always you can click on the images for a larger view)
On the base layer done with DecoArt premium Black Gesso I used DecoArt premium acrylic paints Dark Grey Value 3 and Translucent White and two pieces of natural sponge. I started with some lightly sponged on random pattern traces of Translucent White and used the other sponge to go in with the Dark Grey while the paint was still wet.
So this second layer for the faux marble is a kind of working back and forth with sponging on these two paints and getting mixes of them because you work wet on wet in some areas while in others you apply just a single layer of paint.
Make sure you also leave some areas untreated.
As I had torn my sponge in two I also had some "sharper sponge edges" that I used to add some first not too crisp "veins" in Translucent White. To do so I just let the sponge's edge lightly touch the surface to apply the paint.

As it came in quite handy at this point, I also used the sponge to add Translucent White only to the raised areas of the engraved MDF Wood Shapes - to do so I rather wiped the sponge across with hardly any pressure instead of dabbing the paint on:

I painted the glued on spider webs the same way - using the sponge to gently wipe the paint across the raised areas. It's a lot faster than dry brushing and as this time I didn't aim for accentuated edges with the glued on MDF shapes, it was the perfect choice.

Now on to the third layer to create the faux marble effect - the painted on crisp veins! Use a fine detail brush and premium Translucent White this time.
To make the impression of a whole coffin carved from marble look convincing you have to add the sponged on veins and shades of white and grey and especially the painted crisp veins across whatever comes your way - be it the base layer of the coffin or a glued on MDF shape. Even the nooks and openings within a wood shape need to be painted if your marble veins cross these areas!

The picture below shows how the painted on veins continue from the coffin base across the glued on headstone border:

It is really easy to paint marble veins!
Marble veins look a bit like lightning - so paint the veins without thinking too much, letting them change directions very often and let them split, unite and/or cross each other randomly. If you find you have added too much white paint, immediately dab it back with your fingertip or a dry cloth. Also sometimes lightly smudge the painted lines with your fingertip while you leave others crisp and neat.

Also make sure that you continue the marble vein pattern from the lid around the coffin's sides for a realistic look!

Once you are content with your painted marble veins it's time to add the fourth and final layer!
To do so, go in with slightly diluted DecoArt premium Warm Grey acrylic paint and add some shades of that along and/or between some veins here and there with the detail brush. Do not create any sharp edged patterns but go for a smudged or blended look this time.
Again: dab back if you find you have added too much paint.

It is that easy to paint faux marble! Cool, huh?!
The secret to this is the combination of the sponged on layers, the crisper painted on veins and the addition of a semi-translucent mid-tone of the colours already used in the previous steps (which is the Warm Grey in our case). If you are not sure about how to design your marble pattern, simply browse the internet for "black marble" images. There are plenty of these to find and they are perfect to use for reference.
Here's once more a detail shot that shows all four layers...the really dark areas with just the black premium Gesso added, the sponged on texture with the mixes of Translucent White and Dark Grey Val.3, the painted veins and the final shades done with Warm Grey:

Once the paint had dried, I went in with some DecoArt Silver Spark Metallic Lustre and rubbed it onto the hinges, the little key and key hole and handles using my fingertip.


I used DecoArt premium Warm Grey again to dry brush the skeleton shape inside the coffin box.

Time to paint my creepy crawlies! I used a very fine tip detail brush and DecoArt media fluid acrylics Burnt Umber and English Red Oxide and the left overs from the premium Translucent White on my palette to create some shading so the insects would look more dimensional.


For even more dimension and also to contrast the sandy texture from the coffin I added DecoArt media Liquid Glass to some of the insects' bodies. The caterpillar on top of the Creepy Word Shape had been glued on in the meantime (right after I had painted it).


Done!
I love how my marble coffin turned out!
It really makes the coffin look heavy and massive, doesn't it?


I hope you like it too and that my faux marble tutorial has inspired you to create your own marble headstones, coffins, pedestals, halls, pillars,...with this technique. Thanks so much for stopping by and reading this far!

Happy Halloween Crafting!
Claudia
xxx

Wow! Claudia, words can't do this brilliant piece of art justice! I love your faux marble, and the effect of the tiny craft parts that look like carving is superb. This is a totally inspiring and wonderful project, show-casing the effects that can be achieved with craft parts! Fantastic, inspiring project! xx
ReplyDeleteSo creepy... in the best possible way! Genius paintwork techniques to create your faux-marble and "carved" decorations. And I love the ick factor of the insects creeping across the surface too! Brilliant!
ReplyDeleteAlison x
I love how you’ve created the faux marble coffin, incorporating the different details adds so much interest! Thanks for sharing the painting tips also, I can think of so many ways to incorporate this idea into other work! Always a treat to see how you create! Thanks
ReplyDeleteHands down, best faux marble I’ve seen! Great creation Claudia!
ReplyDeleteEin echtes Schmuckkästchen im wahrsten Sinne des Wortes, genial!! und deine Anleitung würde einen kompletten Workshop füllen :-), a spooktacular inspiration!! Hugs, Kerstin xx
ReplyDeleteAw! Thank you all so much for the lovely comments, Julie Ann, Alison, ann, Artfordinner and Kerstin! Much appreciated! XXX
ReplyDelete