
Hi, servus and thanks so much for stopping by today! Claudia here again - after a short unforeseen break. But luckily lovely Louise jumped in with two amazing projects (if you haven't already done so I highly recommend you check these out!) so you had no reason to miss me
Here's my latest project I would like to share with you - The Numeric Goddess.

Sounds intimidating, doesn't it? (especially to someone like me who isn't good at maths...lol). And maybe she isn't just a kind goddess after all (even though I assigned her a head with my lucky number)....actually I think the "Numeric Goddess" may have even been involved in my skipping my last project date...as I had mixed up the weeks on my calendar (due to being a bit absent minded because of a planned dental surgery) and therefore didn't have a project ready for the proper posting date. But here I am today - trying to make up for it.
I went mini again...you know me - I just love to work in small scale, especially when it comes to creating tiny shrines and assemblage pieces. And the mini sized Block Style House Kit from Calico Craft Parts is a perfect size for me!

Calico Craft Parts used:
- Block Style MDF House Kit - Short - Size: mini
- Star Shape - Mini MDF Wood Plaques
- Sheet of Mini MDF Wood Cogs - Style 8
- Fancy Plaques - Mini MDF Wood Shapes
- Sheet of Mini MDF Hardware Wood Shapes
- Sheet of Mini MDF Wood Wings - Style 4
- Sheet of Mini MDF Wood Crowns - Style 1
Maybe you wonder how I managed to use stuff from so many different Calico Craft Parts kits and sheets, but going small doesn't mean there's enough space to use a load of yummy stuff on...right?
I had already assembled the tiny block house some days ago (using matte DecoArt Decou-Page). I love to have alterables at hand and ready to use.

I have also used the same house kit without the front, so I could create a little open shrine from it (over HERE). This time I used the block version with all the sides glued together. Oh, you can do so many beautiful things with the gorgeous house kits!
Here's a picture of all the Mini Wood Shape sheets I have used. Honestly I love having a variety of tiny beautiful bits and pieces to choose from - it makes creating assemblage pieces so fun and playful.

You can also spot the pieces I had planned to use on the house's sides - alongside a little frozen charlotte, some vintage ribbon, a tiny spool and a vintage wooden bingo number (in the final stage of the process I decided to use a different one because I needed a bit of colour contrast).
I cruelly beheaded my frozen charlotte to replace her original head with the bingo number and a crown...


I first primed all the pieces with a thin coat of Lamp Black Americana acrylic paint from DecoArt. Then I created a crackle base layer on the mini plaques and the house by mixing white DecoArt media Crackle Paint and some drops of media fluid acrylics Raw Umber and Transparent Yellow Iron Oxide and brushing it thinly onto the pieces.

To speed up the crackling process I like to put the pieces close to the bulb of one of my desk lamps. I have two desk lamps, so I use the other to continue work.
The warmth of the light bulb speeds up the drying and crackling.

To the left you can see the pieces under the desk lamp with the crackle paint on them - put aside to dry. To the right are the pieces that in the meantime I applied some DecoArt Metallic Lustre Gold Rush and DecoArt Extreme Sheen paints Vintage Brass and Bronze onto.

After all had dried and crackled, I applied more white Crackle Paint with the tip of a palette knife randomly and let that crackle under my desk lamp's bulb again. Then I went wild with many layers of mixes of DecoArt Raw Umber and Carbon Black Antiquing Cream and washes of media Transparent Yellow Iron Oxide.

When you work on a small scale you have to pay even more attention to detail - so I took the time to also blend all the edges with black archival stamping ink and a piece of blending foam.

It makes such a difference!


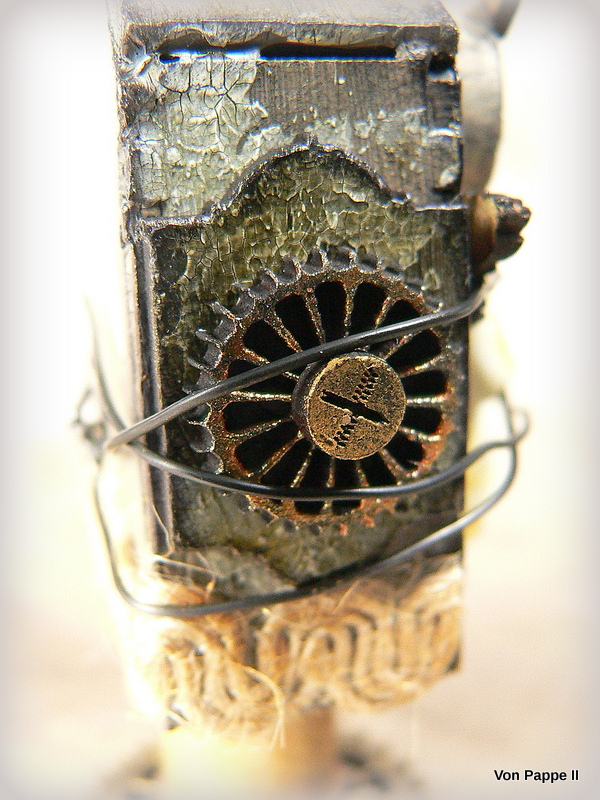
I wrapped some black thin soft wire around my goddess (maybe she gets numerically entangled too at times) and the finished shrine and twisted the ends together on the backside.

I added some rough self adhesive ribbon for more interest and to repeat the colour from the spool and the backs of the wood shapes.
I used the tiny spool and a larger cog from the Mini Wood Cogs sheet to create a stand.

Smaller cogs were used on the sides alongside some tiny screw heads from the Mini Hardware Wood Shapes sheet.
I love how all the tiny bits 'n pieces have come together so beautifully! I hope you like my Numeric Goddess shrine too!


See you in two weeks!
Hugs and happy crafting!
Claudia
xxx

Very cool Claudia! Even though you were a bit cruel to poor Charlotte! LOL
ReplyDeleteCalico makes the best pieces to work with! And you show them off so well!
Jackie xx
lol...yes, I was a bit cruel, wasn't I?
DeleteThank you so much, my friend!
Hugs,
Claudia xxx
Oh my goodness I am new to this and still getting used to using odds and bits. I love your creation maybe I am over thinking as I go but I will keep going. Thank you for sharing x
ReplyDelete:) Thank you so much, Christine!
DeleteIt can (and I think it also should) be a very playful process. xxx
I love shrines and this one is superb! You have created an original mini work of art. Those textures and effects are great and I love that this one is tiny, but perfectly formed! Once again - exceptional work Claudia and I hope that you're now completely recovered from the dental surgery.xxx
ReplyDeleteThank you, Julie,
Deletefor the lovely comment and the good wishes!
The surgery had to be postponed to next Thursday. *sigh
Claudia xxx
A wonderful assemblage project, 7 is my lucky number too :-)! Hugs, Kerstin xx
ReplyDelete:)))
DeleteI love that we share the same lucky number, Kerstin!
Hugs,
Claudia xxx
Amazing atmospheric work - poor Charlotte must have wondered what was happening, but to be elevated to a numeric goddess must have been some kind of reward.
ReplyDeleteAlison x