

I used 3 plain, Calico baubles to play with different materials and techniques while exploring the theme of 'Winter Moonlight'. These baubles are the perfect craft blank - inexpensive with a wealth of possibilities. I think they lend themselves well to the 'shabby chic' look, so I used rustic twine for suspending them from garden twigs for this winter arrangement.

This was a great opportunity for me to get out my wood-burning tool again. I always associate wood-burning with winter projects: perhaps it's because I love to sketch bare trees on a wooden substrate. I began by a pencil drawing on the bauble, which I could erase and re-draw until I was satisfied with it, before sketching over it with my wood-burning tool.

A friend gifted me my first wood-burner, but I have also bought a back-up one and both have controls so you can ensure that the tool doesn't get too hot and scorch the wood too much. I don't gesso before wood-burning, but you can see here how I gessoed the other two baubles and added some gold UTEE to the one on the left.

With this project I worked on the 3 baubles simultaneously, having ideas as I went along. I wanted to use this delightful little owl, perched on her branch in the light of a winter moon, so I gessoed her and pretty soon the ideas came! Calico Craft Parts always trigger my imagination!

Frost fronds on the window pane; white lace curtains illumined by a single candle and moonbeams glittering across a frosty path - all suggest the beauty of winter to me so I took a scrap of old lace, covered it generously with heavy gel medium and attached it to the back of the tiny owl craft part.

Meanwhile my mind was racing on to the next bauble! I wanted to set myself the challenge of creating the moon's face in Paper Clay. I once created 2 little Paper Clay faces for art dolls, but I'm not very experienced in this kind of sculpting, so I was excited to see what effects I might be able to create. I glued a circle of crinkled and flattened aluminium foil to the bauble so that the clay would have a 'tooth' to adhere to and played with positioning some little wings.
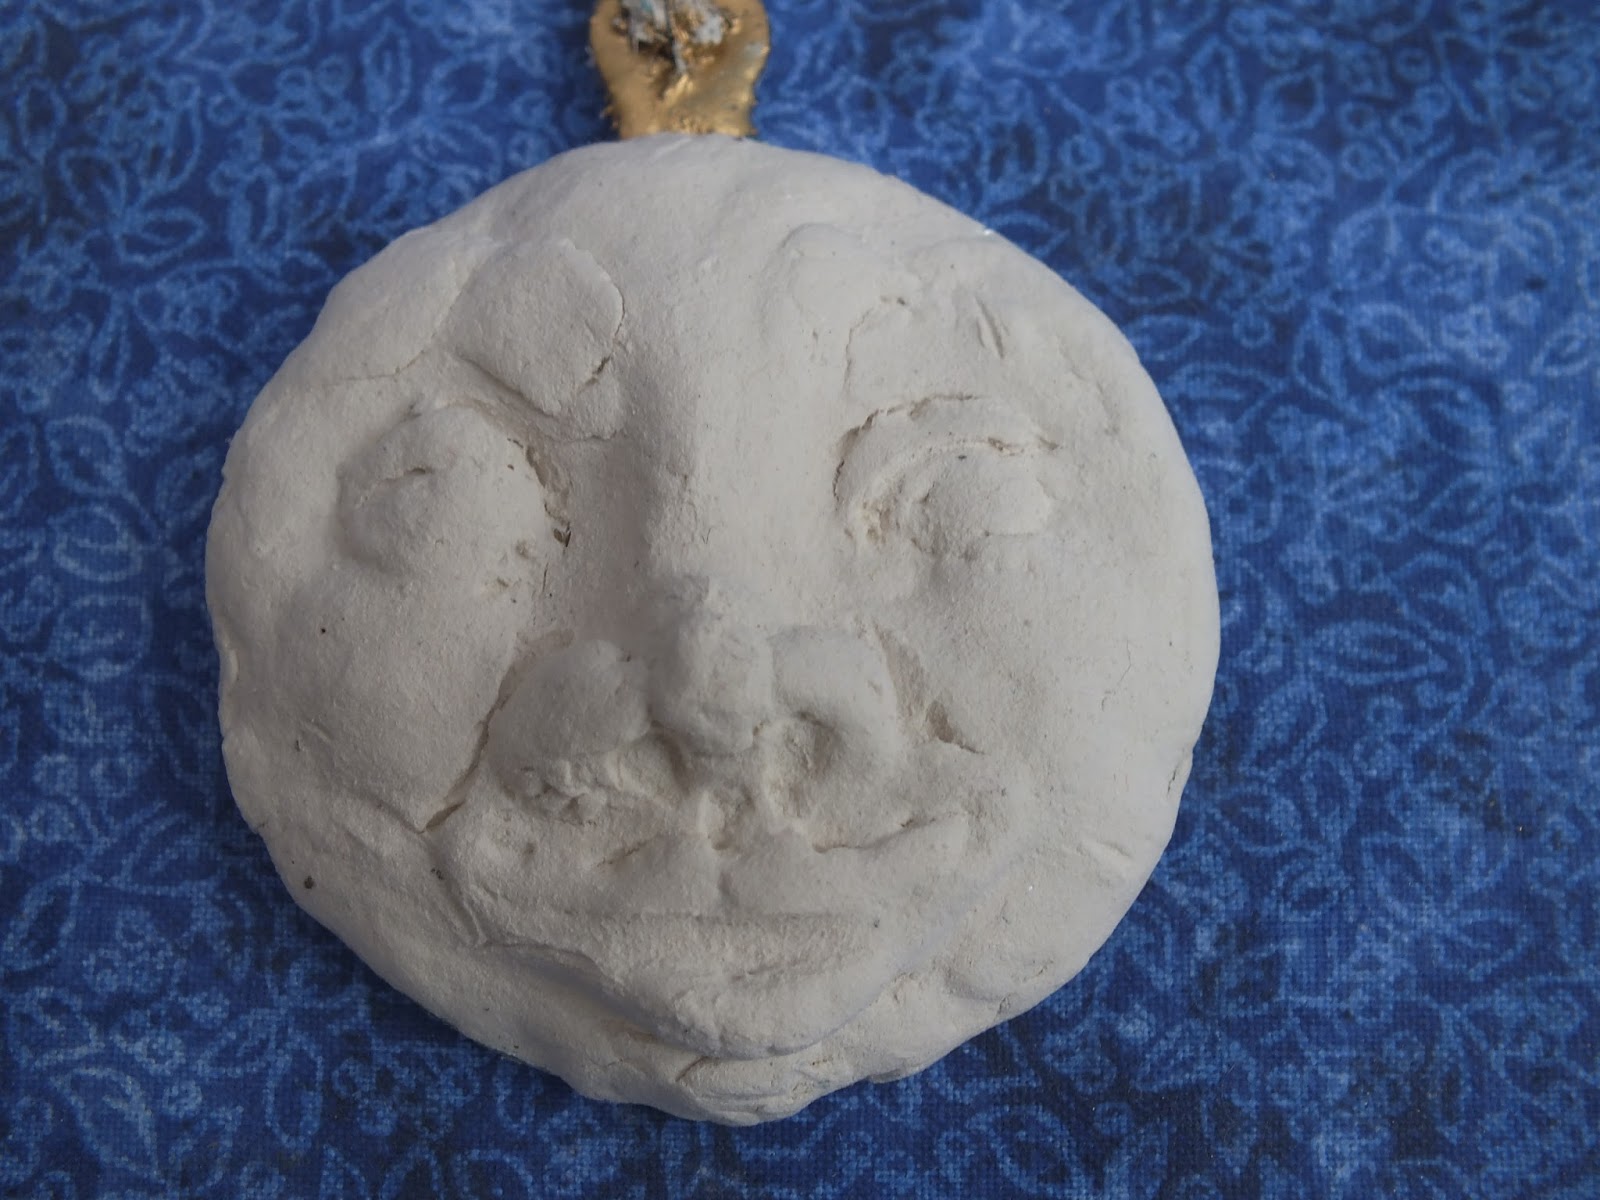
Now, after working the clay in my hands for a while, it was time to build up the Moon's face, adding little clumps, moulding and moistening and shaping with very simple tools like the end of a paintbrush! When I put Mr Moon aside to dry he looked decidedly craggy, but I tried to embrace imperfection and to tell myself that the moon has what you might call a 'rugged' complexion anyway!

Because the baubles would be dangling, it would be important to decorate the backs as well, so using acrylic paint and a cocktail stick dipped in Gesso, I set about decorating the reverse sides.

It takes around 24 hours for the Paper Clay to fully dry out and harden. I was eager to see how much painting my craggy-faced moon might improve him and bring him to life, so I worked on him next. I gave the clay a thin coat of Gesso and then painted with acrylics, added detail with pigment pens and a little water-colour and accented with some gilder's paste.


And here is the project as I add the wings to Mr Moon's back! I used a double layer of wings, one pair painted and glittery, the others left natural wood.

For the wood-burned bauble, I thinned down acrylic paint with acrylic glazing liquid so that I could work with subtle, translucent layers over the burned wood image. Gesso, a tiny Calico wren from the garden birds' sheet, a hint of glitter and a piece of broken jewellery completed the bare tree on a winter's evening.

Once the moonlight owl was fixed to her snowy background and I'd added a tiny button, I was pleased with the shabby chic look of this decoration. I added some spectacles to give her a wise look!

I do hope you've been inspired to play with some of your favourite techniques on plain, Calico baubles. I wish you a cosy and creative week and thank you for stopping by today.
Calico Craft Parts Used in this Project
Plain, round MDF Bauble, style 1
Sheet of MDF Garden Birds
Owl and the Moon Scene style 2, smallest size
Sheet of MDF wood wings, style 1
beautiful, Julie Ann!!
ReplyDeleteThank you so much, Helen. xx
ReplyDeleteLovely baubles, Julie Ann!
ReplyDelete(the one with the cute owl is my fav) ;)
Claudia x
Thank you, Julie Ann for sharing your fun process...I love the sculpted Moon Face and all the glint and glitter of moonlit snowscapes...
ReplyDeleteThank You so much, Claudia. The owl was my son's fav too! And thank you Heather for your lovely comment. I'd like to try creating a crescent moon face in Paper Clay at some time too.
ReplyDeleteJulie Ann these are all darling!! I do so love your burnt tree- what a clever idea!
ReplyDeleteJackie xo
Thank You so much, Jackie. xx
ReplyDeleteWow, these are so clever and imaginative,
ReplyDeleteLucy x
Thank you, dear Lucy. xx
ReplyDeleteWhat a brilliant inspirational post - I love what you've done with the baubles, and each so different. The moon face is probably my absolute favourite - such a character! - but I love your wintry tree, and the paintwork on the owl is exquisite. Perfect colours for me for Christmas too - lovely, lovely!
ReplyDeleteAlison x
Thank You so much, Alison. I hope your Christmas is a wonderfully relaxed and happy one! xx
ReplyDelete