And she is riding her giant fox, Jasper! So try not to faint as you witness the world's one and only team where a magic creature of the dark forest and a wonder from the unknown depths of the ocean unite!!!
So be daring, come over here...yes, yes...It's you I'm talking to, Mylady! Step closer and enter Fraulein Ilse's Freak Show! A myriad of amazing and weird wonders await you for the cost of just 5 Shillings!


(for larger view click on the images)

Calico Craft Parts used:
Lol. Don't ask me where the idea originated from! It just hit my mind when I saw the new fox shapes and the fleur de lis shrine over at the Calico Craft Parts shop site. And I remembered the lovely dolphin shapes....and suddenly it came all together - mainly inspired by the "Freak Show" season of the fantastic American Horror Stories series I have just been enjoying.
These are (most of) the Calico Craft Parts I used:

The poor dolphin had his nose chopped off to form my mermaid shape and the fox didn't fit into the shrine, so I cut off his tail and glued it into the shrine as if it were bent to the side. Two mini shells form Glenda's bra and the tiny sea horse she is holding hides the dolphin's fin.
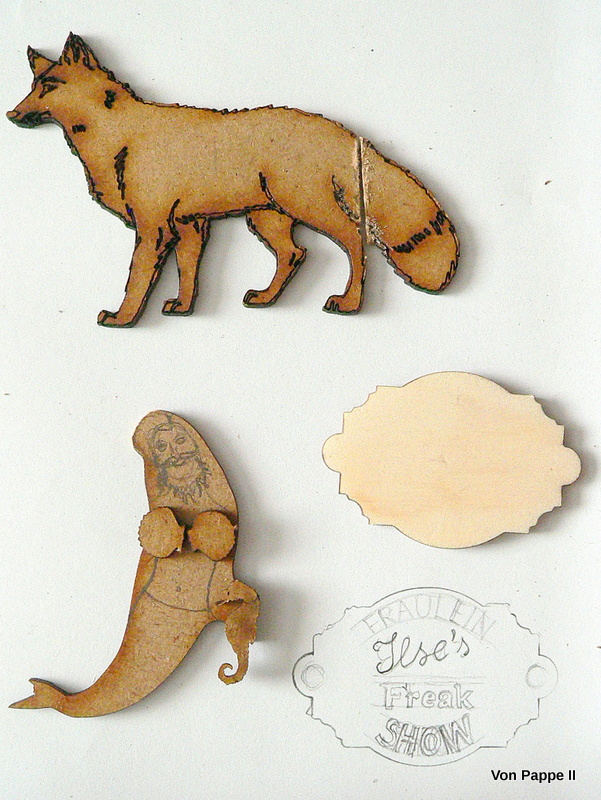
As you can also see, I made a sketch for the show sign to make sure my title would fit in. You could as well create a sign on your computer and print it out reversed for use as an image transfer, but sometimes I prefer a project to look "handmade" - so little imperfections are welcome and intended and I decided to do it free hand (just following my sketch).
I started with painting a first coat onto my two creatures and the sign using heavy body acrylic paints for good coverage.

There's no need to aim for a precise tone at that point as the shapes will be painted over and all the layers and details will cover up most of the ground layer anyway. But it is better to have a coat of paint (that matches the desired look) so the MDF pieces become less absorbant and the added colours will also look brighter.
Next I laid out all my needed pieces to find the exact spots and also roughly sketch the curtains.

The outsides of the shrine pieces and Art Deco ornament were painted in deep red and buttermilk white.

Then I applied a wash of DecoArt Media Transparent Red Iron Oxide fluid acrylic to tone it all down and make it look aged and shabby.

Once that was dry I covered the painted sides with a thin layer of DecoArt Media clear Crackle Glaze and let everything dry naturally (which is important as the crackling process won't work if you speed it up with a heat tool). As it is already quite warm outside it just took about an hour for the Crackle Glaze to do its magic (I finished the show sign in the meantime). To make the crackle more visible I applied a mix of Raw Umber and Carbon Black DecoArt Media Antiquing Creams and let that dry. Don't be afraid if your project looks like this at that point:

Then I went in with a damp soft cloth and removed most of the Antiquing Cream mix until I was content with the look of my shrine.

The edges of the show sign were dry brushed with a mix of DecoArt Media Carbon Black fluid acrylic and Charcoal Grey Americana acrylic paint.

Then I painted the text using soft fine tip brushes (sizes 0 and 1) and DecoArt Media Titan Buff fluid acrylic. A wash of DecoArt Media Raw Sienna fluid acrylic helped tone the sign down once the paint was dry.

To finish it off, I added some yellow dots around the edges (using a fine tip embossing tool) and toned everything down with diluted Carbon Black Antiquing Cream until I had achieved the worn look I was aiming for. I sealed the sign with a thin coat of DecoArt Media Satin Varnish.

The image above also shows how I used some of the small circles that come with the shrine kit (and are meant to create the feet for the shrine) to create the fool's cap. The circles were painted with a warm yellow, crackled and toned down the same way as the whole shrine.
I did the same with three stars to mount them to the top and sides of the shrine. But before I assembled the shrine I had to paint the insides first:


I painted the curtains using a warm white and charcoal grey wet in wet. Then I once more toned down the dried painting using a wash of Transparent Red Iron Oxide.
To assemble the shrine I used matte DecoArt Decou-Page. The feet for my shrine are made from tiny thread spools.

I sealed the whole shrine with a thin coat of DecoArt media Satin Varnish:

A pompom ribbon was glued around the shrine's upper edge and the painted stars were fixed to the top and sides as well:

Now my shrine looked like this:

Time to paint my mermaid and the giant fox! I played around with various tones of reds, oranges, yellows and browns, teal, turquoise and blues, metallic paints and other gorgeous colours and really enjoyed this process (so no pictures I'm afraid).


My son helped a lot by giving directions on how to place the two mini shells properly. ;)
Then it was time to glue Glenda and Jasper in place after sealing them with some Satin Varnish too.
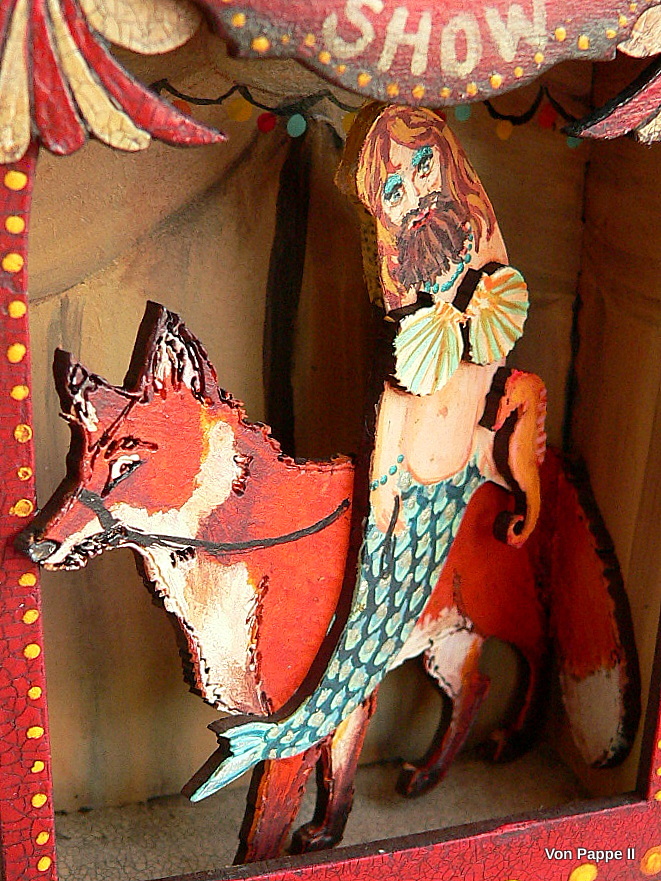
I am so glad Jasper could keep his beautiful tail!!!

So that's it for today! I hope you enjoyed your visit with Fraulein Ilse's Freak Show (and the tutorial too)! If you are inspired to create your own freaks, weirdies and wonders I recommend you hop over to the Calico Craft Parts Shop

and browse their whole range for possible combinations! ;)
Have fun!!!
Hugs and happy crafting,
Claudia
xxx