

Hello Everyone
First of all, thanks to Louse Crosbie for the invitation to be a Guest Design Team member for May. We were fellow DT members of another craft blog so it’s been a privilege to learn from all the talented crafters out there.
This has been my first foray into mixed media and a bit of a learning curve, but thanks to You Tube and Pinterest, I was able to find inspiration to help me choose what I wanted to make from the amazing range of products and themes that Calico Craft Parts sells.
I love oceons, sea life and the colours of the seas and oceons so I decided to choose ocean themed products:

Helen, the owner, included an extra plaque with my order so I decided to use that as the base for today’s project.


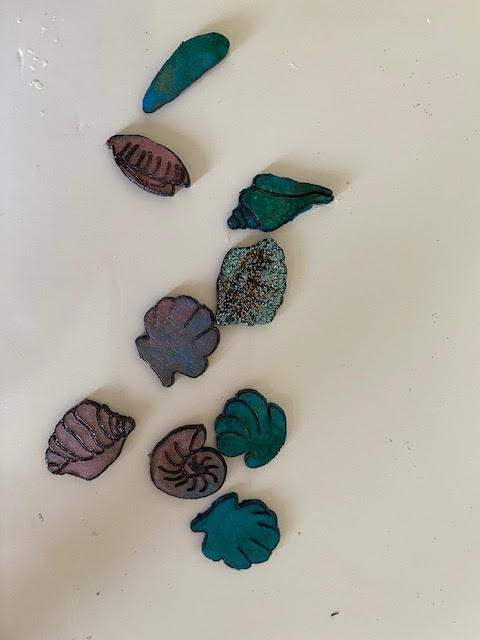
I stamped the seahorse with some of the inks starting with where I thought the shadows would be so darker shades on the head and tail. I sprinkled water to activate the distress inks so it gave a nice mottled look to the sea horse. I then used the darker brown distress ink to draw some markings on the element then I used some bronze coloured modelling paste to highlight some areas and give a metallic sheen, then I added some sparkle with a glitter based products. This also helped give the shell a nice glossy effect (which, sadly does not show up in the photos). I also covered the base in various shades of green and blue mica spray, then added texture with some mesh fabric I had as well as muslin. I then played around with the different gesso, pastes and sprays until I got the look I wanted on the base, however it did end up very blue and green so that’s why I did some of the embellishments in paler colours and glimmer/glacier paste. I also laid some bubble wrap over the base to give me some more texture which I thought I could then use embellishment drops or glossy accents to highlight the bubbles.

So here is how I decided to place everything which I then glued down.

I think I’ll probably use this as a wall hanging as the plaque had holes in the top which have been covered by the gesso and pastes, but to showcase it for the blog, I found some ocean themed papers in my stash which I felt co-ordinated well.

So I hope you like my first ever mixed media project. Thank you to Louise and Calico Craft Parts for giving me the opportunity to try the products and design something as a complete beginner and novice and hopefully this will inspire other beginners to mixed media to just jump in and find your theme then be creative.
Happy Crafting
Liling
xoxo
Supply list:
Welcome here, my favourite theme too, wonderful!!
ReplyDeleteThank you Kerstin x
Delete