The Craft Parts used by Claudia to create this project are available in a money saving bundle (30% off!) over at the web shop - CLICK HERE to purchase.
Hi, servus and thanks so much for stopping by today! I am sharing my first Christmas make for this season and it comes along with a cool way of creating your own (almost) real looking mini-icicles to decorate your Christmas projects with!!!!
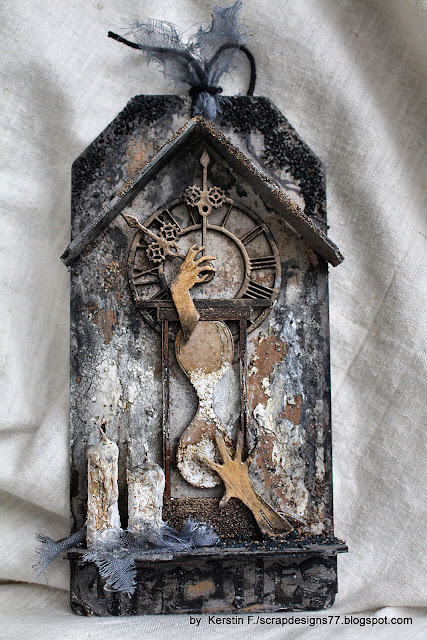
It is a trinket box with one of the lovely houses from the
Town and Country House Kits section in the Calico Craft Parts store and it has a lot of glittering snow - but that only shows when you look at the project from a specific angle or when you move around looking at the box and the house. But I've managed to capture a bit of the festive bling in these pictures:
And I have also discovered a really easy way to create icicles that almost look like the real thing....
Cool, huh? Of course I am sharing the how-to with you in this post ;)
But first let's talk about the
Calico Craft Parts used:
-
MDF Tea Caddy - Storage Box Kit (small)
-
Church - School House - MDF House Kit (small)
-
Christmas Tree MDF Wood Shape Style 4 (small)
- a left over piece from the
Winter Tree Scene MDF Wood Shape - Style 7 (large)
-
Santa & Sleigh MDF Wood Shape - Style 7 (large)
The Craft Parts used by Claudia to create this project are available in a money saving bundle (30% off!) over at the web shop - CLICK HERE to purchase.
The School House Kit comes flat like this...
...and is really easy to assemble within a few minutes. There's an instructional PDF file on the shop site with the House Kit that shows in which order to put the pieces together and how to assemble the little bell tower. I used
DecoArt matte Decou-Page - my go-to glue and sealant. I use a small size worn flat brush to apply the glue to the glue tabs and edges.
While the house was set aside to dry, I assembled the Tea Caddy and set that aside to dry too. The Decou-Page dries really fast - so it takes less than ten minutes until you can continue working on the pieces.
Using
DecoArt white Acrylic Gesso I dry brushed all the flat pieces and painted the house's in- and outside and tea caddy's outer sides. I gave the house and the tea caddy two coats of white Gesso and also dry brushed the reindeer antlers really carefully using a soft brush and rather dapping the paint on instead of brushing it.
While the Gesso dried I applied stars all around the tea caddy's sides using a
stars stencil and
DecoArt media white Modeling Paste. I used a long flat
palette knife to thinly drag the paste across the stencil and make sure I had even coverage before I carefully removed the stencil. Of course I could always do just two sides at one time - so I continued with the house on the tea caddy lid in the meantime and then came back to do the other two sides.
More white Modeling Paste was used directly on the box lid and I applied a generous coat with the palette knife, creating an uneven surface that I placed the house in while the paste was still wet. This way the modeling paste also acted as a glue. The Christmas tree was also put into a little "heap" of "snow" (=modeling paste).
I also used a pointy
palette knife to drag some of the modeling paste off the heap and onto the tree base to make sure it stayed in place and was standing upright.
As the reindeer antlers and the horse-gear are quite fragile and thin, I used a thin strip of cut to size
acetate and glued that behind the wood shape using
DecoArt Liquid Glass (as it dries up transparent and adds to the sturdiness).
The strip was of course visible on the back side of the wood shape but my plan was to cover that up with a die cut banner with a Christmas greeting stamped onto. But first I continued with adding much needed snow to my little winter scene.
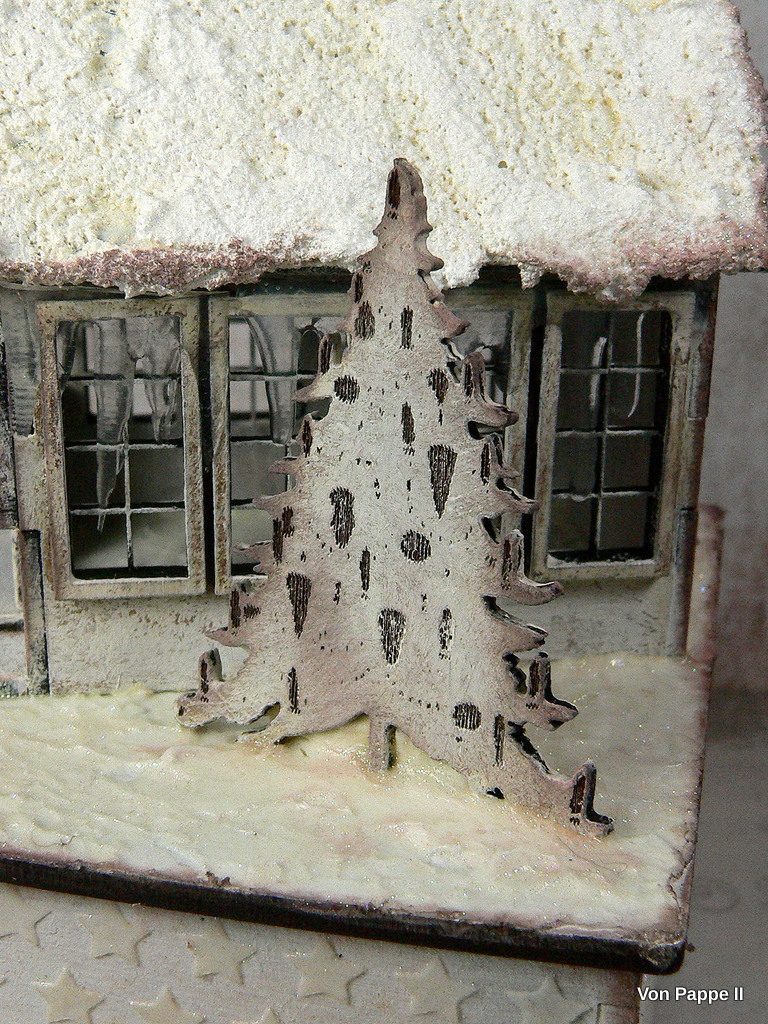
I think I applied almost one third of a small pot of
DecoArt Snow Tex to the roof, but I wanted to create the impression of a lot of snow and not just a thin layer. The more snow the better, right?
While the Snow Tex was still wet, I placed Santa and his reindeer into the little heaps on the roof -
this way it was glued in place without the use of additional glue.
Then I let my snowed on house
dry over night. Once the Snow Tex had cured, I lightly inked the edges of the house, house roof, box and box lid with
brown archival stamping ink using a piece of
blending foam. Then I took a
soft brush and applied a thin coat of
DecoArt Ice Crystal Glamour Dust to the roof and the snow on the ground around the house.
On the evening before I had also started an experiment...how about
making icicles using Liquid Glass and applying it to my non-stick craft mat (where it would hopefully cure and be easy to peel off and glue to my house the next day)?!!
So what I did was to kind of "draw" icicle pieces using the
Liquid Glass tube's nozzle as I would use a pen. I made sure I added quite a thick layer and didn't make the icicles too thin. Then I left that to cure over night as well.
Tadaaahhh! This was what I got when I checked my craft mat the next day! Yay!
So I measured the house roof's sides and "drew" more icicle borders on my craft mat and waited for that to cure as well. I love how close they are to the real thing!
All I had to do was cut a straight edge where necessary and glue the icicle borders into place using a bit of matte Decou-Page that I applied to the window frames and the roof's edges. The result was definitely worth the wait (for the Liquid Glass to cure, which takes at least two hours I'd say).
Once the icicles were glued in place I only had to
die cut and stamp my banner to cover up the acetate strip on the Santa & Sleigh wood shape. I used an old Tim Holtz Sizzlits die and blended the banners' edges with vintage photo Distress ink. The Christmas wish was stamped using
letter stamps and
brown archival stamping ink.
Voilá!
Obviously I forgot to adjust the white balance when taking the steps images, but I found out before I took the images of the finished piece - so these are much closer to the real look.
I hope my little snowy Santa scene has put you in the right mood to get on with your Christmas crafting and maybe there is someone you know who would love to get a winter or X-mas themed trinket box for Christmas... ;)
Hugs and happy X-mas crafting!
Claudia
xxx