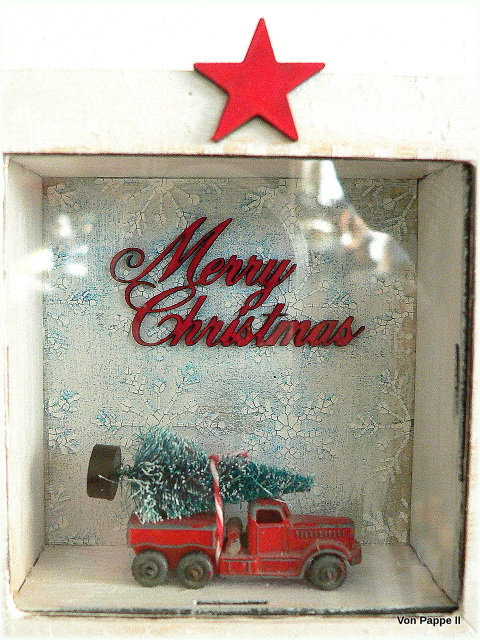
Christmas is fast approaching and I gladly managed to create another piece to decorate my home with to celebrate the advent season. It was a rather quick project, but due to Calico Craft Parts' fab Birch Plywood Box Frame Kit I used it has become a real eye-catcher on my wall.
Calico Craft Parts used:
I started with loosely brushing on white DecoArt media Gesso onto the plain parts of the Box Frame Kit using a very worn wide bristle brush to create visible brush strokes and texture.
Once the Gesso had dried I masked the frame section of the back panel with masking tape and added some white DecoArt media Crackle Paint through a snowflakes stencil with a palette knife. I put the panel on the radiator to let everything dry.
The other gessoed pieces were given a white star pattern by stencilling on white DecoArt media Gesso through a star stencil. I used one of DecoArt's stipple brushes for this.
I only applied the stars to the outsides of the box sides, but I did both sides of the frame piece - back and front.
In the meantime the DecoArt media Crackle Paint had done its magic...
... so I added some DecoArt Turquoise Sparkle to highlight the cracks and also add a bit of bling.
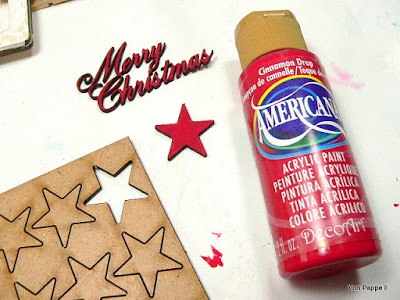
The Word Shape and star were painted with DecoArt Americana Cinnamon Drop acrylic paint.
Time to mount the clasps that hold the acrylic glass pane in place:
I inserted the small dowels into the holes at the back of the frame using a pair of pliers to hold them in place while I gently hammered them in with a plastic mallet.
Then I placed the V-shaped pieces onto the dowels and held them in place with my pliers - making sure the prongs were placed close to the hole so I could gently hammer them to slide my small pieces onto the dowels without braking them. (see image below)
Once the painted quote and my car were glued in place inside the box , I removed the protective sheets from the front and back of the acrylic glass and inserted it into the frame.
Again I used pliers to gently rotate the little hammered on clasps so they slid into the slots of the box and kept everything in place.
The red star was glued to the front and the hanging hook was glued to the back of the box using matte DecoArt Decou-Page.
Et voilá! My Christmas Box was ready to be put up on a wall! Yay!
But as the box frame is quite deep, you can also put it on a table or your mantelpiece if you want to.
I hope you like my little
"Christmas Tree Transport Scene in a Box"!
;)
Wishing you
a very merry Christmas
and
happy holidays!!!!
Claudia
xxx


This is a wonderful piece of art Claudia ... so unique and unusual and such an eye catcher! I always love what you do, but this is really special! Such a keepsake! Carol x
ReplyDeleteAdorable . Love the little truck wonderful texture too . Tracy x
ReplyDeleteThis is amazing Claudia, I love the material you have used and all the fabulous details! Hugs Kerstin xx
ReplyDeleteI love the 'Retro' look of this lovely, festive creation, Claudia - beautifully original! Happy Christmas to you and thank you for all the inspiration over the last year! xxx
ReplyDeleteThank you all so very much, Carol, Tracy, Kerstin and Julie! XXX
ReplyDeleteMerry Christmas to you and happy holidays!
So Christmas tree will be home on time... beautiful scene, with a vintage feel I love! Merry Christmas to you too, Claudia!
ReplyDeleteThank you, Lys. Merry Christmas and happy holidays from Vienna! XXX
DeleteBoldog Uj Évet
ReplyDelete