Monday 31 October 2016

Happy Halloween! - by Claudia

Hi, servus and happy Halloween, dear Calico Craft Parts friends!!!
I hope you are all enjoying this holiday as much as I am and are having a lot of fun!

This last Halloween-ish project of mine can also be seen as a celebration of late fall - with fog blurring one's vision, the first bit of snow in higher regions, with crows in the bare trees's branches and spiders looking for a cosy place inside the house and with darkness already setting in in the afternoon. Which makes me want to look for a warm and cosy place inside too and light some candles.

I have created a shadow frame - using one of Calico Craft Parts' alterable printers trays and some of their wonderful (and wide range of) autumnal and/or Halloween MDF pieces - and tried to capture what I love most about this time of the year.


Calico Craft Parts used: 

- MDF Printers Tray Kit - Style 4
- Gothic Mansion Haunted House MDF Wood Shape - Style 4
- Flying Barn Owl MDF Wood Shape - Style 4
- Pair of Ravens on Branch MDF Wood Shape 
- Sheet of Mini MDF Wood Birds - Crows & Ravens 
- Spider MDF Wood Shape - Style 7


I kept the number of parts used and background techniques quite small so the lovely wood shapes and the papers and crackle of the background would be the stars of my make.


The printers tray was glued together using DecoArt matte Decou-page and then I added torn dictionary page pieces to it quite randomly. I tried not to work too neatly so the edges would still look torn and worn. I also added a thin coat of matte Decou-Page on top to seal the surface.

The wood shapes were dry brushed with DecoArt media black Gesso, so none of the beautiful detail would get lost!


Next I scraped on some white DecoArt media Crackle Paste here and there using a palette knife. I left it to air dry.


In the meantime I took a worn bristle brush and added strokes of a mix of black and white DecoArt media Gesso in some spots.


Once the white Crackle Paste had dried I applied a thin coat of DecoArt media carbon black Antiquing Cream. I heat dried the Antiquing Cream and then wiped off the excess using a damp soft cloth.


This way the cracks became more visible, the whole project was toned down and the black that had seaped into the tray's corners and edges formed a visual frame too.


I used the left over parts from the MDF plate the printers tray came in to stack all my wood shapes.


For my hanging device I drilled two holes into the tray's frame and fixed some rough string to it.


Done!


Thanks for stopping by 
and 
hugs and happy shopping and crafting 

Claudia 
xxx


Wednesday 26 October 2016

Christmas Hanging House Dec. by Lesley

Howdy peeps.

I have been working on some little Christmas hanging decs these past couple of weeks, and thought i would share one with you.


Obviously this one is typical of a Christmas dec.......the others i have made have dolls heads in them and even a clown was used! But child number one insisted it was in bad taste to post it here in light of the news lately. Can't say i agree 100%!

I used one of the tall houses, gluing it together as usual but leaving the front off. I gave the entire thing two coats of white paint. Once dried, i gave the outer wall a coat of crackle glaze and rubbed silver paint into the cracks when it had dried.


The inside of the house was also given the crackle treatment.....whilst it was still wet, i chucked a load of dimensional balls into the box, large and small.


I used silver paint to dab over the surface of the balls, and then spritzed some silver shimmery gloss spray directly into the house. I love the texture the different size balls give the box.

Next....came out the soldering iron. I covered all joins with tape and soldered over the top. I deliberately kept the soldering bumpy rather than going for a smooth look.......thought it gave the house even more texture.


The little bottle brush tree was originally white. Using my finger, i covered it with a green wax and glued it in place.


The final layer of texture was the roof, which i covered with small tinsel bits.


To hang the house, i soldered a small jump ring to the roof and added a piece of chain.


A link to a my fellow team member Claudia's blog popped up in my newsfeed the other day.....and i popped over to have a looky. Great minds think alike......and she has been making christmas decs using the little house as well! You can hop over and have a gander here at her lovely vintage hanging dec.

Thanks for reading!
L.xx

Ingredients used
Block style house kit.

Sunday 23 October 2016

A Domestic Goddess - another spool shrine by Julie Ann

Hello and thank you so much for dropping by Calico Craft Parts Blog today. A few weeks ago, I turned three spools of winter ribbons and twine into a miniature 'Spool City'. You can see it here. I just love making houses that are also art dolls and functional into the bargain, so I decided to create another spool character. Meet Athena, Goddess of Domestic Crafts.


Athena is wise and she wants to remind us that although Winter is a time of ice and snow, we can still have warm hearts and show our love for close friends and family by wrapping gifts for them with love. She offers us twine as she stands at the open door of her cosy home.


Because I had a wider spool I wanted to alter for this project, I chose one of the small framed tall house kits. I gave the whole kit a thin layer of Gesso before stenciling a brick pattern onto the roof in 3D Gloss Gel. You can see here that, as the Gel dries it becomes transparent, leaving just a raised area to paint and gild.


Here are the side panels. I wanted a raised effect only at the edge, as I intended to have a strip of tape in the middle, so I masked with some narrow tape and used a text stencil with the 3D Gel.


Once I've chosen a face, the art doll's character can blossom. I take a basic face from my library of hand-drawn faces, but it usually undergoes changes, as i colour and shade it and add definition. I chose to make Athena's face from a small heart plaque. I cut the print of the hand-drawn face to roughly the right size. This can easily be filed down around the edges. Once I'm satisfied with the effect I spray with a good professional fixative.


On the back of the house, the stenciling is simply acrylic paint, but the technique of using light over dark layers and moving the stencil a fraction to the right before re-stenciling, creates an impression of dimension.


I've added some warmth in the red and golden bricks; shading to the face and jointed arms from one of the small doll kits to reach out and welcome us. The bodice is reminiscent of warm summer days, now just a memory.


I love how the gilding paste really highlights texture on the side panels. When the house was fixed into place with glue it seemed to me that the walls were like a warm cloak enveloping Athena.


These plastic clips from a local hardware store are so useful for creating good contact between glued surfaces. It's probably my imagination, but the Goddess looks just a tad worried about what's going on here!


Now that Athena's position is more dignified, as befits a domestic goddess, I think she looks less concerned! I've used masking tape to keep her arms in place until the glue is set, and you might notice that I've added strips of hand-painted card to the frame and a narrow tape along the bottom. Whenever I add decorative tape to a project, I always stick it down with some matte medium first as the adhesive can easily peel off.


Now she's firmly in place on her spool world, ready to help with gift-wrapping and tag making!


Sheet Moss and a tiny pine cone create a miniature forest floor at Athena's feet. She has lacy sleeves and a lace skirt, stiffened with Heavy Gel Medium and gilded. The leaves scattered over the floor are punched from a scrap of hand.made paper. It's always fun to find uses for scraps when you're making art dolls.


Athena has a secret. A friend of mine asked me to if I create a spool goddess for her and this is what I came up with! I do hope Athena will make herself useful on my friend's shelf. As October draws to a close and we prepare for all kinds of winter celebrations to lighten the dark days, I hope that maybe you'll be inspired to use some of the beautiful seasonal Calico Craft Parts to create some winter-themed altered art of your own.

Calico Craft Parts used.
Framed MDF Tall House Kit (small)
Standard Heart Birch Plywood plaque
Standard Jointed Art Doll Kit Style 2 (small)
Sheet of Mini MDF Christmas shapes (Snowflakes 2)

Monday 17 October 2016

Bids, Please! - by Claudia

Good morning, ladies and gentlemen, and welcome to our annual Halloween auction of the rare and the bizarre!

Today we are presenting an exquisite selection of rare magical and mystical antiques and our first item is this very old handmade "portable potions tome" from the early 18th century.
Opening bid are 160 GBP.


These book shaped potions boxes were quite common in the early 18th to the late 19th century and ranged from plain models for the small purse to real exquisite and elaborate ones for the renowned and wealthy witches. The style of the tome you are bidding on today indicates possession by a better-off middle-class witch.


Portable potions tomes were never signed - neither by the manufacturers nor by their owners - mainly due to fear of prosecution. They usually held a witch's most favourite potions and poisons to turn to and the content of this particular tome shows that it must have been in good use and so up until the late eightteenhundreds.


Preferably the tomes were done in plaque or tombstone shape and that gladly makes assigning them to specific manufactories quite easy.
This piece was made by the manufactory of the French twin sisters Blaire and Marie Malfaisant, who quite successfully overtook and ran the business from a long line of ancestors that can be dated back to the fifteenth century. The manufactory was located in Somnamblis, a village located south of the Ardennes. The region has always been known for its beautiful and huge oak trees so the manufactory's emblem shows two oak leaves flanking an acorn below three potions bottles in varying shapes.


The fainted green on the leaves tells that this specific tome has been made in the early half of the eightteenth century. From 1743 on these were done in an autumnal red which was retained until the manufactory's decline in the 1890s.


Witches used to customize their tomes by attaching charms and spells to the spine. Paper beads rolled from handwritten or typed protective spells were quite common, as well as twigs or roots from trees under which witches loved to have their gatherings. Driftwood was more common in regions that were known for healing wells. Each witch had her special healing stone - in this case it is a piece of amber. These stones could be touched or licked to release their healing power and helped with many different light states of indisposition.


Considering its age the item is in excellent condition. The flasks' and capsules' contents have dried out, but traces of poison hemlock, dried toadstool, pricklyburr tincture, nutmeg liniment, mandrake tonic and holly ointment could still be detected by our chemists.


These were all quite common and indicate that the last owner of this tome, Portia Primwick, was mainly into healing witchcraft for the wealthy customer. The Primwicks' line of ancestry in witchcraft is well documented and can be accessed in the library of the Town Museum of North Hogthrompton, where serveral generations of Primwicks had lived and been highly appreciated townspeople.


The portable potions tome had originally belonged to Portia's great-grandmother and was by tradition passed on from mother to daughter.
The cover shows traces of intense use, but is still intact, which proves the high quality of the materials used by the Malfaisants and their manufacturers' high level skills.


Leather strips and fabric on the book's spine still are the originals as are the label and the box with the laquer sealed lid. The craquelure is a typical sign of age and not of damage.


You are bidding on an item that was produced in a limited edition of twenty pieces only!!!
Ladies and gentlemen, we are awaiting your bids! 

***


Calico Craft Parts used: 

- Shaped Profile Greyboard Mixed Media Board - Style 17 
- Shaped ATC Wood Blank with Flourish Cut Out Frame
- Skull MDF Wood Shape
- Sheet of Mini MDF Label Holders Wood Shapes
- Sheet of Mini MDF Wood Apothecary Bottles
- Sheet of Mini MDF Acorns and Oak Leaves


And for those who managed to stay with me this far a very short how-to:


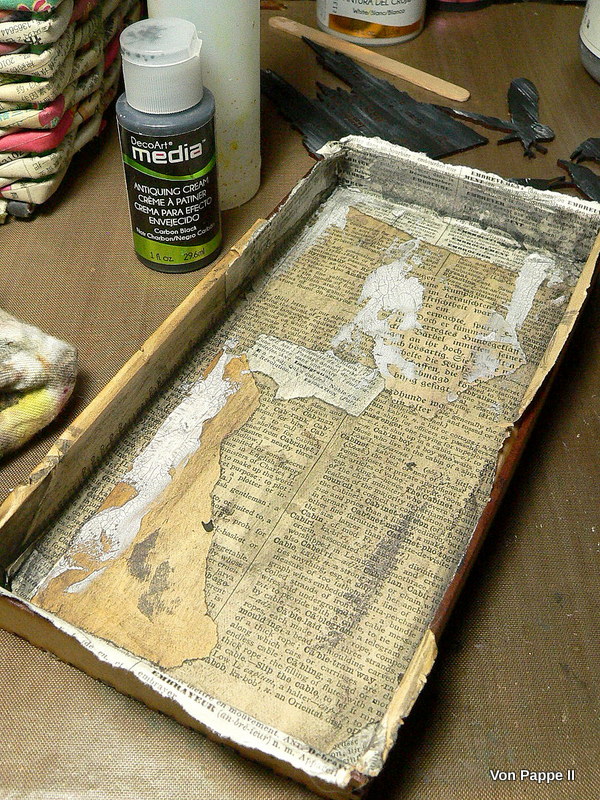
Cut the greyboard mixed media bord into three pieces to form the book's spine and covers. Cover with crumpled tissue paper on the outsides and designer paper on the insides. Dry brush with white DecoArt Gesso to tone it all down.


Use some wide fabric ribbon and heavy glue (like matte DecoArt Decou-Page) to fuse covers and spine. Leave a gap of about 3 to 4 mm between the parts. Once that has dried go in with different distress inks, spray inks, washes of DecoArt media fluid acrylic paints and some dry brushing with darker browns to add colour and depth to the crumpled covers.


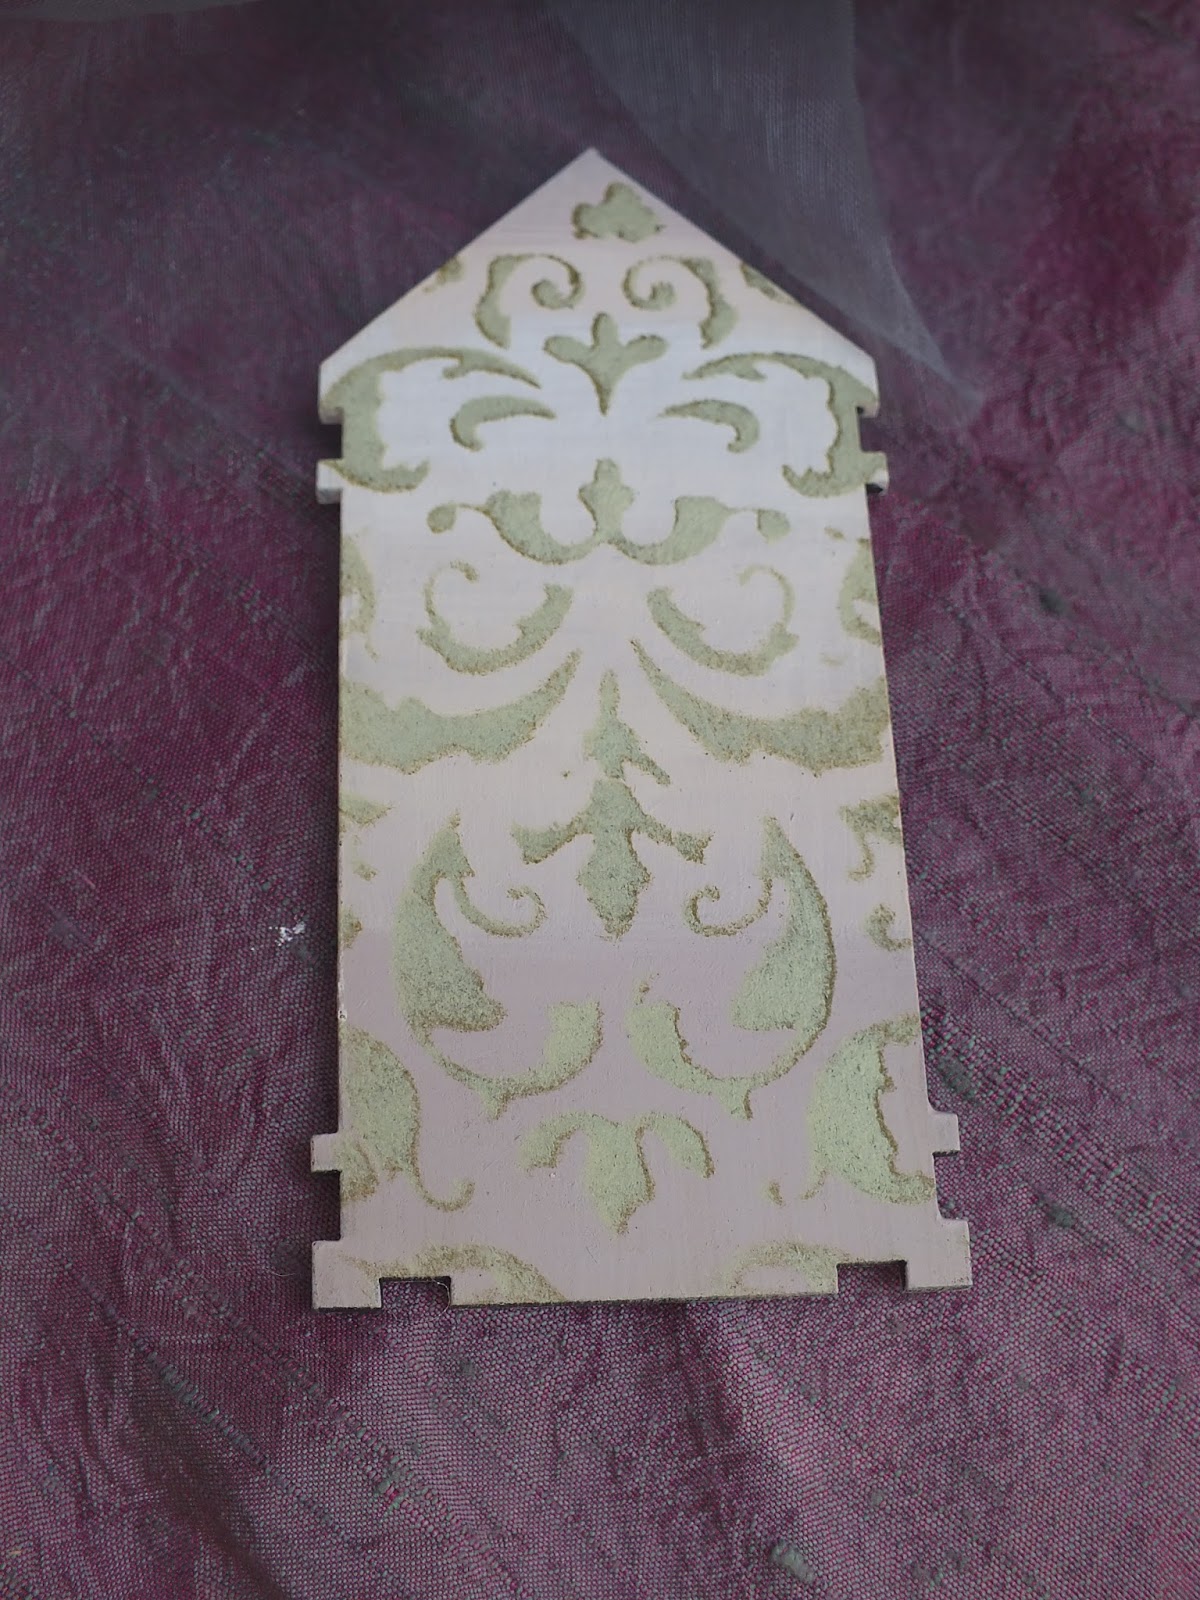
Use DecoArt media white crackle paint, DecoArt media antiquing creams, spray stains, acrylic washes, inks,....to create the skull ATC plaque and to build up crackle and an aged look.


Use your favourite Halloween stamps to decorate your portable potions tome. Add splatters. Fix some old ribbon to front and back cover using a piece of fabric and DecoArt matte Decou-Page.


To create the label stamp a word, glue behind the label and seal with a layer of DecoArt Liquid Glass. Let air dry!

For the aged look on the cover and MDF parts add crackle paint and/or glaze by scraping it on with a palette knife. Tint with washes of DecoArt media acrylic paint and/or antiquing creams afterwards.


Once all is dry, use some matte spray varnish to prevent the inks from being reactivated by humidity or any liquids. Let dry.

Fill a cardboard box with small vials and/or bottles. If needed tone these in with alcohol inks for a stained and aged look. Glue the box to the inside of the back cover.


Decorate the box lid: glue on designer paper or stamped image. Seal with matte Decou-Page. Add DecoArt media clear Crackle Glaze. Let dry naturally. Then highlight cracks with black Antiquing Cream. You're done!


Thank you for stopping by today and for reading this far! I hope you have enjoyed your visit!
Have a lot of fun crafting for Halloween! Check out Calico Craft Parts' shop - there are loads of awesome Halloween craft parts to find!

Hugs and happy Halloween crafting!
Claudia
xxx