Wednesday 30 March 2016

When Rust Turns To Colour by Lesley

As you may have noticed, i have a love for all things rusty. The colours, the texture, the corroding of metal........i love it all.

Normally when i create a piece of work, i use paint to give a rusty effect. This week i have actually used a huge chunk of rusty metal as my base. It was tempting to not actually do anything to it, the colours are that gorgeous!


This is not the actual chunk i used (i forgot to photo it before attacking it with paint) but the colours are exactly the same. I have lots of these size pieces, they came from the remnants of an old boat down the harbour near where i live.

To begin with i decided what craft parts i was going to use and laid them out where i wanted them on the rust, adding some metal bits from my stash. These craft parts are fab. So may bits on one one sheet, an absolute bargain too! I took a photo of them, then painted them all black and put them to one side.


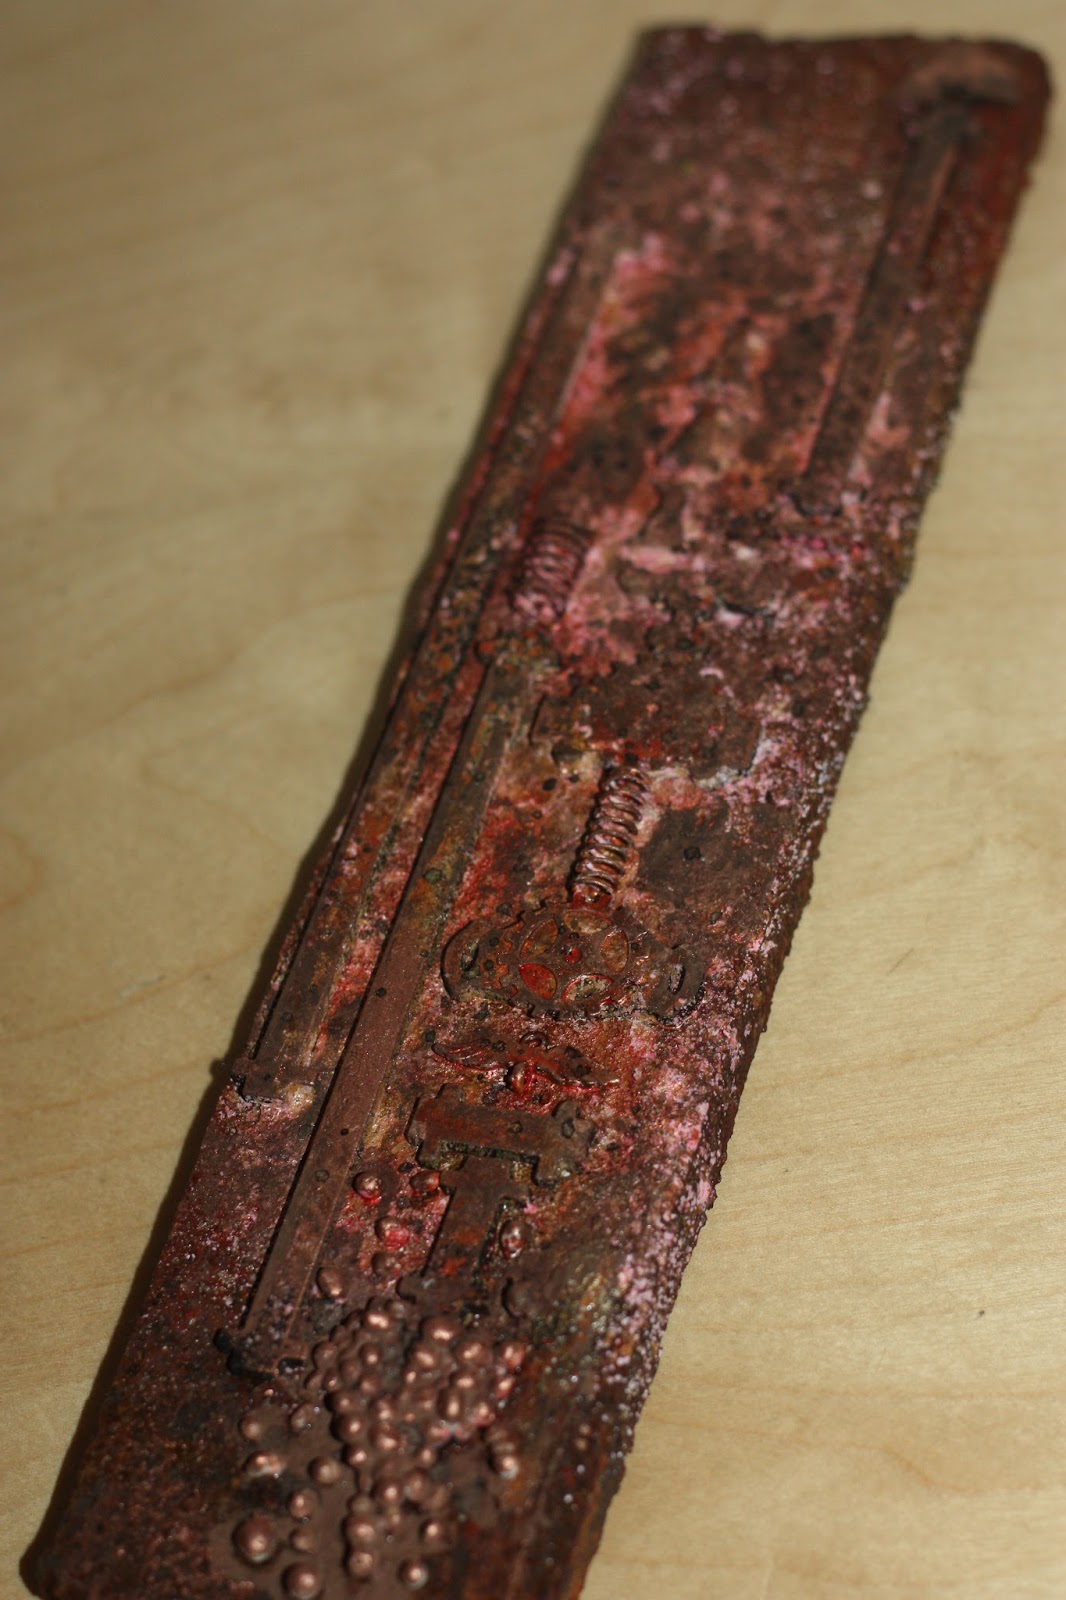
Using Decoart Media sprays in white and red.........i started adding some colour to the metal. This is where i messed up and didn't thoroughly dry the red before adding the white. I ended up with a pinkish colour........which is so not me!!


I glued the craft parts onto the metal following the picture i had taken prior. Then i started to add more color in layers using spray inks and paint.


I like doing pieces like this.........but struggle to know when to stop adding colour! I finished by adding some brass wax cream to the craft parts and flicked some black acrylic paint over the top
.

When working with bits of rust like this, i do tend to treat the entire piece with flat matt varnish after. A good couple of very liberal coats. Rust does have a tendency to shed dust and bits everywhere!

Ingredients used.

Pipework maze


Sunday 27 March 2016

Sweet Airs, Fantasy ATC Triptych by Julie Ann

Hello from Julie Ann at Magpieheaven. I'm back today with the second of my projects for the Calico Crafts Parts blog. 

Last time I asked you to step into a miniature theatre and view the first scene from Shakespeare's magical tale of travellers shipwrecked on an enchanted isle, The Tempest. Now I've created a miniature triptych from 3 Calico Craft Parts ATCs that could well depict a scene from some fantasy land where 'Sweet airs...give delight'.


These sturdy ATCs have such detailed, intricately crafted frames they can be combined with dolls' house hinges to form an intriguing triptych. I chose to combine 1 shaped ATC Wood Blank with a fancy cut-out frame with 2 ATC Wood Blanks with Seashell Pillar Frames .


This little Robin MDF Bird Shape was all ready to sing her heart out, but first she needed a quirky new head in the form of a Mini Greyboard heart!


Here are the ATCs painted black with their frames decorated in shades of green acrylics and lightly gilded. I also decided to give the little songbird a crown from a sheet of Mini MDF Crown Shapes Style 3.


The midnight black of the blanks has now been transformed to blue twilight on the magical isle with some Crackle and shades of blue Acrylic with a touch of violet water colour.


I suggested the magical isle in the background with a little stamping and some more water-colour highlights. The robin is now one of the spirits of the Isle and 2 feathers from a sheet of Mini MDF Feathers Style1 drift gently down, painted in shades of green and blue opaque and translucent acrylics.


I added my own text to the ATCs either side of the Spirit of the Isle, 'Lark Ascending' and 'Sweet Airs'.You can see the tiny Dolls' House hinges I attached with non-toxic super-glue to the reverse side of the ATCs after decorating.


These Art Nouveau letters, which I painted and gilded had just the right air of exuberance and looked to me as if they were quite capable of flying from the triptych with the butterflies from the Mini MDF Wood Butterflies Sheet Style 4. You can select from a number of alphabets at Calico Craft Parts and create the word or words of your choice for your particular project.


A final glimpse of the Spirit of the Isle. After painting the crown with a blend of yellow and red acrylics and a touch of thick gold embossing enamel, I coated it with clear embossing enamel and melted this with a heat tool. I've added an extra feather and part of a flourish along with features in water-colour and black pigment pens. 

These Calico Craft Parts ATC Blanks were such a lovely substrate to work with and individually they would make a great ATC for a swap. Why not check them out on the Calico Craft Parts Store here? I've really enjoyed this opportunity to play with these beautiful craft blanks and I would like to thank ZuZu and the Team for inviting me to contribute to the blog. Happy Creating Everyone! 

Saturday 26 March 2016

Callie Spoon is back! by Trish

Hello!

If any of you are long time Calico Crafts blog readers, you may remember Callie Spoon.... my Art Doll that went on adventures! Well, she's back! This time, a beach scene....


Lots of Calico Craft Parts were used in the creating process, namely these:


I *may* not have been totally on the ball when it came to sizes....... always happens! You might want to measure things if you want to create a scene that is a bit more in scale than mine :)
The 'old' Callie Spoon scenes were created using a wooden spoon as the base for the doll. As these are no longer available, I improvised and drew a sort of spoon shape on some chipboard.....


No need for accuracy for the circle part, that will be hidden! I decorated the legs...


Red Glitter shoes and stripy tights, bit of a Trish signature look :)

The arms were created by twisting some wire like so:


This was then wrapped around the top of the 'legs', to put the arms in the correct position...


To create the dress, fold over a piece of card....


Sketch out a dress shape, using the doll as a guide to size. Make sure the shoulders of the dress sit on the fold of the card....


Cut out...


Decorate, remembering to colour thie inside as well, as this can sometimes be visible....


Manouver the dress over the arms (hold them tight in to the legs!) , so it sits just below the 'bowl' of the spoon shape....


Twist into position, then glue so both the back and front of the dress stay joined...


The 'Callie' head (short for Calico, of course!) is the same Octopode factory stamp I have used for all my Callie Spoon creations.... stamped and coloured...


Cut out, then glue to the 'spoon'....


I added a heart, and a hair embellishment made from sand and shells!

The base is created from a wood slice. I drilled three holes...


Then added a layer of sand..


Wire was glued into the holes (don't worry about excess glue, this will be hidden)


The remaining Calico Craft Parts were painted...


And then the three main pieces were glued to the wires on the base...


The finishing details can now be added....


Glittered shells, and lots more sand! I even added glitter to the top of the pistachio ice cream!


 All done!


I hope you like her!

Calico Craft Parts used:
Beach Hut
Mini shells
Ice Cream
Sign

Love Trish x


Thursday 24 March 2016

Forest Love - Part Two - by Claudia

Servus and welcome to my second guest designers appearance over here at Calico Craft Parts!

I am so happy, honoured and thankful to be invited and I have already told about my excitement in my first post over HERE two weeks ago - so I will spare you the repeat (as I am sure you all know how wonderful their wide range of fabulous wood shapes and craft blanks is) and directly move on to presenting my second project to you.

Here's "Forest Love #2"!


Calico Craft Parts items used:


Artist Trading Block Stack Kit 
Art Deco Ornament Wood Shape - Style 6
Oak Leaves and Acorns Border Wood Shape
Ivy Leaf Garland Wood Shape - Style 1 

Sheet of Mini MDF Wood Insects Style 3
Sheet of Mini MDF Wood Crowns - Style 3
Sheet of Mini MDF Wood Wings - Style 3


I couldn't resist choosing the ATB Stack Kit as I love shrines of all sorts and Calico Craft's with the pointed arch opening was especially appealing to me. 

The ideas for my "Forest Love" projects mainly emerged from discovering the amazing Mini MDF Wood Insects shapes - as they are what I admire and love most about the forest (or nature in general): tiny living jewels and miracles right in front of your toe-caps! So finding how detailed and intricate these wood shapes were, immediately led to the idea of creating a shrine to capture everything I love about the forest in.


I started out with painting the crown, wings, flourishes and insect shapes using DecoArt Media fluid acrylics mainly.


I very much went into detail with that as I wanted to have my insects and floral pieces look as close to reality as I could.


 The Earwig was first given a coat of a dark red and then some strokes of lighter orange at only one side of each section to give the impression of dimension.

Shades in black and white highlights were added with a very small fine tip brush to enhance that impression.

My caterpillar and the other insects were done the same way.

 Red Forest Ants are just amazing. We spend our summer in a region where there are a lot of them along the hiking paths and we always spend a long time watching them being busy and carrying fallen leaves and pine needles to their awesomely large ant hills.

 A Cherry Stink Bug.  (I still think they deserve a less derogative name...lol).


A small stag beetle. He must be a young one as he is still quite small. If you have ever seen two grown up males fighting you will never forget how impressive (and gigantic) they looked (and how lucky you were to become witness to this as they are really rare around here).  


I also immediately fell in love with the fragile beauty of the enchanting Oak and Acorns flourish:


I added some dashes of DecoArt Media Interference Gold paint on the flourishes and insects here and there to imitate that special "bling" when sunlight hits the forest ground to reveal another treasure.


Also the entire ATB tower was given a gold interior to resemble that. The outside was first painted with a dark brown, then given a coat of DecoArt Weathered Wood Crackle Medium and then painted with a Medium Beige. I dabbed on some dark brown along the edges using my fingertip and also added some smudges here and there for a more natural feel.

My main goal was to have the outside give the impression of birch tree bark.


The crown, wings and flourish were dry brushed using Medium Beige and a bit of Venetian Gold DecoArt Dazzling Metallics.
 
 The Ivy Leaf Garland was cut in two and glued to the middle and upper cube.

 The largest cube was filled with found forest treasures that were all glued in place with matte Decou-Page.       


 The middle and upper cube were filled with some painted over acorns and mushrooms from the dollar store. 


 I placed the painted insects on my ATB shrine the way they looked as if they were just about to crawl over and into the project...


The flourish also was given a coat of DecoArt Media Raw Umber Antiquing Cream and then wiped back to give a bit of a weathered and aged feel to it. 

So that's it - my Forest Love Shrine. I hope you like it as much as I do and are inspired to not only craft away but also browse the wonderful and wide range of fantastic Calico Craft Parts to discover all their wood shapes and craft blanks treasures! 

Thank you so much for stopping by and also for the wonderful comments you all left with my previous Forest Love project!


Hugs and happy crafting,
Claudia 
xxx