Friday 24 September 2021

Dracula's arrival at Whitby!

🦇Pages from Bram Stoker's Dracula🦇

I have spent many Holidays and many Halloween's at Whitby enjoying the beautiful scenery, exploring the lanes that twist and turn like a maze. Eating fish and chips by the harbour with the backdrop of the St Mary's Church and the haunted ruins of Whitby Abbey, which overlooks the whole town.

The town and surrounding areas are steeped in history and due to its wild moors near by the scenery is very atmospheric. It's no surprise that it has and still does inspire artist, poets and writers. Bram Stoker, who arrived in Whitby in July 1890, was himself greatly inspired by his visit to this wonderful wild location. He spent many days exploring Whitby, including its library where by chance he came across a book that contained a history of Vlad Tepes also known as Dracula 'son of the dragon'. So with the haunting background of the bat filled Abbey, the weather worn graveyard of St Mary's Church and that book found in the library it's no surprise that Bram was inspired to write one of the best Gothic masterpieces ever written.... 'Dracula'!

🦇Dracula's Castle🦇 

To make this project you will need. 

https://www.calicocraftparts.co.uk/arch-shape-greyboard-mixed-media-board-style-7.html

 https://www.calicocraftparts.co.uk/stone-mullion-narrow-moorish-window-mdf-wood-shape.html

https://www.calicocraftparts.co.uk/nosferatu-mdf-wood-vampire-shape-style-2.html

https://www.calicocraftparts.co.uk/bat-mdf-wood-shape-style-3.html

https://www.calicocraftparts.co.uk/fleur-de-lis-flourish-mdf-wood-shape.html

https://www.calicocraftparts.co.uk/flying-bat-colony-mdf-wood-shapes.html

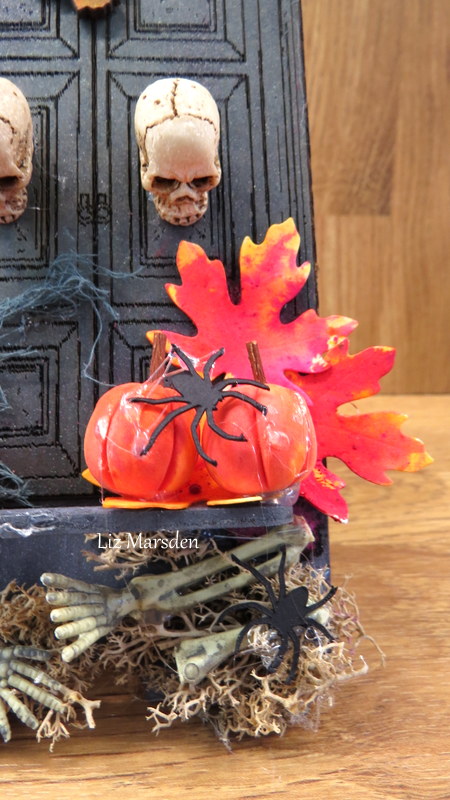
Paint, inks, glue, card, pages from Dracula(these can be photocopies) , glue, glitter, crackle gel and texture paste. 


I painted all my shapes firstly with matt black paint then added paints, texture pastes and glitter. 
To give me an idea of where the arched Gothic Window would go I painted that area grey. 


To create a 'Whitby moon' I painted card circles with inks and added crackle gel. Once dry and crackled I added some glitter to add some sparkle. I did a batch of these as they make great moons for cards or tags. 

🦇Full moon🦇


To create a background behind the window I used pages from an actual book of Dracula. This was a modern book which I found in a charity shop. It has seen better days and already had pages missing. I would highly recommend photocopying pages so not to damage treasured books! I inked the pages to age them with green and grey inks and added acrylic paint blood splats! 
Using the Gothic window as a guide I cut out a window shape which I glued onto my background. I then added a layer of crackle gel. Once dry I rubbed in some blue paint to bring out the details of the cracks. I then added a mixture of texture paste and glitter to create a Textured stone wall. 


Once my Textured wall had dried I added the moon, window and all my painted shapes to create the scene of Dracula's Castle. As a finishing touch I adding silver highlights and glitter to Dracula and the window to create moonlight. 

🦇Dracula emerges by the light of the full moon🦇
 
🦇Dracula's Castle🦇

🏰 From Castle Dracula to England 🏴󠁧󠁢󠁥󠁮󠁧󠁿 ........


🦇The arrival of Dracula in Whitby aboard the doomed ship Demeter🦇

To make this project you will need.

https://www.calicocraftparts.co.uk/galleon-boat-mdf-wood-shape-style-6.html


Again paints, inks, texture paste, glitter and crackle gel. 

As I did before for 'Dracula's Castle' I painted all my shapes with a base of black matt paint. Then added paints, texture paste and glitter. 


The ship I painted a blue/grey and I added red acrylic blood splatters. I then added a layer of crackle gel. Once dry I rubbed in some dark blue paint into the cracks and some dark orange around the bottom of the ship. This gave the look of old cracked porcelain. 


Close up showing crackle detail. 


The background for this piece I chose as it was about the poor fated Captain on the doomed Demeter! This was inked to with grey ink and splatted with acrylic blood. I also added acrylic blood to the wolf's mouth. 

I then glued on my paper background and my painted shapes to create the scene of the stormy ship Demeter doomed arrival to Whitby! 


🦇Dracula's arrival🦇


Reports are that all crew and captain aboard the Demeter have perished in the terrible storm.  Local witness say they spotted a huge dog or wolf jumping off the ill fated ship................


I hope you enjoyed my 'Kat makes' and it inspires you to create your own. 
If you have any crafting question please feel free to get in touch. I am always happy help if I can. 

May I take this opportunity to thank Calico Craft Parts for asking me to step in a Guest Designer. It's been a lot of fun and I hope to return again soon with more project ideas. Until then, may I wish you all a very Vamp-tastic Halloween! 
🦇 🦇 🦇 🦇 🦇 🦇 🦇 🦇 🦇 🦇 🦇 🦇

🕸️🦇Have a Vamp-tastic Halloween 🦇 🕸️


Thursday 23 September 2021

BOO!!! By Liz

  Hi all, I just couldn't resist this awesome MDF coffin with Handles that is available online from

Calico Craft Parts, it comes with a removable lid which is fabulous for holding sweets etc too,


I chose to place the lid horizontally to the coffin so I could have a plastic skeleton from my stash popping out,


I added some texture on the sides of the coffin with some texture paste and a stencil, then when dry I gave a thick layer of heavy black Gesso, when dry again I went over in places with some silver wax,

Meanwhile I took some bones and gave them a light coating of white Gesso, then adhered them here and there on the coffin sides,


On the lid I used another stencil with some silver texture paste, then when dry I went over the edges with some more of the wax, I glued a skull and crossbones to the lid to finish it off,

I added one of the spiders as if it's crawling around the box, with a small bat on a piece of acetate to appear as though flying,


I love making Halloween projects and hope you may have a try too,

Coffin with Handles

 Bones

Flying Bat colony

Spider style 6

Happy Crafting!!

Hugs Liz x

Saturday 18 September 2021

Moonlight shadows - Tag by Kerstin


Welcome everyone!


I was inspired to create a romantic tag with this awesome moorish window.

 I used only a few colours and completed this depiction of a moonlit night

 with a cutting die, a moon sticker and some dried nature materials.


 some close up's


used MDF shapes from Calico Craft Parts


Stone Mullion Narrow Moorish Window

 Thorned Rose Scroll - Flora & Fauna Flourish Style 24

 Spider Web - MDF Corner Wood Shape

 MDF Tag Shape - Classic


Thanks for your visit!


Happy crafting!

Kerstin

Friday 10 September 2021

🎃Pumpkin Jack and The Groovy Zombies! By Kat Hazelton.

Hi everyone, I am delighted to be asked back to do another guest spot for Calico Craft Parts blog page. Today I am posting two 'Kat makes'

I thought it would be lovely to kick-start the beginning of Autumn with a nod to the pumpkin fields growing up and down the country. A sure sign that Halloween is around the corner. So my first 'Kat make' is a friendly Scarecrow called Pumpkin Jack.

Jack stands proudly guarding the pumpkin patch in the local farmers field. Jack is a kind and gentle soul though maybe a bit too kind as the crows instead of being scared by him like to nest in his waistcoat pocket.

To make Pumpkin Jack you will need.

Art Doll Kit

Carved Pumpkin Skull Shape

Mini Wood Shapes - Birds, Crows & Ravens

Selection of paper and fabrics

Scissors, string, glue, crayons or orange paint, black paint, pencil, drawing pens, card, paper and buttons.

To make Jack's clothes I drew around the art doll pieces to give a guide to form a pattern. I created sleeves, shirt body, waistcoat and trouser legs. I used a range of handcrafted papers you can use felts, fabrics or patterned paper. 


To create Jack's beautiful head I coloured the mdf shape with a distresed orange crayon and added fine details with an art pen. To give Jack deep dark black eyes and mouth I drew around his head onto a piece of card. Which I cut out and painted with matt black acrylic paint. I then glued Jack's head onto the cardboard backing and then onto the mdf head shaped that came with the kit.


Those little details, to make Jack's clothes look more scarecrow I drew on little stitches with a white pen. I also added little pockets, patches, buttons, handkerchief and straw. The straw is dried sweetcorn husk. Notice the little crow has already moved into Jack's pocket. The crow was coloured in with a black crayon and highlighted with a white pen. 


To put Jack together I used string threaded through the pre-drilled holes. 


For that added touch I made Jack a scarecrow perch by gluing two sticks together. 
Jack is now ready to watch over the farmers pumpkin field until harvest time. 


My second 'Kat make' is a fun light hearted take on Halloween Zombies. Instead of scary flesh eating Zombies you see in the movies these Zombies are a group of happy Hippies from the 1960's! They enjoy dancing, picnics, and picking giant groovy flowers! Oh and they are all vegetarians so you are all safe. 

To make The Groovy Zombies you will need. 

Bright coloured acrylic paints, white paint and a white pen for adding details. 
Assorted papers flowers, glitter, gemstones, moss plus ribbon for hanging


Firstly I detached the mdf shapes and painted with a base coat of white acrylic paint. 
Once dry I painted them with bright acrylic paints. Then added fine details with a white pen.


Using the same paint I splatter my paper flowers and added a sprinkle of glitter.


My Zombies now painted are ready to assemble. 


Once assembled I decorate the base with flowers, moss and added a ribbon for hanging. 

My Zombies are all done and having fun! 


Well I hope you enjoyed both 'Kat makes' and I hope they inspire you to have a go at creating. If you have any questions please get in touch I am always happy to help if I can. 
Happy making, 
Kat 😊

My next 'Kat make' will be on the 25th of September! This one will be an extra spooky Halloween one wahahahahaha! (Evil laugh) 🦇🦇🦇🦇🦇🦇🦇🦇🦇🦇


Thursday 9 September 2021

Welcome, All Ye Who Enter Here/ By Liz

 I always make projects for Halloween which as you know isn't overly a thing we British do, but I do it for fun and usually they end up with my Granddaughter who loves to dress up and do trick or treat!! 


In my stash from Calico Craft Parts I had one of the plywood mobile phone bases, and I had an idea (out of the box as they say!!) to use it to set a scene for Halloween, they are really fab for holding phones too, lol

So first of all I gave the phone stand a coating with some sprays keeping in with the Halloween theme,

I then took one of the Pannelled doors which has fabulous detail on it, I didn't want to lose this detail so again I used sprays and the result was fab, they gave colour and a little shimmer, sorry though you can't see that too well on the picture, but it shows all the details,


I adhered the door to the phone holder,


I then used one of the floral flourishes on the top of my Halloween scene to add interest too, again using sprays to colour,  

I then added Halloween themed bits and pieces from my stash,

These doors look fabulous for shabby chic/pretty projects too, but I think it looks awesome for Halloween just round the corner too,

Birch Plywood smart phone stand

Pannelled double door

Thorned Rose Scroll - Flora and Fauna flourish style 24

Well I hope that's given you a little inspiration for how to use the products and just maybe a little differently too,

Happy Crafting!!

Hugs Liz x

Saturday 4 September 2021

Skull & Ghosts - Pirates curse by Kerstin


 Welcome everyone!


Have you seen the latest Hanging kits on Calico Craft Parts???

Awesome 🎃👀🎃, such a lot of creative possibilities!! 

Over the next few weeks I will introduce you three different variants.


New Skull & Ghosts - MDF Halloween Hanger Kit reminded me of dementors (Harry Potter)

 and so I created two different Halloween projects out of this one set.

 A Halloween canvas with flying dementors, where I used the hanging ghosts from this kit

 ( coming soon) and a jewel for setting up. 😀


Do you fear death??? Who doesn't know this famous saying from the Pirates of the caribbean?!

That was my inspiration for this extraordinary home decor piece,

 that looks very good in the wall unit or on the shelf, 

with dim lighting it looks even more interesting.


 Hints & Tricks


some close up's


used MDF shapes from Calico Craft Parts


Skull & Ghosts - MDF Halloween Hanger Kit

 Sheet of Mini MDF Wood Cogs - Style 1

Pocket Compass

 Galleon Boat MDF Wood Shape - Style 2

Hammerhead Shark 

 Coral - MDF Wood Shape Style 6

Dotted Peacock Weed - MDF Seaweed Wood Shape Style 3

octopus arms, the anchor chain and the pirate head were made 

with the help of silicon moulds


Thanks for your visit!


Happy crafting!

Kerstin