
I am kicking off the new year with an industrial style make that combines a lot of effects I love to create: faux rust, cool crackle, a worn and grunge look and a bit of rubber stamping...

Maybe you know the (little but serious) problem that often comes with getting new things for your creative hobbies - there's no more space left in your studio for storing them properly...well, I definitely found that I really(!!!) need to do some proper and heavy decluttering, reorganising and tidying up this year. lol
That of course means one has to browse and sort the whole stash and rummage through boxes, tucked away bundles of "maybe I will use that for .... one day"-stuff and other forgotten treasures...which most of the time leads to surprising finds...like this awesome birch plywood smartphone stand that I had (no idea why!) stored away in a different place than my other Calico craft parts:
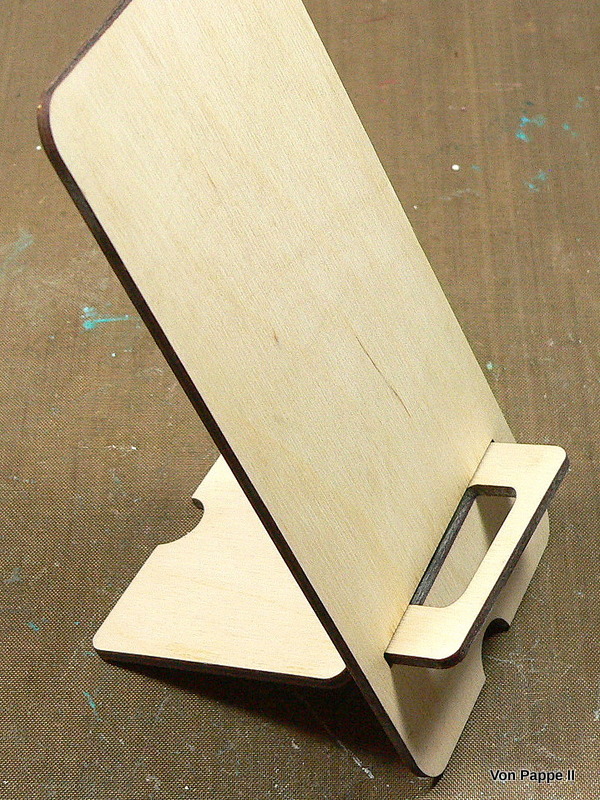


Calico Craft Parts used:
- Birch Plywood Smart Phone Stand
- Sheet of Mini MDF Hardware Wood Shapes
I started with painting the front sides of both pieces with DecoArt Student Acrylic Burnt Umber.

Once that had dried, I added a thin coat of DecoArt Americana Weathered Wood and let that dry to the touch.

Then I gently added a layer of DecoArt Americana premium Titan Buff acrylic paint with a wide, soft brush.

The crackling started almost immediately and I put the pieces to the side (onto the radiator) to let them dry naturally.
In the meantime:
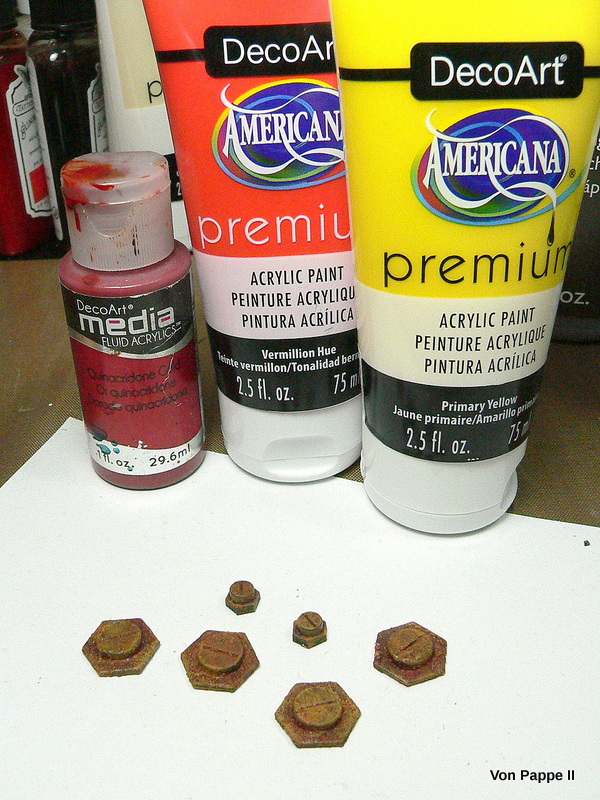
I had already glued together some screw heads from the Mini MDF Hardware sheet and combined them with die cut screw nuts (while the Weathered Wood had been drying)...

...now I stippled on some DecoArt media Texture Sand Paste with a small, worn bristle brush and let that dry.

Then I stippled on a coat of Burnt Umber Student Acrylic...

...and once that had dried I dry brushed the screws with mixes of DecoArt media Quinacridone Gold, DecoArt Americana premium Vermillion Hue and Primary Yellow.
By then the crackled smartphone stand had dried so I continued with adding a thin coat of DecoArt media Ultra Matte Varnish and used the heat tool for drying.

Then I filed the slot opening wider as I knew I was going to add more layers of acrylic paints and varnishes to the second piece that was meant to fit in there.

Using black archival stamping ink I stamped on my chosen images and words and heat dried everything before I painted around the image's outlines with DecoArt media Yellow Oxide fluid acrylic to make the image stand out from the crackled background.

I had made a thin cardboard mask for the stamped image, because I wanted to add tiny splatters of DecoArt media Quinacridone Gold with a splatter brush, but wanted the image to stay "clean".

Then I added washes of DecoArt media fluid acrylics English Red Iron Oxide, Transparent Yellow Iron Oxide and Prussian Blue Hue. I added and/or dabbed off until I was content with the look.

I created drip lines by adding a wash of Quinacridone Gold to the screws. To finish off the piece I dabbed on some Burnt Umber Student Acrylic paint for a kind of chipped off paint effect.

The screws were dry brushed with DecoArt Americana premium Carbon Black.

I used permanent spray paints to colour the backsides.

A last layer of DecoArt media Ultra Matte Varnish was added to make the phone stand more durable.
Done!


Thanks so much for stopping by!
Hugs and happy crafting!
Claudia
xxx

I so love what you have done with the stand Claudia! It really is an amazing transformation. Love that you are also have a declutter - me too! But I am not getting very far! Jennie x
ReplyDeletelol, Jennie...I haven't even started yet because I can't decide where to start...so much stuff and so little space. *sigh
DeleteThank you so much for the lovely comment and all the best for your declutter! Maybe you will find some forgotten treasures...*giggle
Hugs,
Claudia xxx
So cool! Grungy, rusty perfection. I can't even bear to think about de-cluttering, though it's much needed. Good luck!
ReplyDeleteAlison x
Thank you! giggle...I'm with you on thinking about decluttering Alison! Even the thought of it is already exhausting and stressful. Ah, well, I'm afraid there's no more getting away with just thinking of it...it needs to be done - I spend too much time searching for crafty stuff. ;
DeleteHugs,
Claudia xx
What a fabulous transformation Claudia, I love your colour choices and those rusty drips - brilliant!! I seriously need a de-clutter too, perhaps I should take your lead!! Anne xx
ReplyDeleteI have to admit I haven't started yet, Anne...but it has to be done soon. I can't find anything and now I've reached the point where this starts to get more annoying than anything else. lol
DeleteGood luck with your declutter! xxx
Ah may zing effect Claudia, I just love it, fabulous work of art. X
ReplyDeleteThank you very much, Jane! :) XXX
DeleteWow! This looks fantastic! I love the rust. You could sell these stands in trendy stores! xx
ReplyDeleteAw! Thank you so much, Julie! Mwah! XXX
Delete