Saturday, 16 October 2021
Follow the wind - Autumn tag by Kerstin
section - Halloween and Autumn Wood Shapes -
and completed this natural impressions
Happy crafting!
Saturday, 9 October 2021
Oh mummy! by guest designer Lori Woods
Hello friends! I'm super happy to back with another guest design post for you and since it's October, I went super spooky!
The Standing Skeleton kit is a fantastic 3D kit that has so many possibilities but I decided to make a creepy mummy with mine. Once I had assembled the skeleton, I gave it a quick coat of white gesso. Next I created two eyeballs from clay and glued these into position in the skull eye sockets. Now came the fun part, wrapping the mummy!
I made a mix of watered down white glue- I used PVA but you could use any kind of glue that has a nice runny texture as the idea is to saturate the fabric with it. I cut strips of muslin and gave them a good soak in the glue mix then squeezed out the excess. Then I began wrapping! It doesn't have to be neat and tidy and you can miss out areas of bones like the hip bone and some ribs to give the effect of an ancient old mummy who's starting to unravel a bit!
Once the wrapping was finished and the bandages were dry, I took some watered down brown acrylic paint and used this to create some areas of shadow and a little green paint to create an effect of some moss growing on the mummy. A quick dry brush of white gesso and some red paint for the eyes and the mummy was finished!
Although the kit does stand by itself, I wanted to give the mummy a base so that I could position him in a sort of lurching stance. I used an oval MDF board, painted it green and glued on some art stones to create a bit of texture. I then positioned the mummy in the stance that I wanted and using a strong glue, attached him to the MDF board.
Thursday, 7 October 2021
The Witches Lair by Liz
Beware of the woods on Halloween eve,
as the witches are maybe working their magic around there, lol
Yep I've created another halloween scene, using again the fabulous MDF products from
Calico Craft parts,
this time I used a metal clock as the base then decorated it with the mdf pieces,
After painting the clock with some black Gesso, I stamped an image of the moon onto some watercolour card first to create the scene, then sprayed a little colour on the inside back,
Then the fun began with adding the mdf pieces,
I first adhered the trees in place, when set I then added some moss, I added the bones at a later stage that I added onto the top of the moss,
I adhered some cheesecloth which I had first coloured with some black gesso onto the top left hand side of the clock, then to add some interest to the scene I used one of the floral pieces,
On the right hand side I took one of the Sider webs and added some glue strings as a little extra for the Spider creating his web, which if you look closely is on the web as well,
In the middle I attached some of the bats onto a piece of acetate, these then appear to move if you move the clock,
At the bottom left I added some of the awesome Toadstools, can you spot the skull peeking out from behind, lol
I then finished off the bottom right with this fabulous Pumkin,
Calico craft parts:
Rose Bramble - Fauna Flourish style 23
Bones - sheet of Halloween mini wood shapes
Fungi - mdf wood shape style 13
Happy Crafting!!
Hugs Liz x
Saturday, 2 October 2021
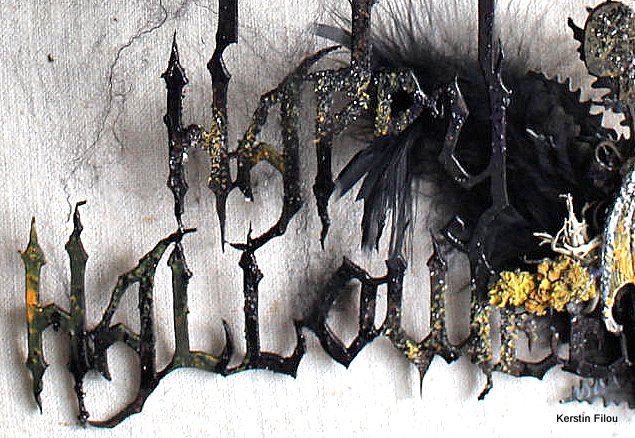
Halloween Hanging Kit by Kerstin
Welcome everyone!
Have you seen the latest Hanging kits on Calico Craft Parts???
Awesome 🎃👀🎃, such a lot of creative possibilities!!
Today
Happy Halloween - MDF Halloween Hanger Kit
Flying witch reminded me of our Walpurgis Night, on this night witches ride on brooms
to the Brocken in the Harz mountains to meet with the devil and other demonic beings.
some close up's
additionally used MDF shapes from Calico Craft Parts
Winged Devil
Curly Single Toadstool - Plain or Engraved
Winter Tree Scene MDF Wood Shape - Style 4
I hope I could inspire you!
Have fun realizing your
own visions and ideas!
Thanks for your visit!
Friday, 24 September 2021
Dracula's arrival at Whitby!
![]() |
| 🦇Pages from Bram Stoker's Dracula🦇 |
I have spent many Holidays and many Halloween's at Whitby enjoying the beautiful scenery, exploring the lanes that twist and turn like a maze. Eating fish and chips by the harbour with the backdrop of the St Mary's Church and the haunted ruins of Whitby Abbey, which overlooks the whole town.
The town and surrounding areas are steeped in history and due to its wild moors near by the scenery is very atmospheric. It's no surprise that it has and still does inspire artist, poets and writers. Bram Stoker, who arrived in Whitby in July 1890, was himself greatly inspired by his visit to this wonderful wild location. He spent many days exploring Whitby, including its library where by chance he came across a book that contained a history of Vlad Tepes also known as Dracula 'son of the dragon'. So with the haunting background of the bat filled Abbey, the weather worn graveyard of St Mary's Church and that book found in the library it's no surprise that Bram was inspired to write one of the best Gothic masterpieces ever written.... 'Dracula'!
![]() |
| 🦇Dracula's Castle🦇 |
To make this project you will need.
https://www.calicocraftparts.co.uk/arch-shape-greyboard-mixed-media-board-style-7.html
https://www.calicocraftparts.co.uk/stone-mullion-narrow-moorish-window-mdf-wood-shape.html
https://www.calicocraftparts.co.uk/nosferatu-mdf-wood-vampire-shape-style-2.html
https://www.calicocraftparts.co.uk/bat-mdf-wood-shape-style-3.html
https://www.calicocraftparts.co.uk/fleur-de-lis-flourish-mdf-wood-shape.html
https://www.calicocraftparts.co.uk/flying-bat-colony-mdf-wood-shapes.html
Paint, inks, glue, card, pages from Dracula(these can be photocopies) , glue, glitter, crackle gel and texture paste.
To create a 'Whitby moon' I painted card circles with inks and added crackle gel. Once dry and crackled I added some glitter to add some sparkle. I did a batch of these as they make great moons for cards or tags.
![]() |
| 🦇Full moon🦇 |
![]() |
| 🦇Dracula's Castle🦇 |
![]() |
| 🦇The arrival of Dracula in Whitby aboard the doomed ship Demeter🦇 |
To make this project you will need.
https://www.calicocraftparts.co.uk/galleon-boat-mdf-wood-shape-style-6.html
The ship I painted a blue/grey and I added red acrylic blood splatters. I then added a layer of crackle gel. Once dry I rubbed in some dark blue paint into the cracks and some dark orange around the bottom of the ship. This gave the look of old cracked porcelain.
Close up showing crackle detail.
The background for this piece I chose as it was about the poor fated Captain on the doomed Demeter! This was inked to with grey ink and splatted with acrylic blood. I also added acrylic blood to the wolf's mouth.
I then glued on my paper background and my painted shapes to create the scene of the stormy ship Demeter doomed arrival to Whitby!
![]() |
| 🦇Dracula's arrival🦇 |
Reports are that all crew and captain aboard the Demeter have perished in the terrible storm. Local witness say they spotted a huge dog or wolf jumping off the ill fated ship................
![]() |
| 🕸️🦇Have a Vamp-tastic Halloween 🦇 🕸️ |
Thursday, 23 September 2021
BOO!!! By Liz
Hi all, I just couldn't resist this awesome MDF coffin with Handles that is available online from
Calico Craft Parts, it comes with a removable lid which is fabulous for holding sweets etc too,
I chose to place the lid horizontally to the coffin so I could have a plastic skeleton from my stash popping out,
I added some texture on the sides of the coffin with some texture paste and a stencil, then when dry I gave a thick layer of heavy black Gesso, when dry again I went over in places with some silver wax,
Meanwhile I took some bones and gave them a light coating of white Gesso, then adhered them here and there on the coffin sides,
On the lid I used another stencil with some silver texture paste, then when dry I went over the edges with some more of the wax, I glued a skull and crossbones to the lid to finish it off,
I added one of the spiders as if it's crawling around the box, with a small bat on a piece of acetate to appear as though flying,
I love making Halloween projects and hope you may have a try too,
Happy Crafting!!
Hugs Liz x