Saturday, 13 February 2016

Mixed Media ATC's by Mark


Hi, Mark here and I'm So thrilled to be the guest designer this month.
Now with Valentines tomorrow I can't quite share my second guest make with you as I can not let the better half see what it is till tomorrow so please check back towards the end of the month to see what I made for her. Today though I have one of My biggest loves, ATC's.
I have used these ATC's

As soon as I saw the variety of different ATC's in the store I got very excited and decided the first 3 would be variations on a theme, my vintage rouges gallery as it were.
I would of had a few more step by step pics but  my phone corrupted everything and lots of pics were lost :-( but ill do my best to give a quick run down on what was done to each ATC.


Using Decoart Media fluids the frame was painted and aged using some colour washes.
The back plate was also painted and aged with some washes of Transparent Yellow Oxide and Quinacridone Gold, these colours are a go to for me when working with distressing and grunging things up. 
Once the images have been stamped some Decoart one step crackle was added, I Crackle glazed the pieces separately as I wanted to get larger cracks on the frame and a more delicate crackle on the picture. This is achieved by varying the thickness of the One step crackle.


Instead of adding washes to the frame to give a distressed and aged look I did some heavy dry brushing with lighter and darker shades of paint for the top ATC and a contrasting colour for the bottom ATC.
I also turned the frame of the bottom ATC round and used the back side as I just wanted to have the fleur de lis detail and not the delicate scroll work that is also etched on the front.
All three of these ATC's had Decoart antiquing cream applied to the cracks to bring out the details.

For my last ATC I decided to go for a cleaner finish but keep with the picture frame theme.


After a slightly watered down base coat of white acrylic paint (I didn't want to lose any of the etched details that have been laser cut into the frame)
The lighter green was painted all over and then with a finer detail brush the outer details were painted with a darker green. Some black antiquing cream was added and wiped away, this re emphasized the etched detail and also left more depth to the green.


My final ATC is a clean and simple Artdeco style ATC.the frame has been painted in silver and aged with some Decoart Black Antiquing cream. The antiquing cream has pretty much been completely removed to leave a light staining on ver the silver and it has been left behind in the etched details.


Thank You for taking the time to stop by and again a great big Thank You to Calico Craft and their amazing DT. It's such an honour to be working with such talented Artist and such lovely mdf pieces that work perfectly with the Decoart Media Line xx
Hopefully I will see you latter in the month where I will share with you my Valentines make for my special little lady.

Thursday, 11 February 2016

Believe ATB stack by Trish

Hello!
Back again with another ATB creation!
This time (nobody faint) I haven't used a face.... just lots of hearts in time for Valentines day!


The ONLY thing about ATBs that I don't like is that it's really difficult to capture them well in a photo! Here is one from a bit of a different angle....


And not only is there no face involved, there is NO PAINT on there either!!! I may need a lie down :)
I created lots of backgrounds by swiping a variety of dye inkpads over a craft sheet, spraying with water then very gently dabbing the cardstock over the colours....


I then embossed a circle design over the top, using white embossing powder...


You could get the same effect by doing a resist technique, i.e embossing first before you get the card inky. I find this way around better for me though, as I can create loads of backgrounds really quickly, and then only emboss the ones I like best! Sometimes the colours go all muddy and you have to discard the background, and that would be really annoying if you has already taken the time embossing it first!
Obviously the backgrounds are bigger than the sizes needed, so we need to trim them down.
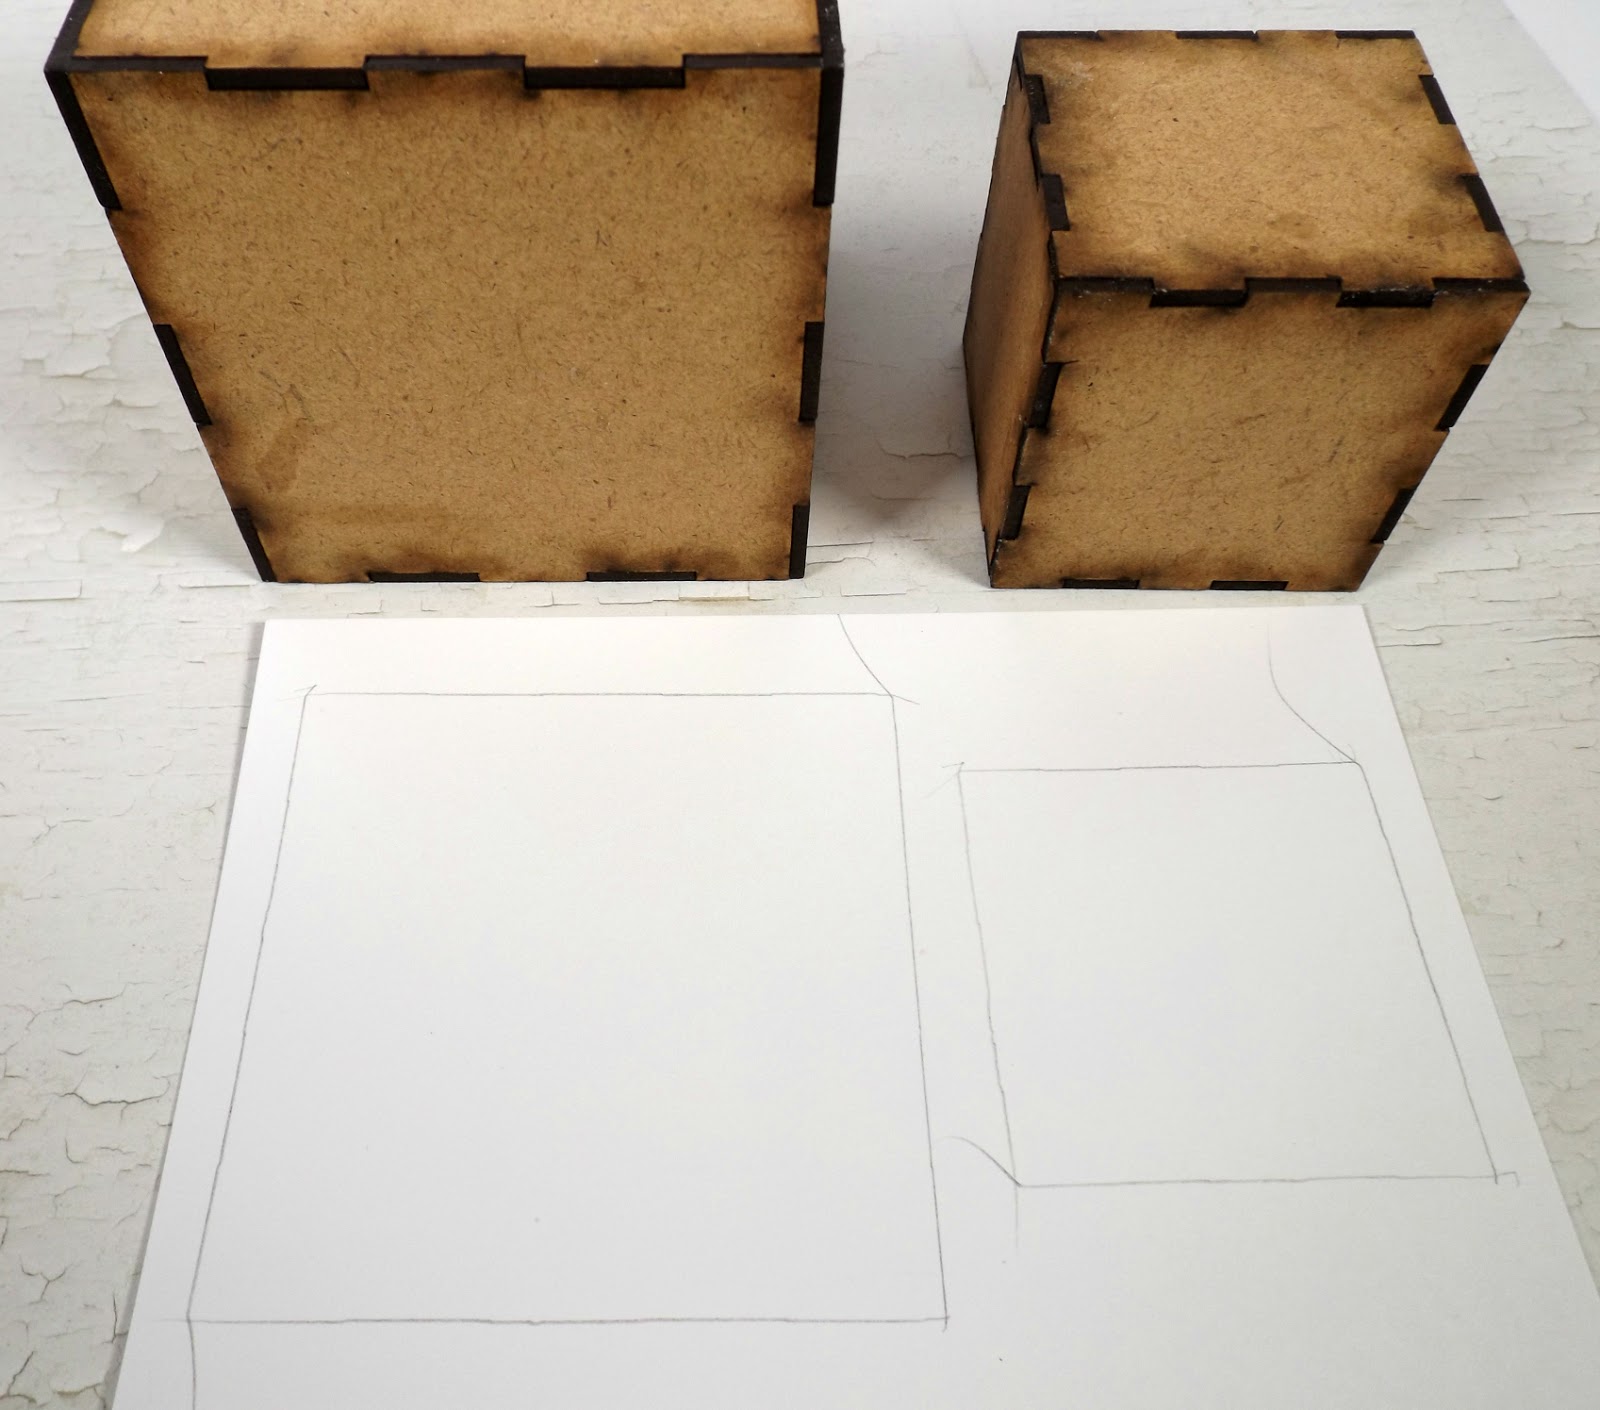
I draw around the cubes...


Then cut out the squares so I have a template....


This can then be moved over the backgrounds, and when you find a nice bit you want to use, just trace the square and cut out!


The squares can then be glued to the cubes...


I didn't bother colouring the cubes first, as I knew I was going to edge the sides with black ink!


I punched out lots of hearts from white paper, then glued then to a curved bit of acetate. I created two strips, then glued them to the ATBs..


The whole thing was finished with white gessoed spools for feet, and a word sticker...


Have a great day everyone!
Trish xx

Calico Craft Parts used:
ATB cube kits: 1 small, 1 medium.


Monday, 8 February 2016

Bittersweet love.... by Astrid

Well, it's nearly Valentine's day, so I thought I'd share another project featuring some of the marvelous Valentine inspired craft parts. This project was really quick and easy to do, perfect when time is running short.


I created an envelope out of black card and gave it a decorative flap with the help of some dies. There are numerous tutorials out there on how to do something like that, so I won't go into the details here.


I covered the base with decorative papers aged with the help of some inks and then decorated with various Craft Parts. These are the ones I used:


As you can see, I positioned the large heart from the Valentine set with the Art Deco ornament in the center and added a little flower on top. I then used two of the corner embellishments to balance it out. I love how the different craft parts echo each other in shape and can kind of harmoniously work together like this.


All I did to alter the wood shapes a bit was colour them with dark brown ink (I used Adirondack Espresso) and then high lighted them a bit with Decoart Metallic Lustre in Champagne


The feather and other elements were all coloured in the same way. I added a few details to the feather with a black pen.


The envelope closes with a little magnet.


The back was left plain, just lined with paper with a bit of back ground stamping.
Next I made a card to fit inside the envelope, using some of the other Valentines elements from the same sheet.
I chose the title bittersweet love, as this particular heart reminds me of barbed wire, and don't we all know that love at times can have this other bitter sweet side...... That's also the reason I kept the colours quite dark, a change from the usual red and pink.


The little heart has the words I Love You engraved inside, because, yes, true love can overcome those tricky prickly patches, and as the saying goes, - Love can conquer all.....

Well, I'll leave you with that philosophical musing, all that remains is to wish you all a very happy Valentine's Day!!
Thank you for visiting like always
xxx

Thursday, 4 February 2016

Apparently, its time to be Romantic? By Lesley

Its coming up to that supposedly romantic time of year.....Valentine's Day. I purposely don't buy into it all.....i think you should be nice to your partner/hubby at all times of the year!

But i have made a couple of cards, which are not too Valentineish, and could be used all year round for your loved ones.


I started off with a kraft coloured card blank. Black paint was splodged on the front in the corner. I used one of the small birch plywood hearts, painted it red and added a coat of glaze. Whilst it was still wet, i sprinkled it with teeny tiny micro beads in black.


Once the glaze was dry, i glued to the front and added a word to finish.

This is the second card.........


Starting with a kraft card blank again, i swiped white and pink paint across the front. Once dry, i used a stencil and some more white paint. The mini hearts were painted with he same pink paint, and i added crackle glaze over the top.


White paint was rubbed into the cracks. And i added splatters to the card before gluing down the hearts and the words.


Super quick cards........ideal if you forget to buy one! ha ha

Thanks for reading.
L.x

Ingredients used.
Birch plywood heart
Mini heart plaques

Monday, 1 February 2016

Steampunk ATCs by Alison

Hello all, Alison here from Words and Pictures and I'm back on the ATCs today.  I have to go with two pictures straight away, because even I can't believe how different these look in sunlight...


... compared to in the shade!  Either way, I love working with the Calico Craft Parts ATC blanks - even the Plain ATCs give such substance to this small format.


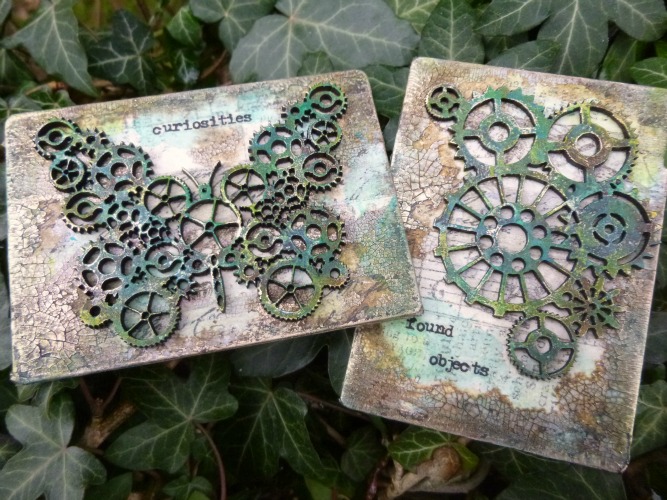
This time I've paired them with some of the fantastic Steampunk designs - cogs and gears are always fun to play with.


I started out by layering stripes of tissue tape onto the ATCs (last of the process photos, sorry - I got wrapped up in it all!).


I applied a light coat of gesso to soften the look of the tape and then added DecoArt Crackle Glaze with my fingers.


When it had crackled, I played with layers of Antiquing Creams and DecoArt Media Fluid Acrylics, adding them and wiping back, until I was happy with the look of the backgrounds.


(At times I was quite brutal with the scraping of the crackle - I really wanted a distressed, eaten-away effect.)


I used a coat of Ultra Matte Varnish to seal it all in so no more of that crackle will be going anywhere.


For the beautiful Steampunk Cog Butterfly (in sunlight and in shade)...


... and the Steampunk Mechanical Cogs Style 3 (in sunlight and in shade)...


... I also used the DecoArt Media Fluid Acrylics...


... rubbing colours on with my fingers and wiping back...


... the same process really...


... but with some gilding wax layered in to the mix at times.


A couple of rub-on words complete the look.


I like how you can embed a rub-on right in to the piece so that it seems to belong there.


And that's your lot... I hope you like them, and if you'd like to play with a Steampunk look, do check out all the amazing designs available by clicking on the links in the text.

Thanks so much for stopping by today, and I'll see you again soon.

Alison x
Words and Pictures