Thursday 29 November 2018

Advent Shrine by Jennie

Hello and welcome to my final project for this month of November here at Calico Craft Parts.


I am always in awe of the lovely shrines created by my fellow teamies here at Calico Craft Parts and decided that I would have a go at making myself an Advent Shrine - something peaceful to reflect on whilst burning my Advent candle each evening during the month of December.


I had a rather large Display Arch Shrine Kit sitting in my drawer so rather than planning anything I just dived in and decorated it as it appealed to me. 


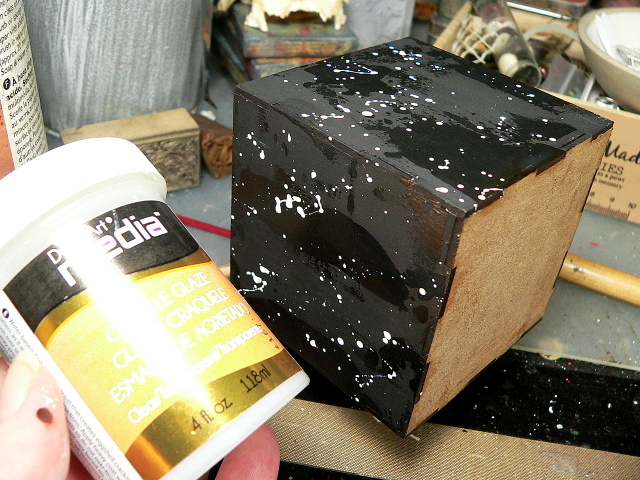
I started with the inside of the shrine covering the MDF with printed tissue paper, DecoArt Crackle Paste and blue and brown inks.


I also used the Crackle Paste on the outside frame .....


.... but no brown ink was required as the MDF stained the crackle glaze beautifully!


Crackle Paste was again used on the back of the Scrabble Board Tiles ....


.... and mini letters used to create my main focus word.


This beautiful chandalier has been in my box for ages but had got a little damaged just through handling, so there was some clever placing of elements to hide the bits missing!


I needed something large to balance out the top of the shrine and the large Holly Leaf and Berry Corner was just perfect ..... with the addition of some of my handmade paper flowers (there is a tutorial on my blog for these rolled roses if you are interested in giving them a go!).


Finally I packed some elements in and around the chandalier .......


.... and aded some gold glass beads here and there (here being where I planned them to go and there being where they also manage to get to as well!)


I think this will provide a lovely focus for Advent when it is so easy to get so caught up in presents, parties and preparing food. 

And now I have made one I am sure I will be making more - this was a project I thoroughly enjoyed putting together.


As always thank you so much for joining me and happy crafting!

Jennie x


Calico Craft Parts Used:


Monday 26 November 2018

"There's a Howling in the Forest" - Desktop Organiser - by Claudia

Servus and thanks so much for stopping by today!

Claudia here and I would like to share a little somethin' I have made as a birthday present for a dear friend who loves wolves (I guess when you are into fantasy live role playing and go by the first name of Wolfgang this is "your animal" ;)


 ....and as there are some really cool wolf wood shapes in the Calico Craft Parts range I decided to use one of these on an Artist Trading Block with a square opening to make him a small desktop organizer to store his USB sticks or pencils in. (I have already done a wolf themed shadowbox with several awesome wolf wood shapes over HERE quite some time ago)


Calico Craft Parts used: 

- Artist Trading Block Cube Kit - Square Aperture- medium size
- Wolf Howling at Moon - Halloween Wood Corner
Winter Tree Scene MDF Wood Shape - Style 2
- Sheet of Mini MDF Wood Birds - Crows & Ravens


I first glued together the Artist Trading Block (with matte DecoArt Decou-Page, which dries really fast), then I primed the outsides of the block with DecoArt Americana Lamp Black acrylic paint. Once that had dried I used Americana Snow White acrylic paint to paint a rough circle in the spot where the moon was to go and to add splatters to all four sides.


I also used Lamp Black to add a base layer of acrylic paint to the other wood shapes I wanted to use. I cut the large tree scene wood shape into two pieces to use on two different sides. On the fourth side I used one of the ravens from the Mini Wood Shapes sheet. Once the black paint had dried, I dry brushed on layers of Snow White. Using a very fine detail brush I started painting the wolf's head.


Next I applied some DecoArt media Clear Crackle Glaze with a palette knife and set that to the side to let it dry naturally.


In the meantime I continued painting the trees, raven and wolf wood shapes with DecoArt premium paints Cobalt Teal Hue, Warm Grey, Titan Buff, Phtalo Green-Yellow and media fluid acrylics Raw Umber and Prussian Blue Hue.


 Once the Crackle Glaze had fully cured, I used DecoArt media Titanium White Antiquing Cream to highlight the cracks (as always: apply the Antiquing Cream, let set, then wipe back with a damp cloth until you are content with the look). It also turned the black areas where no Crackle Glaze had been added into a beautiful foggy grey.


To add more interest I applied sprinkles of paint using a splatter brush and premium Cobalt Teal Hue and media fluid acrylics Transparent Yellow Iron Oxide and English Red Oxide. Once these had dried I finished that off with a very thin wash of Transparent Yellow Iron Oxide to warm up the cold grey and white tones. I also added the wash to the painted wood shapes. 


To apply the painted wood shapes to the Artist Trading Block I used matte DecoArt Decou-Page.


The final step was to seal the whole project with some matte DecoArt Americana spray sealant (to keep the white Antiquing Cream from being activated again and/or coming off).


Et voilĂ  - my hand made birthday present! I hope you like the idea and leave inspired! 

Hugs and happy crafting!
Claudia
xxx


Saturday 24 November 2018

Snow fairy shelter: By Zuzu


Today I’ve made a little shelter for a snow fairy.
It’s made from the following craft parts...
House/shrine kit
Trees
Deer
holly leaf corner
Snowflakes mine are taken from one of the mini sheets.
The sign is from the Mini wood lamp posts sheet.

In addition I’ve used paper from stamperia and basics like glue and paint.


Thursday 22 November 2018

Elf on the Shelf Sleigh by Lesley

Hey everyone.
I hope you're all cracking on with your Christmas projects......it will soon creep up on us!

My twins (like every other kid) are really into The Elf on the Shelf. Its hard work coming up with daily ideas for the entire month of December. But it got me thinking whether I could utilise any crafts parts...….


I've had this sleigh in my stash for a while but had never got around to using it. 


I started off by gluing it together and priming it with gesso. 


The bottom part was painted with a liquid metal paint.
And then I used metallic green and red on the top part.


A touch of green wax was used on the edges.


No Christmas project is complete without a touch of sparkle! I used liquid glue and chunky glass glitter to cover the seat.


I look forward to using the sleigh with the elf next month!


Thanks for reading.
L.xx

Ingredients used.....

Monday 19 November 2018

2 Arch Angels at Calico Craft Parts by Julie Ann

Hello Everyone! I don't know about you, but each year the Holiday Festivities seem to sneak up on me and catch me unawares. This year I was determined to have some creative fun without being in a rush! I've eased into the Festive mood with a duet of Christmas tree angels that were fun and easy to create using bits and bobs from my studio and Calico Craft Parts.


May I introduce you to Felicia and Fidelia - the angelic duo? I love to use these highly adaptable Calico Craft Parts in unexpected ways, so I really enjoyed creating these young ladies and getting to know their characters as I went along. In fact, I had so much fun making their acquaintance that I might well be making some more to join in with their carols! I'm keen to turn their divine duet into a heavenly choir now!


I started out with this selection of Craft Parts, intending to make just one angel. Ever since I was a child, seeing figures in the patterns of the carpet and the curtains and the shape of dancing dolls in the scissors, shapes have become characters to me. It was one of those 'What if...' moments - 'What if I combine doll parts with a Calico arch from a triptych kit as a gown, a mullioned window as embellishment, a snow-flake as a halo and angel wings?'


Stamped blue tissue, Lace scraps, Chiyogami paper and gold paint were quickly gathered! Round mini MDF plaques with my own artwork provided a face.


It didn't take long playing around with arrangements, before Felicia's delightful personality emerged. She is drawn to the vibrant colours of stained glass windows and loves to add her ethereal notes to the sweet voices of the choir for a moment at the Midnight Mass Service. She has a mischievous side, though. Sometimes the congregation feel the slightest brush of her gossamer wing turning the page of their carol sheet, or they notice a candle flame flicker like a cheeky wink as she flits by.


As I was creating her, I noticed some skeleton leaves on my desk and .
suddenly an idea for gossamer wings was born.


The ideas started to come thick and fast as a winter blizzard! Felicia's companion, Fidelia took shape. She is more of an 'outdoor' type. She loves to add her sweet notes to the call of the owl in the snowy churchyard. To create the moon for her arch-gown, I cut a circle of card from a scrap of 'master-board' I had stencilled with 3D gel medium and touched with a gilding wax.


Fidelia is a practical angel with her sensible warm stripy socks. Distress glitter sprinkled over the skeleton leaves and the snow created a frosty touch.


As my 'arch angels' will be seen from the back as well as the front, I wanted to decorate both sides.


I've used stamping, collage and paint. This was a great way to use all the little scraps I keep in a special box.


Felicia with her delight in the jewel-like colours of stained glass and her spirit of playfulness tells us to 'Make Art Everyday'.


Fidelia reminds us to look and listen to the natural world all around us as winter sweeps in. Perhaps - if you have some crafting time - you could gather some craft parts and see what angel characters the shapes suggest to you? The Calico Triptych kits come with 3 pieces so they have lots of potential because, as well as making a traditional Christmas triptych with them, you could use the 3 arches as one larger and 2 smaller angels. You could even link them to form a festive hanging. Have a wonderful, creative time until we meet again in 2 weeks' time.
Calico Craft Parts used in this project
Arch Top Triptych MDF Wood Kit
MDF Round Mini Plaques
Standard Jointed Art Doll Kit, Small SizeS
Mini MDF Christmas Snowflake Shapes Style 2
Mini MDF Christmas Snowflake Shapes Style 1
Stone Mullion Window
Owl and Moon Scene MDF Wood Shape
Sheet of Mini Angel Wings style 3
Sheet of Mini Angel Wings style 4