
Over here in Austria we put up our Christmas trees on the 24th so we can exchange gifts under the tree that evening. We then have our decorated trees up for some more days or even weeks - mostly we put ours away on January 6th (but I remember my mum keeping it up sometimes until the tree had completely dried and one day just fell over ;)
I have several hand crafted pieces hung on my tree that I especially love - some made by my dear friend Kerstin (also really cool steampunk themed ones), some made by me during the last decades (like the ones I did in the middle of that incredibly hot summer of 2003 when I was pregnant and fled our flat to spend the day in my husband's bureau where they had an air con ;)
This year I also managed to create a new ornament to hang on our Xmas tree - using some of Calico Craft Parts' beautiful Hinges & Hardware Wood Shapes from their Ironmongery & Architectural Elements collection...

I often find I have a more relaxed and more creative approach to some joyful Xmas crafting right AFTER Xmas...so I made this crackled heart ornament between Xmas and New Year's Eve. So it kind of got "test-hung" on the Xmas tree once it was finished ;)
Calico Craft Parts used:
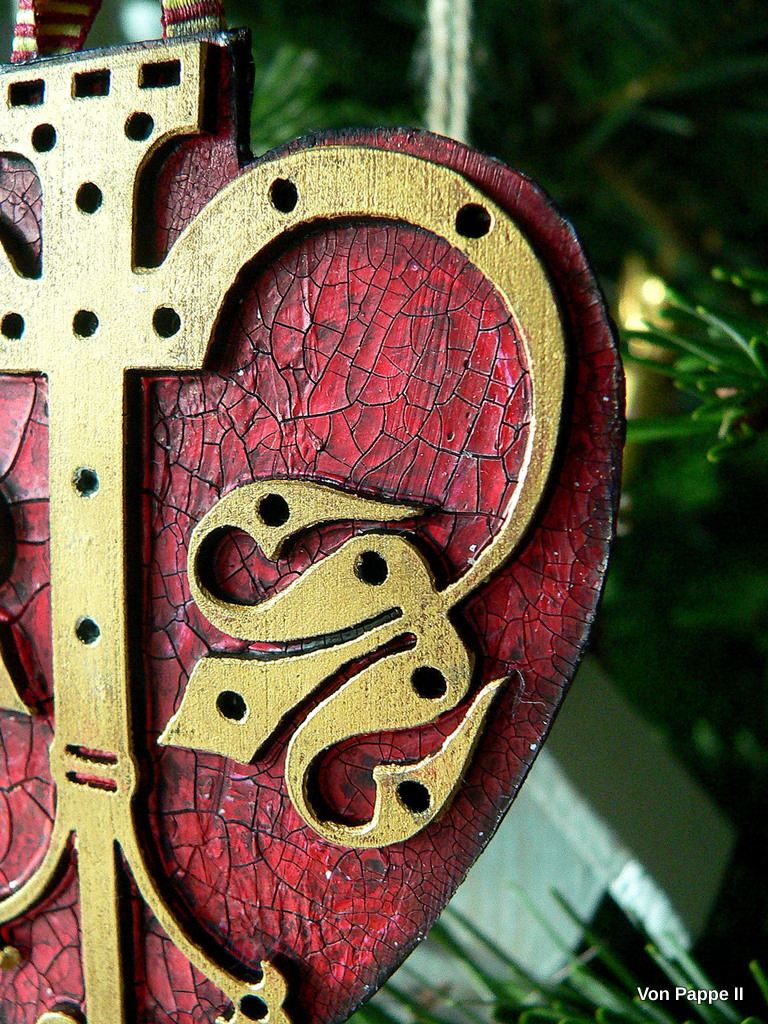
Ornate Fleur de Lis Decorative Hinge MDF Wood Shape (two pieces, large size)
My first idea when I first saw this particular hinge shape was that it would make for a beautiful heart shaped ornament on a mixed media piece or something like that. The idea to use it as a decorative piece to hang on our Christmas tree followed shortly after that...and I am thinking it would also make for a lovely addition to put on wrapped Xmas presents for especially loved ones...
The how-to is quickly explained:
For my two heart shaped bases I used steady cardboard from packaging left overs.

I placed one of the hinges on the cardboard and drew a heart shape around it with a pencil.


Then I cut that shape out, flipped it over and used it as a template to draw my second heart for the other side of my "hinge heart ornament". Flipping the first shape over makes sure both hearts will be a perfect fit when being glued together - even if the hand-drawn heart isn't exactly symmetrical!

I used DecoArt Americana Lamp Black acrylic paint to paint the fronts of the two heart shapes and heat dried them.

Then I took a palette knife and evenly spread a thin layer (maybe half a millimetre) of DecoArt media white Crackle Paint on top of the dried black paint. While the Crackle Paint was still wet I put the two hinges in place and put two heavy paint bottles on top as weights to make sure it all stayed flat while the crackle paint was drying.

The Crackle Paint not only created beautiful crackle but also worked as a glue to hold the hinge shapes in place.

Using a fine detail brush I painted the crackled areas with DecoArt media Pyrole Red fluid acrylic paint.

Once that had dried, I darkened the hearts' edges using black archival stamping ink and a piece of blending foam.

That was followed by a coat of diluted DecoArt media Carbon Black Antiquing Cream to tone down the bright red.

I used cotton buds to remove some of the Antiquing Cream on top of the red paint, so it mainly remained in the crevices to highlight these.
Afterwards I applied Gold Rush DecoArt Metallic Lustre to the hinges using my fingertip. I also used some soft cloth to buff the dried Metallic Lustre to a sheen afterwards.

Once both sides were done, I prepared a short piece of festive ribbon to glue between the two hearts as a hanging loop. Everything was put together using DecoArt matte Decou-Page that I generously applied on all sides of the ribbon's ends (the very ends were folded once and glued in place like that to form a proper loop)...

...and cloths pins to add a little pressure while the Decou-Page dried.

To finish off my ornament I took a very fine detail brush and added Lamp Black acrylic paint to all the hinges' holes to cover up the white from the Crackle Paint.
Voilá!

Some detail shots:


Maybe I am not the only one who enjoys some Xmas crafting during the Christmas holidays...but then after Christmas is also before Christmas, isn't it?
And as the ornament can also be used in any kind of mixed media project, I dare share this project and tutorial with you right now. I hope you like it!

Hugs and happy crafting!
Claudia
xxx

No comments:
Post a Comment