Claudia here again to share some inspiration on how to use your Calico Craft Parts in your art journaling this time.
I had ordered five 200 x 160 mm sized
House Shapes already months ago with the idea of creating a kind of sturdy concertina fold journal by hinging the single houses together with fabric ribbon or some garden fence pieces maybe, so the journal can be put up on a shelf and all the different houses, filled with different people and lives (and universes), can be visited and displayed.
Then I got interrupted by a different project, then distracted by another one (and another one), then I wasn't sure if I would be able to get the journal to look like I visioned it, then I found I had lost hold of the vision and idea,...well, I guess some of you know the story...
...but as I have been dealing with a lot of hormonal chaos during the last months I have now developed a kind of anxiety or stress disorder that forces me to practice self-care and listen to my actual needs closely...and that brought me back to the creative plans and things I really love - one of these being my forgotten house-journal-project!!!
At the moment I try to take pressure and high expectations out of the game wherever possible - and focus on the process instead of a specific result. Creatively spoken this means I am trying to get back to the techniques, media and topics I really enjoy (sometimes you just lose track a bit of that when you are mainly focusing on design team work) - and I allowed myself to just let the creative process take the lead.
So I decided to finally start my house-journal and fill the houses one by one - without a uniting theme, but rather with the concept of making them journal pages, where you simply indulge in creative play instead of trying to put a lot of meaning into everything on the pages. So here is page house No. 1 -
the result from a joyful session with my beloved book pages and other scraps, yummy texture and the media I feel most at home with:
I happily rummaged through my large scraps box and put together a little pile of scraps that spoke to me most (either because of their colour or because a specific pattern caught my eye) - even the black frame is a left over from some die cutting, but I thought it was a perfect fit for House No. 1. - which is actually Persistence Lane, No. 706.
Calico Craft Parts used:
-
House Shape - MDF Mixed Media Board
-
Sheet of Mini MDF Label Holders Wood Shapes
-
Sheet of Mini MDF Hardware Wood Shapes
-
Ornate Scroll Decorative Hinge MDF Wood Shape
-
Shields - Mini MDF Wood Shapes
-
Spider Web - MDF Corner Wood Shape
Before I started the collage, I primed the MDF house shape with
DecoArt "lace" Chalky Finish paint that I scraped on loosely with a palette knife. For gluing scraps of book pages, tissue and designer papers to the base I used
matte DecoArt Decou-Page - my go-to glue and sealant.
The back of the house was left untreated for now - I will start another house on this side whenever I feel up to it and it does not have to be thematically connected to the other side.
I used a
sanding block to remove any excess from the glued on scraps.
Next I blended the house's edges with
black archival stamping ink to create a black edge that repeats the black from the text and imagery.
Using the very tip of my palette knife I spread some
white DecoArt media Crackle Paint here and there and especially on the black frame that forms the focal piece.
More inspirational rummaging - this time in my box of smaller Calico Craft Parts! I came up with some screw heads, label holders, a mini shield, a hinge and a spider web corner from a previous taken apart project.
Before gluing these in place, I decided to paint a smudged brown outline around the house shape in
Raw Umber media fluid acrylic paint.
To repeat the yellow-ish tint from some of the scraps I sprinkled on some
Primary Yellow from a
media Mister. That was followed by more sprinkles done with a
Carbon Black media Mister.
I had found a portrait of a French writer on one of my dictionary page scraps and used that on the Mini Shield Shape that was to go right under the roof top.
The label holders were toned in using
Titanium White media Antiquing Cream. In the meantime I had also added some
haberdashery to the frame for a bit of dimension and interest.
The shield with the portrait of Monsieur Charles Nodier was given a thick coat of
DecoArt Triple Thick after it had been glued in place.
Finally I toned down the white crackled areas on the black frame using a wash of (which means heavily diluted)
Carbon Black media fluid acrylic - that made the frame stand out from the background and much more visible. At that point I also changed my mind and painted the previously white hinge black.
Voilà!
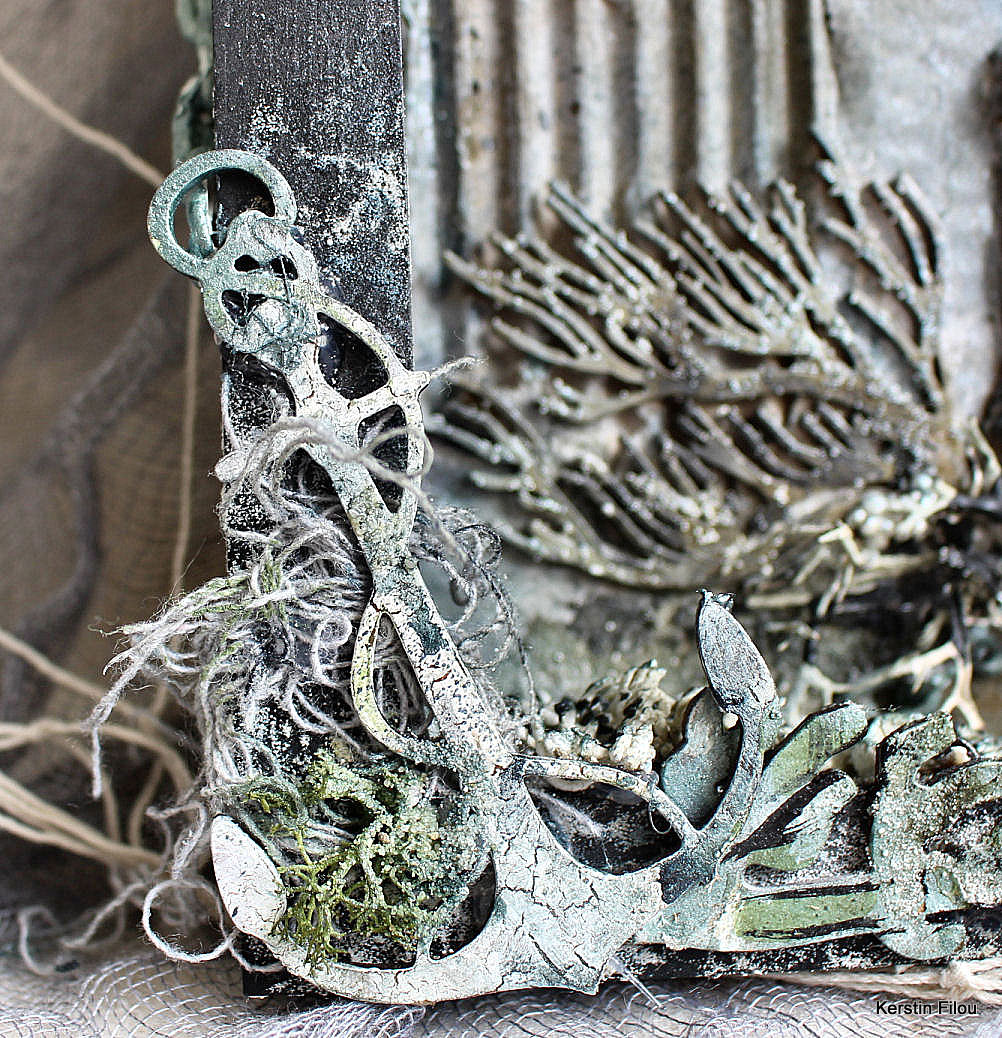
Some close ups:
Hope to see you again in two weeks!
Hugs and happy crafting!
Claudia
xxx